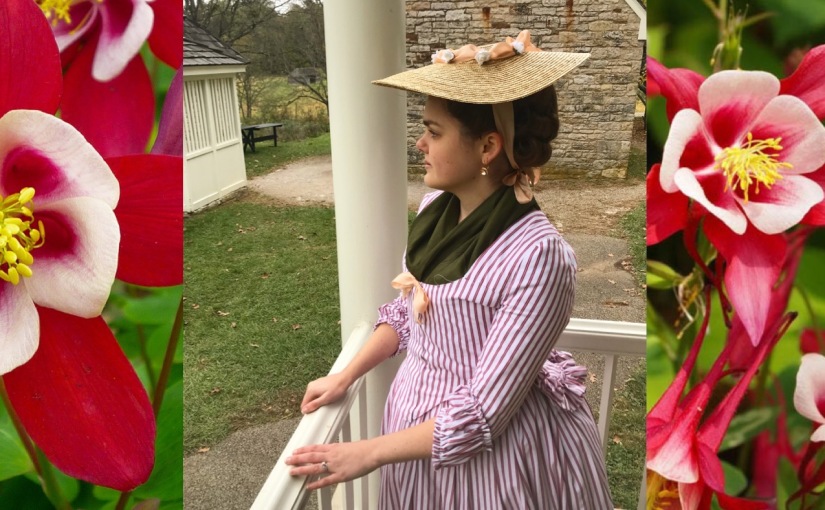
Chemise à la Reine

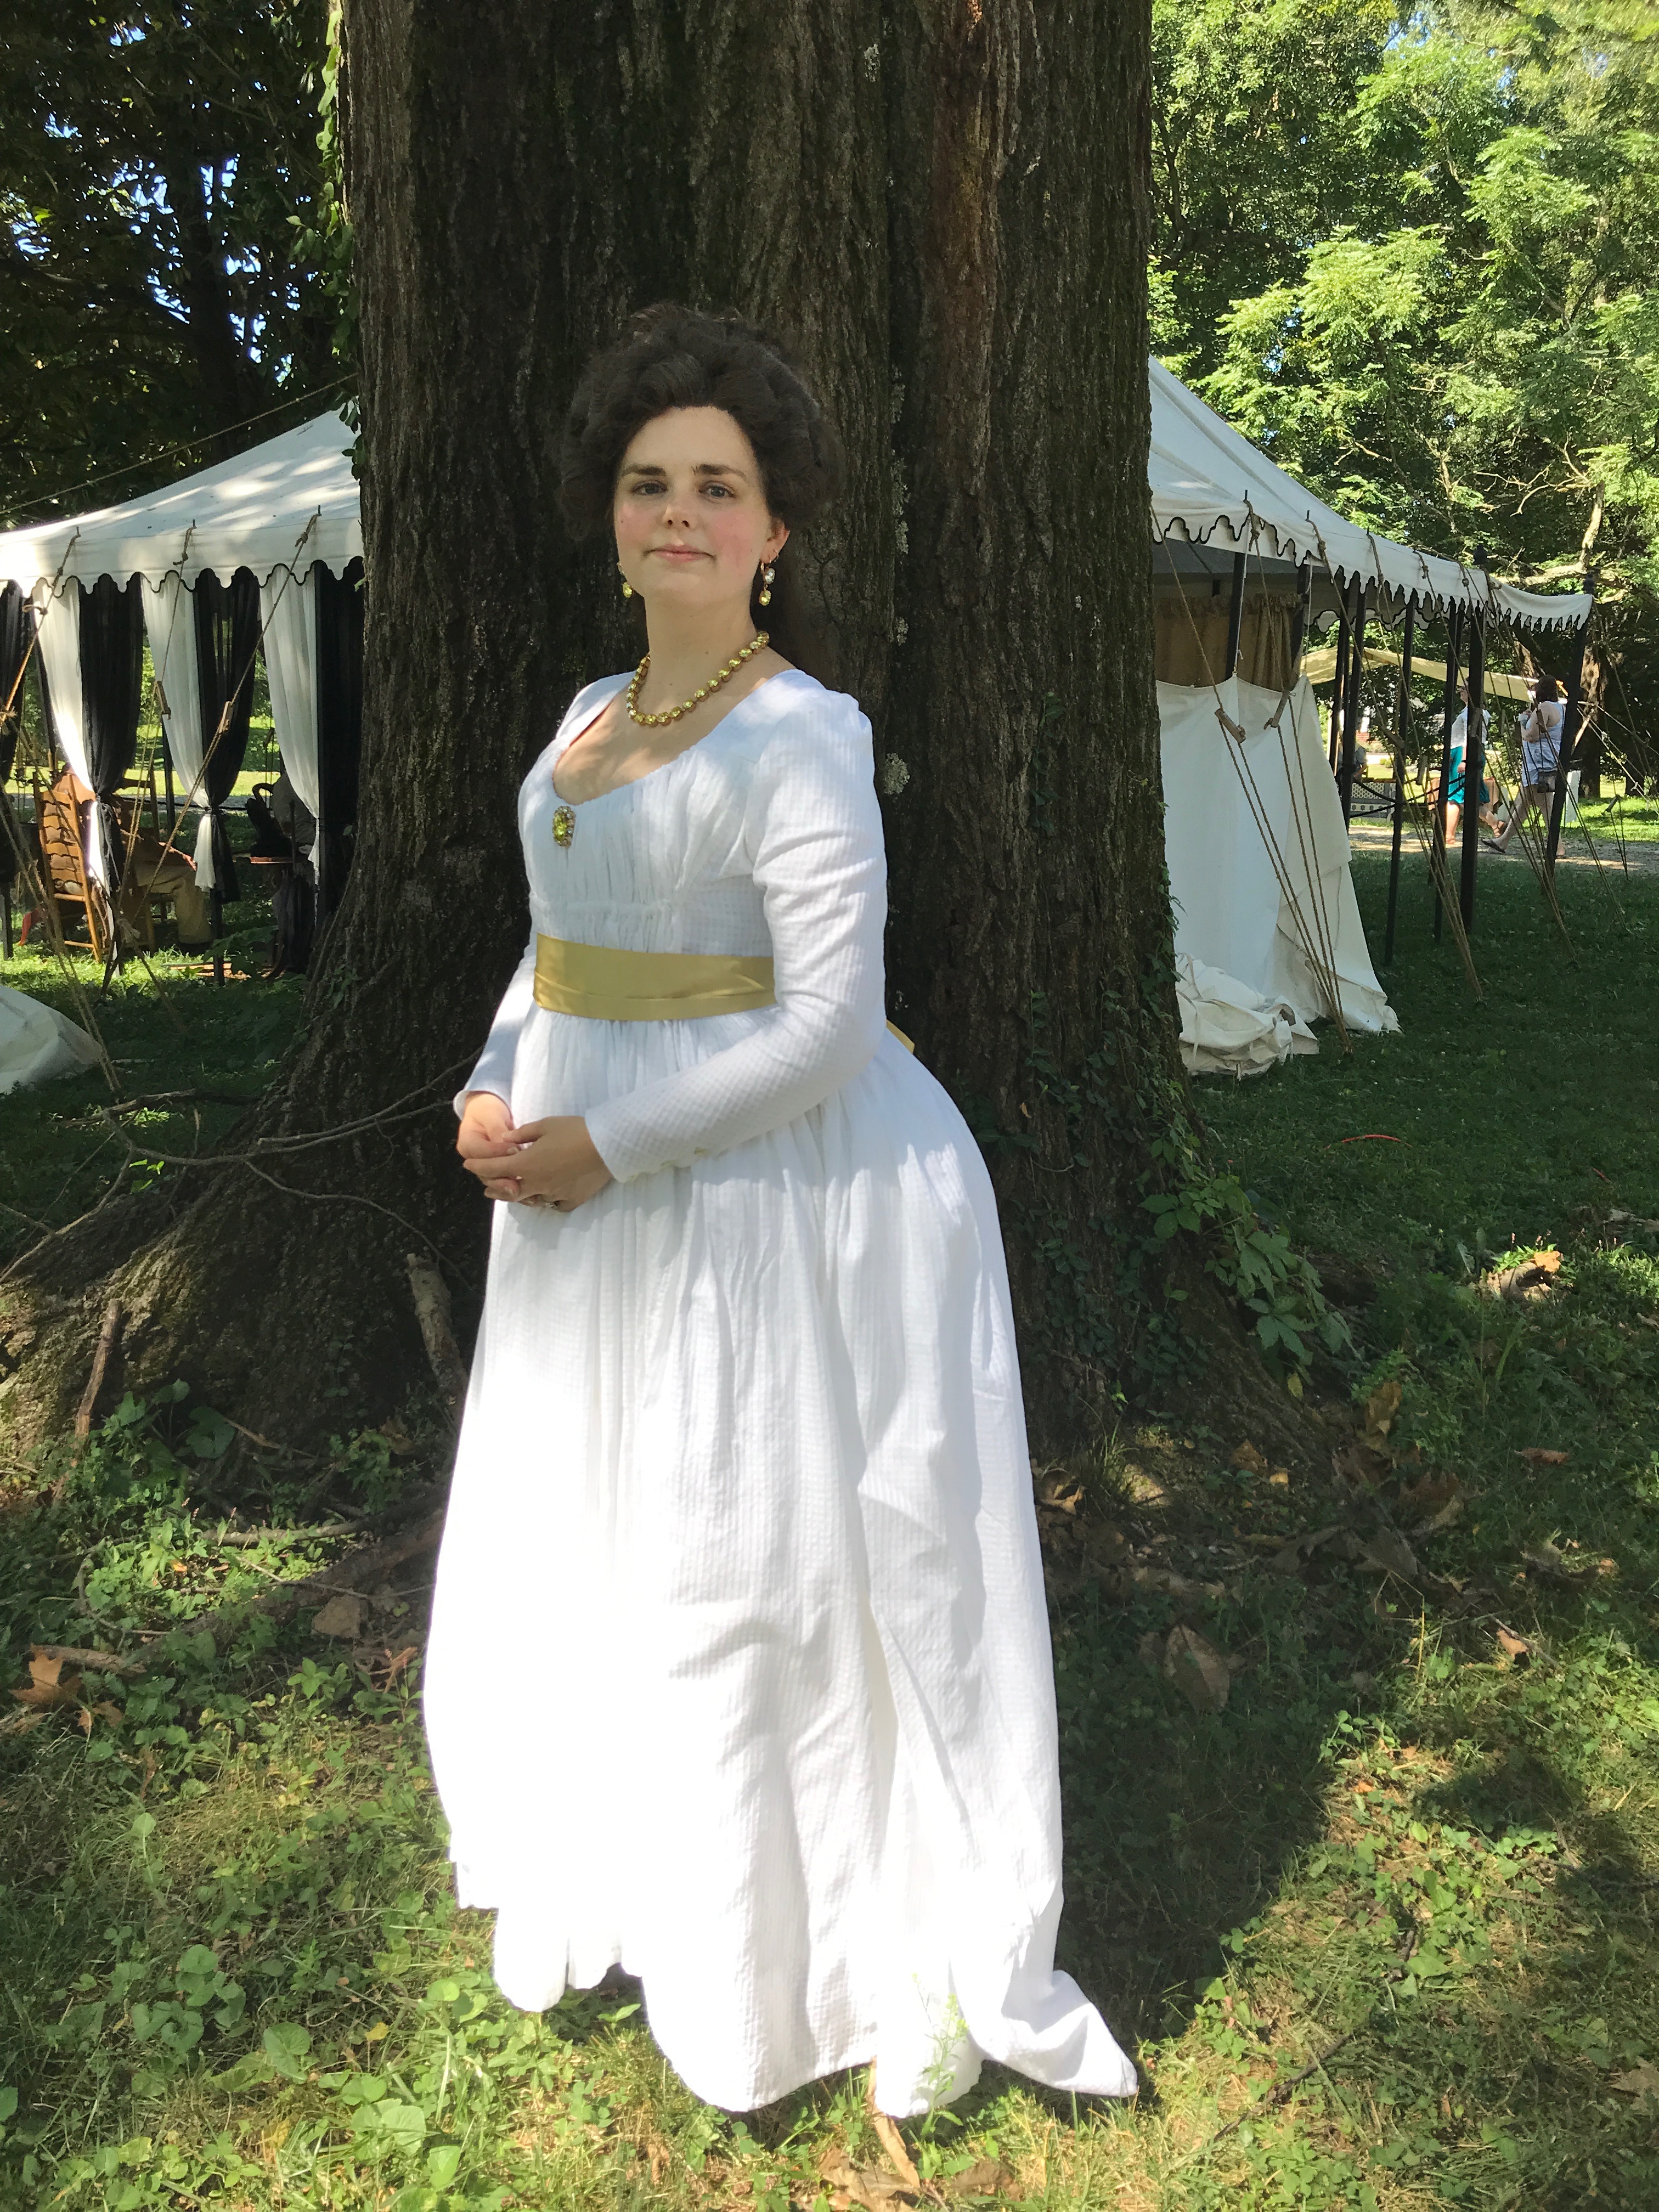
After taking forever over the Part 2 of my Dragonstone Landing post, it’s nice to be able to write about a construction that was both very simple and very satisfying. This is a gown with no embellishment: no embroidery, no ruffles, no lace, no anything! But, it was constructed entirely by hand using historical techniques that I’ve learned over the several Burnley & Trowbridge workshops I’ve been to (these workshops are so worth the money and the drive to Williamsburg! If you’re interested in jumping into full-on period garment construction, there’s nothing I would recommend more highly!). I loved every stitch of making this gown, and I didn’t want to take it off the day I wore it! After a long day in the booth in the KY heat, that’s saying something.

Chemises à la Reine are frothy confections of fine, usually (but not always!) white fabric, which came into fashion in the 1780s and began the slide from 18th century fashion to Empire/Regency fashion. They are lightweight and heavily gathered. Many have poofy, gathered sleeves unusual earlier in the 18th century. There is a lot of variety in the sleeves–some have a single row of gathering, some two, some three, some are gathered in at the bottom, some end in a ruffle. Some gowns have straight sleeves or shaped sleeves–some full length, some shorter. There are a huge variety of ruffles on the necklines and hems of these gowns as well. So, while the base of the gown: gathered, white cotton, can seem very repetitive, there is actually a huge variety of designs within the category of Chemise à la Reine.
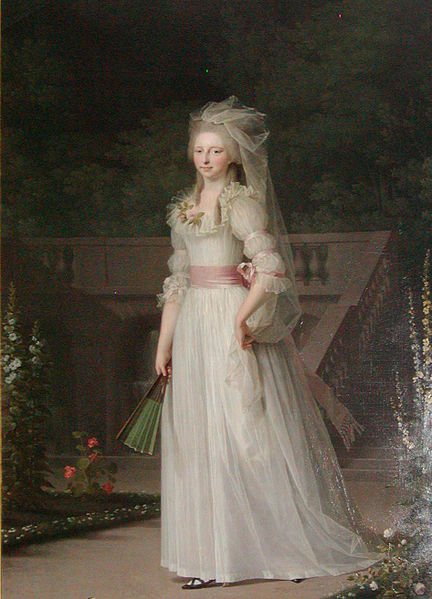
Portrait of Princess Louise Auguste of Denmark by Jens Juel, 1787. In the collection of the Museum of National History, Denmark.

For the Jane Austen Festival this year, we at Custom Wig Company wanted to have coordinating outfits to wear in the booth. We all loved the idea of showing off some fabulous hedgehog hair, so our uniforms became chemises à la Reine with colored sashes. We wanted to make sure that we weren’t all wearing exactly the same dress, though, so we played with different variations of the look.

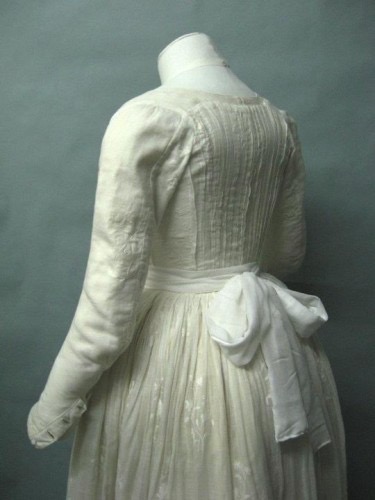
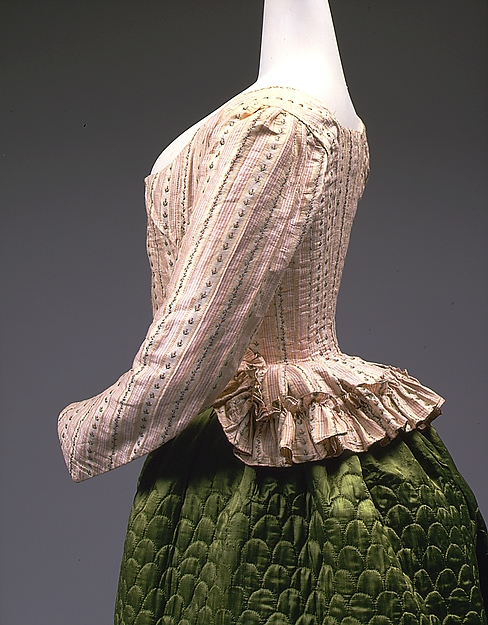
I wasn’t sure exactly where I wanted to go with my chemise gown until I saw this one from the Musée de la Toile de Jouy. It was featured in episode 6 of A Stitch in Time with Amber Butchart.

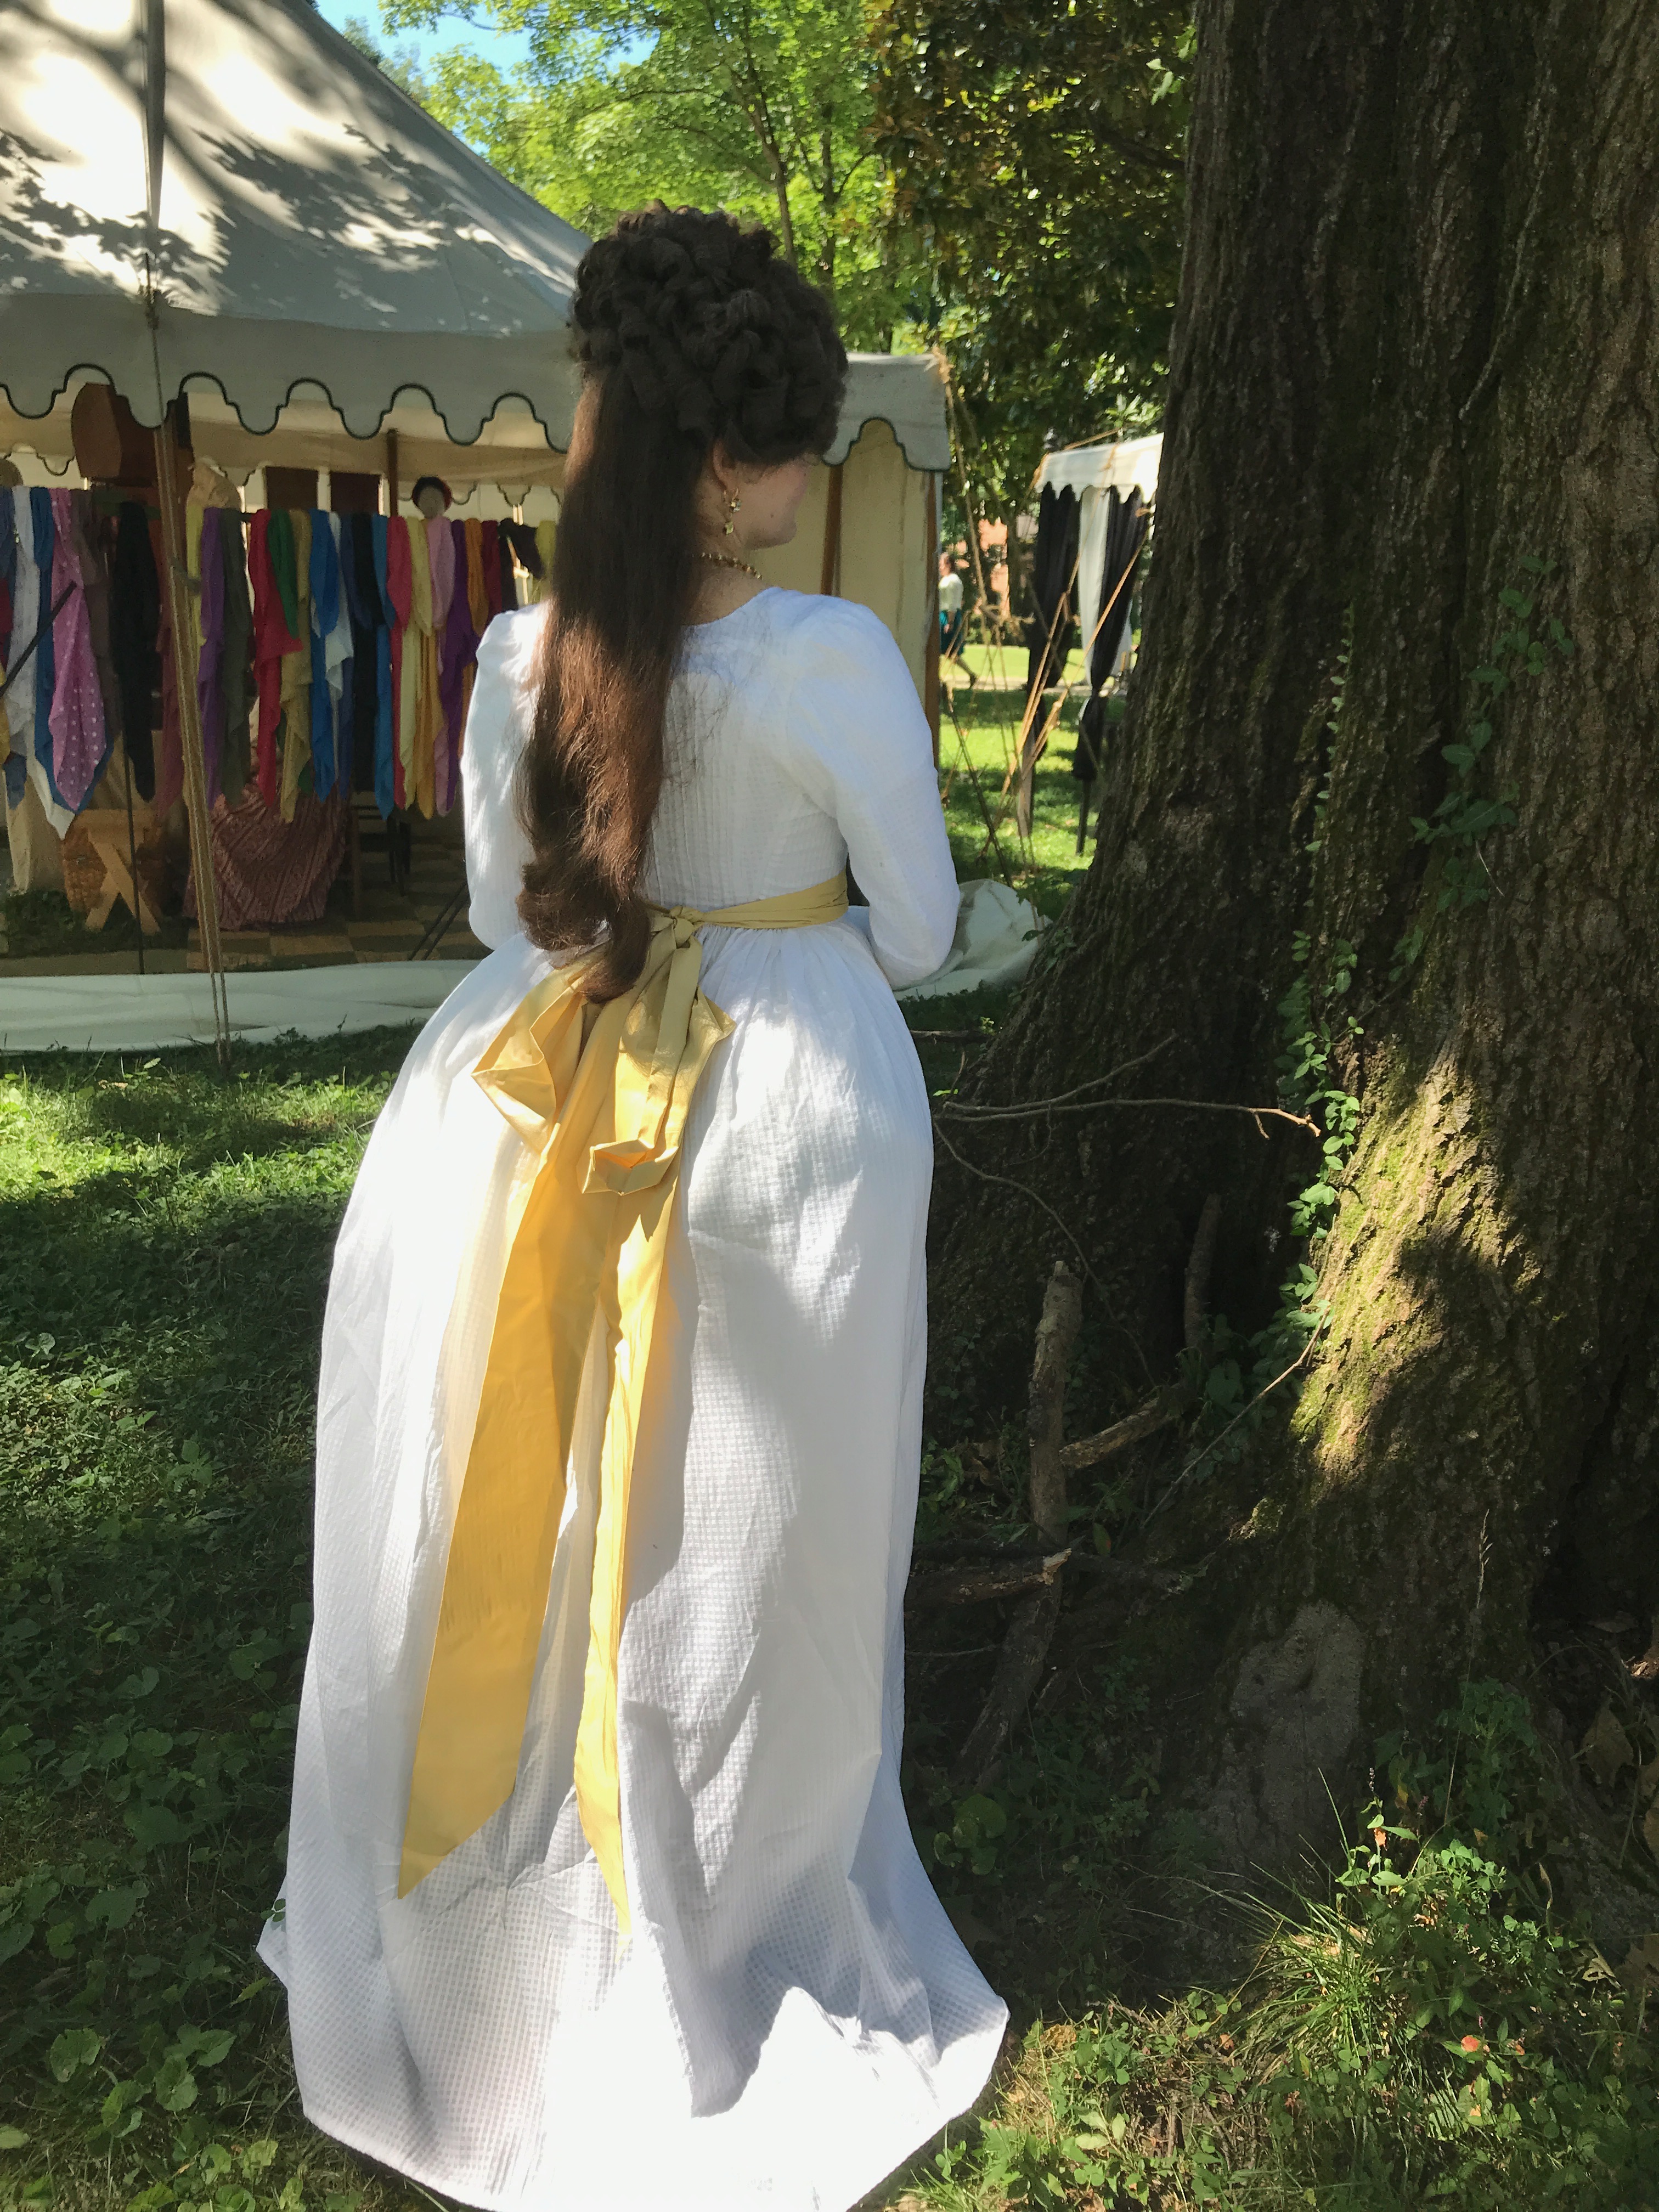
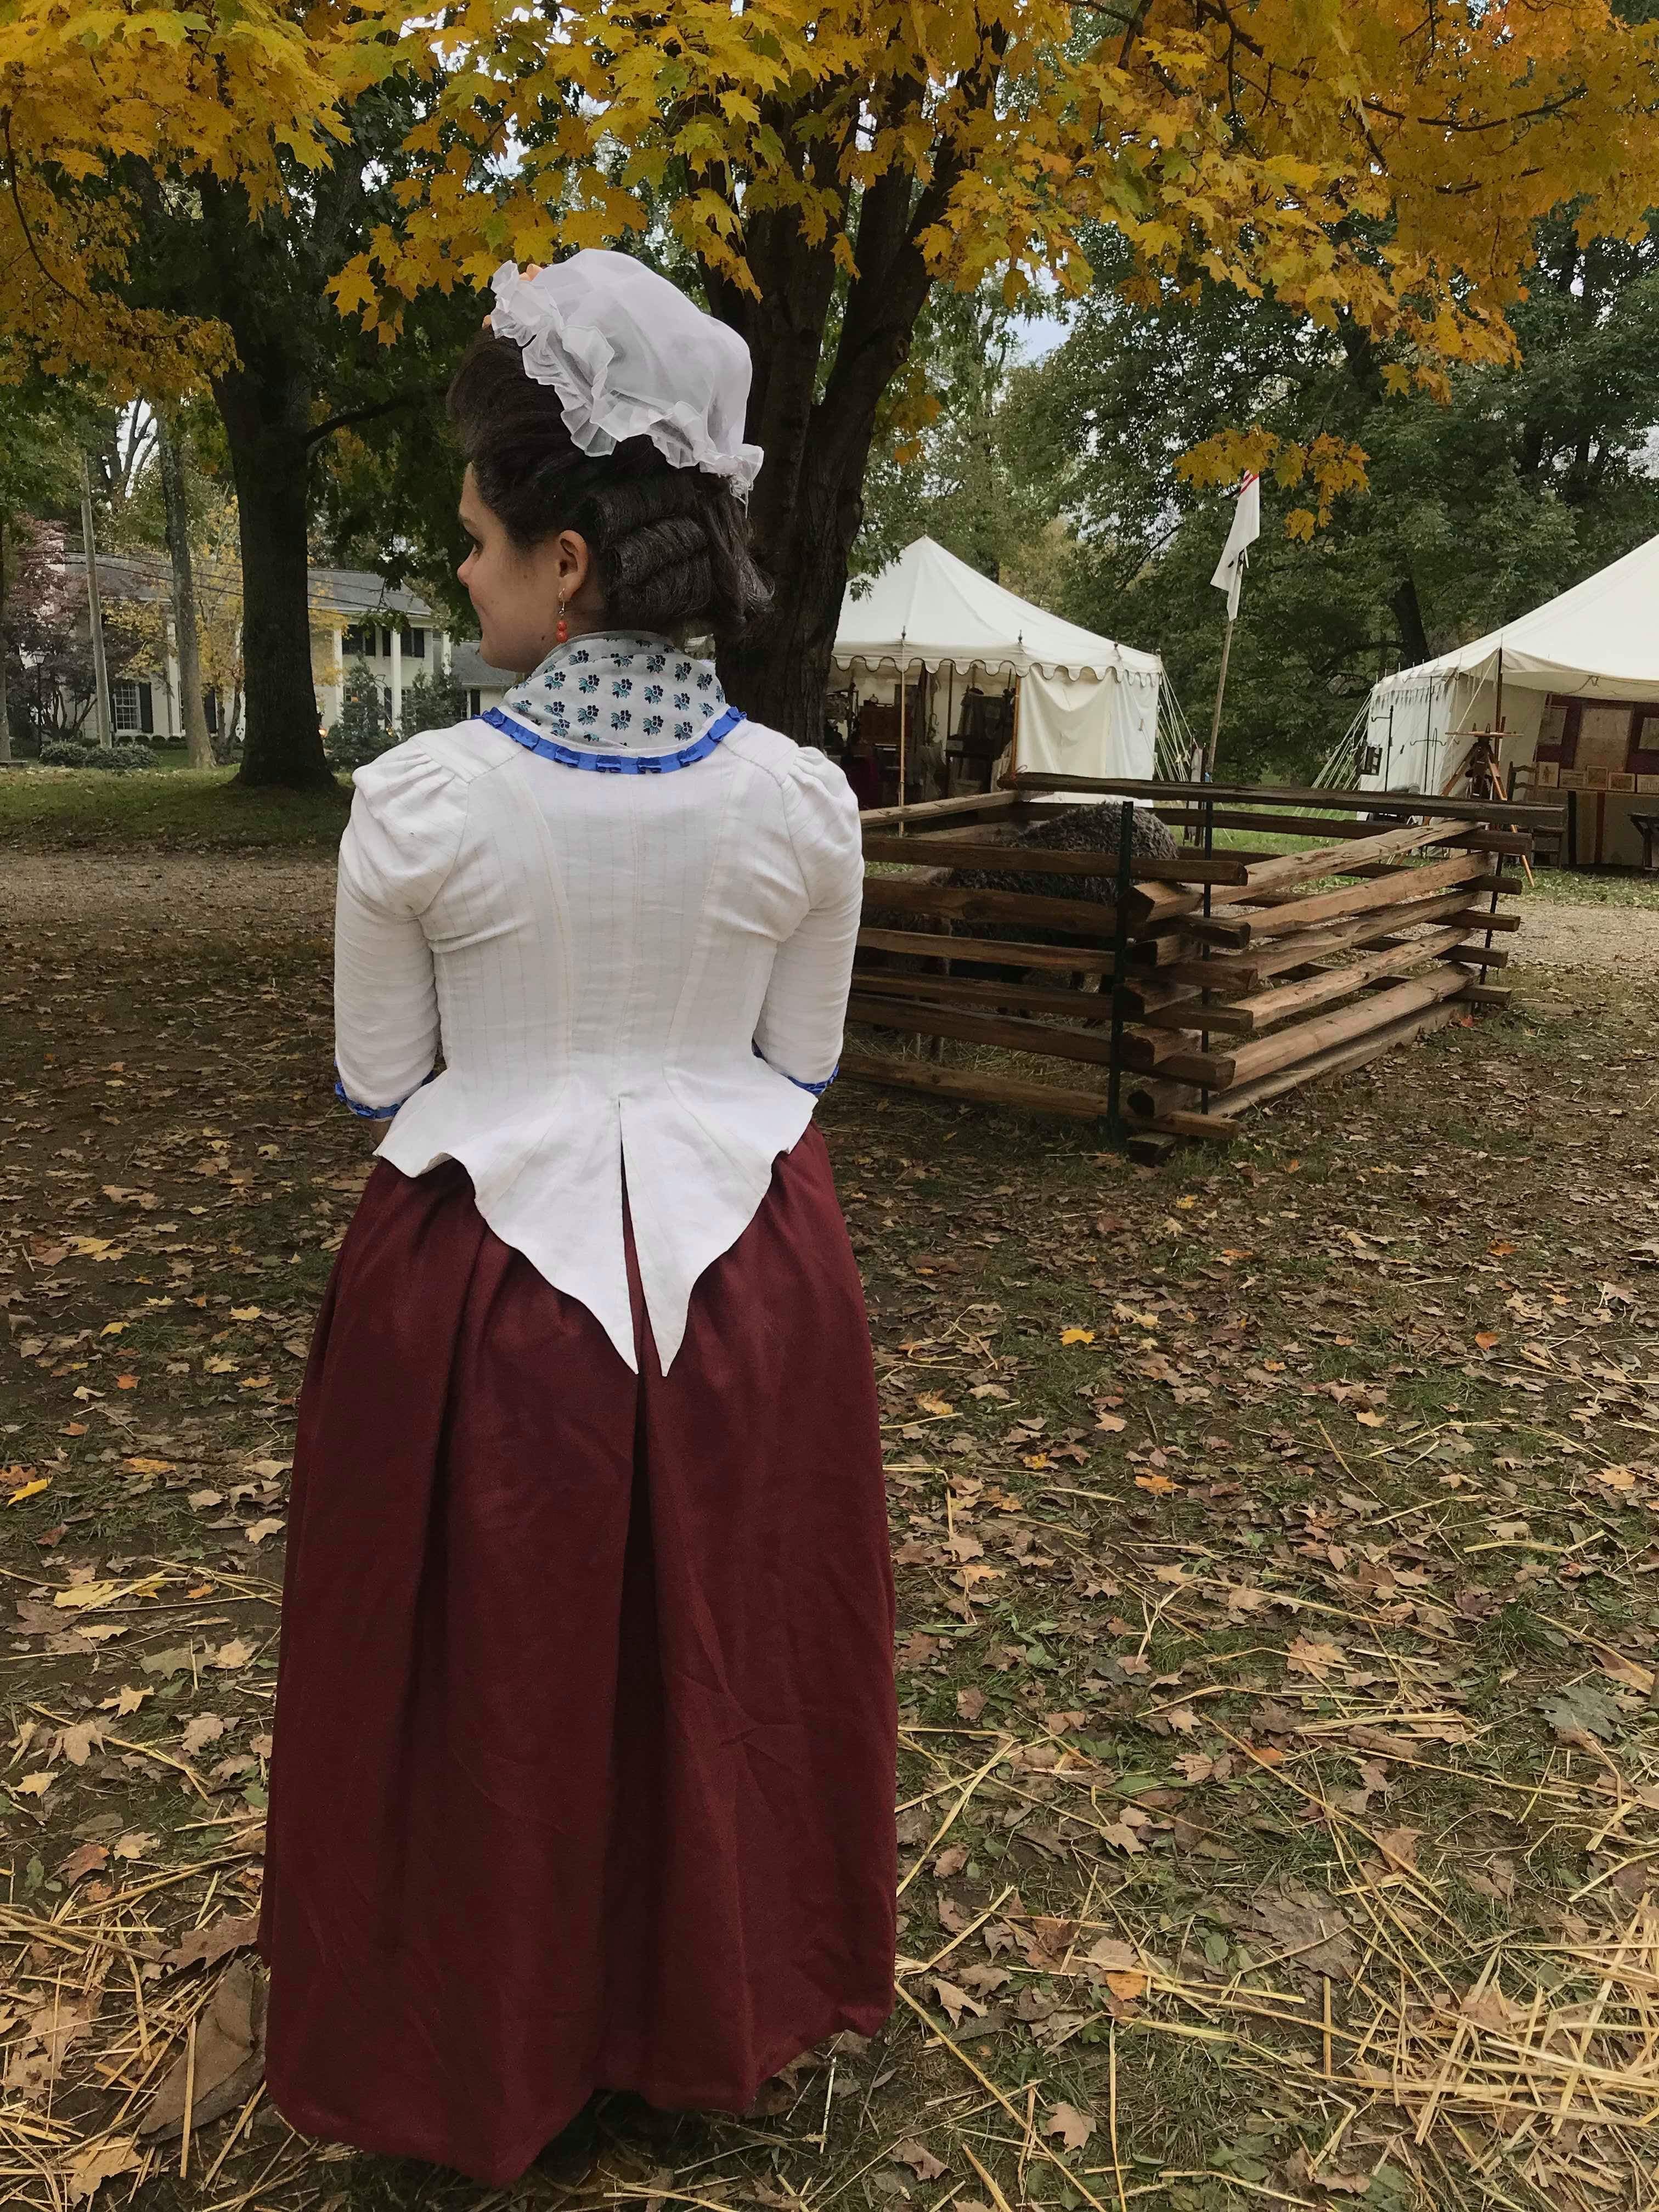
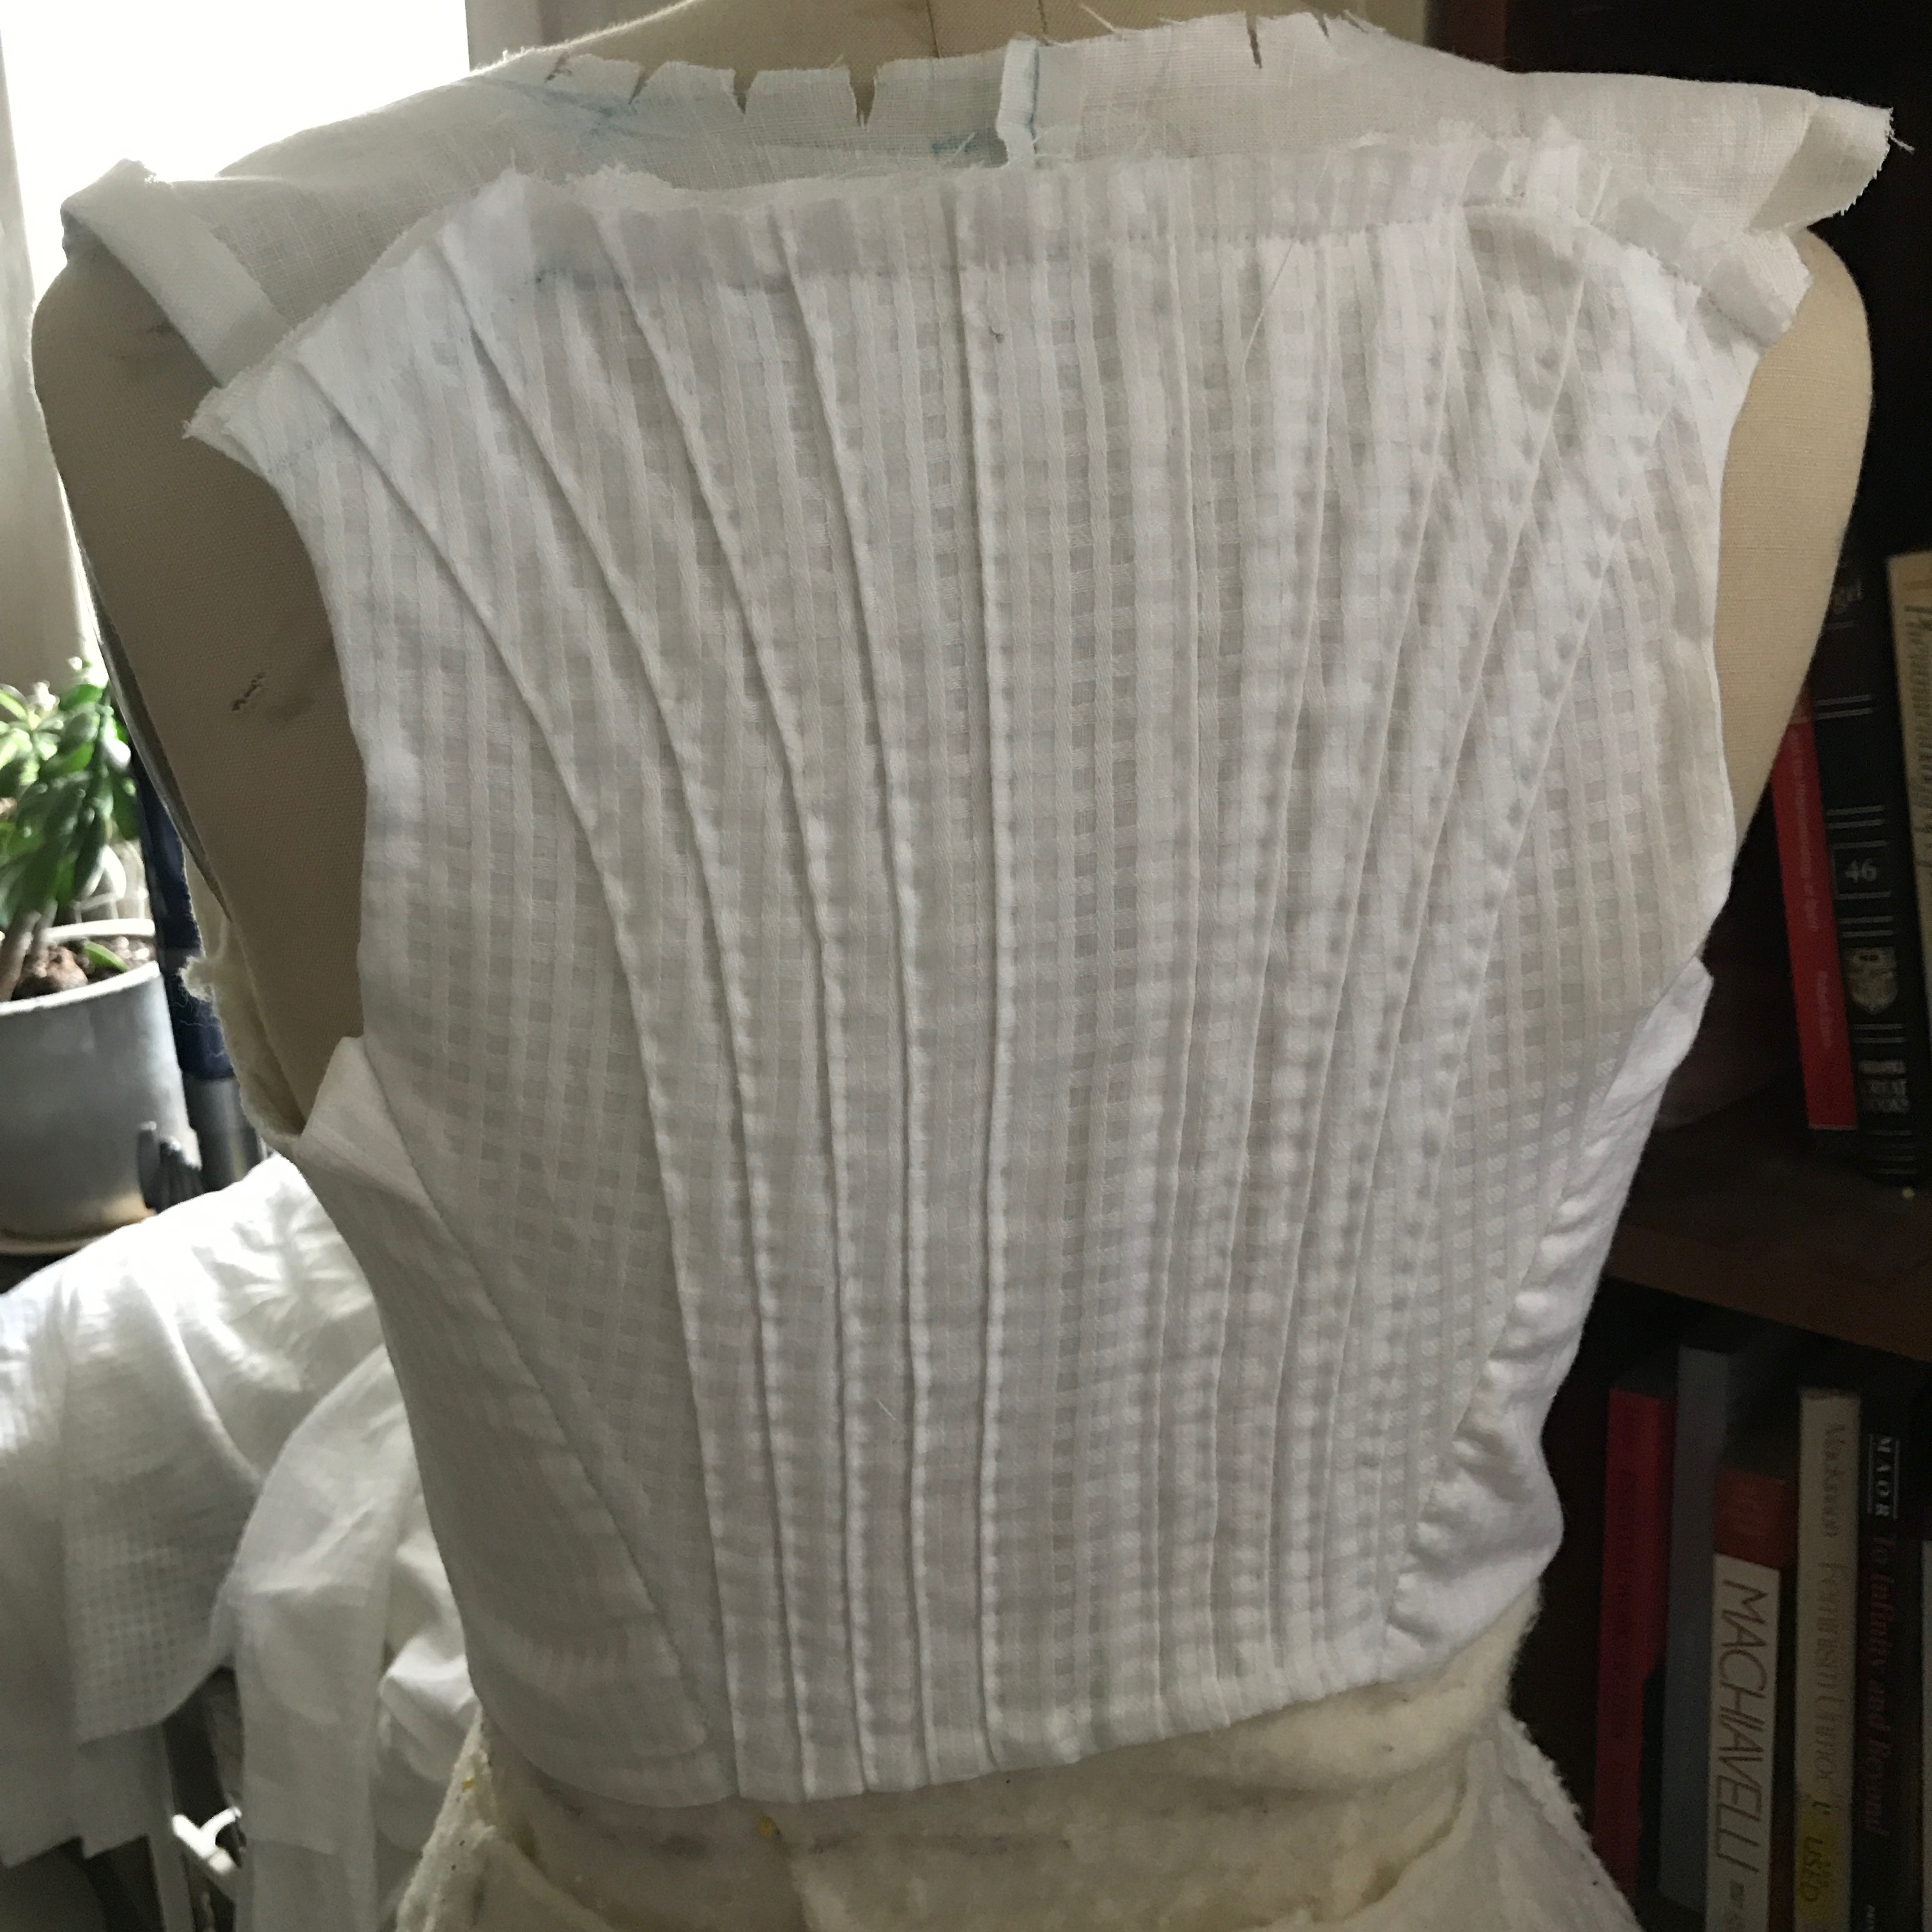
Rather than being gathered all the way around, it has a pleated back, and flat sides, with an enormous gathered skirt and front, and plain straight sleeves. I liked the way that it took the airy, frothy chemise gown, and gave it a slightly sleeker look.

I really wanted to have my new 1780s stays done before I started the gown, but finally I had to accept that that wasn’t going to happen, and I started this with less than two weeks to go until Jane Austen Festival!

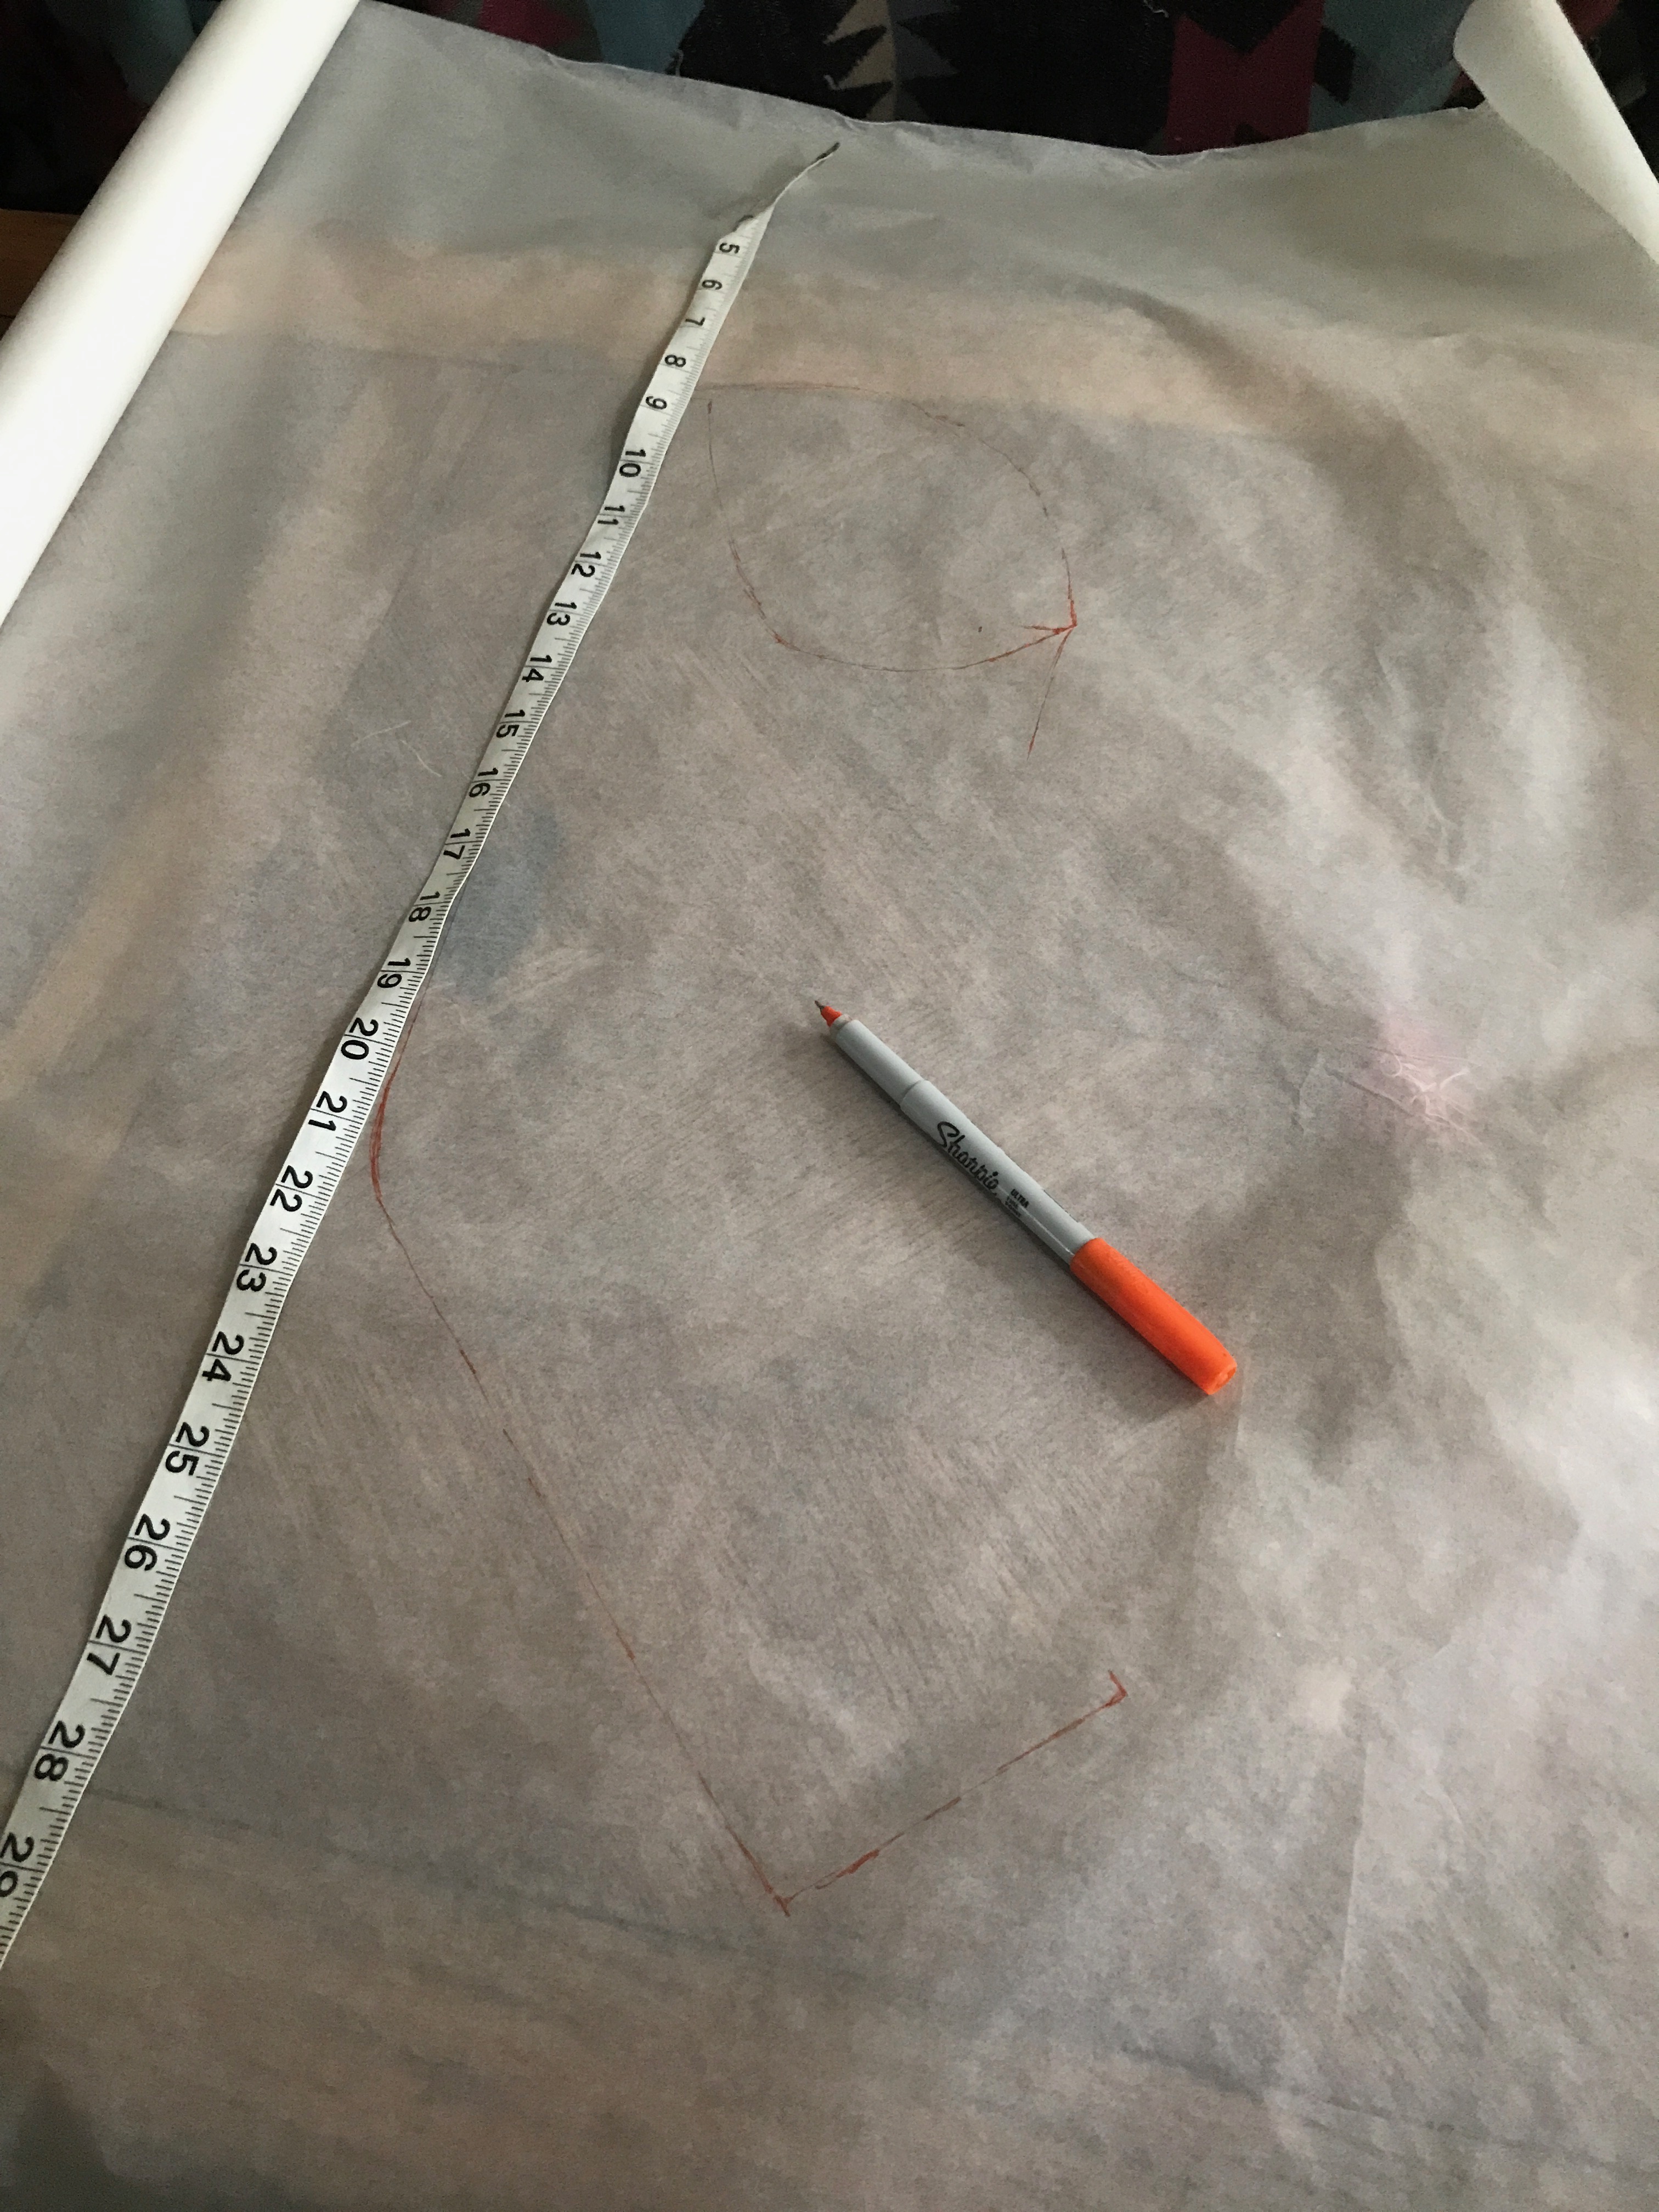
I started with the bodice pieces, which Brandon helped me drape. I used a technique wherein the pieces are hemmed around the lining before assembly, so all the seams get finished before they actually get sewn. The gorgeous sheer, checked cotton is from William Booth, Draper.

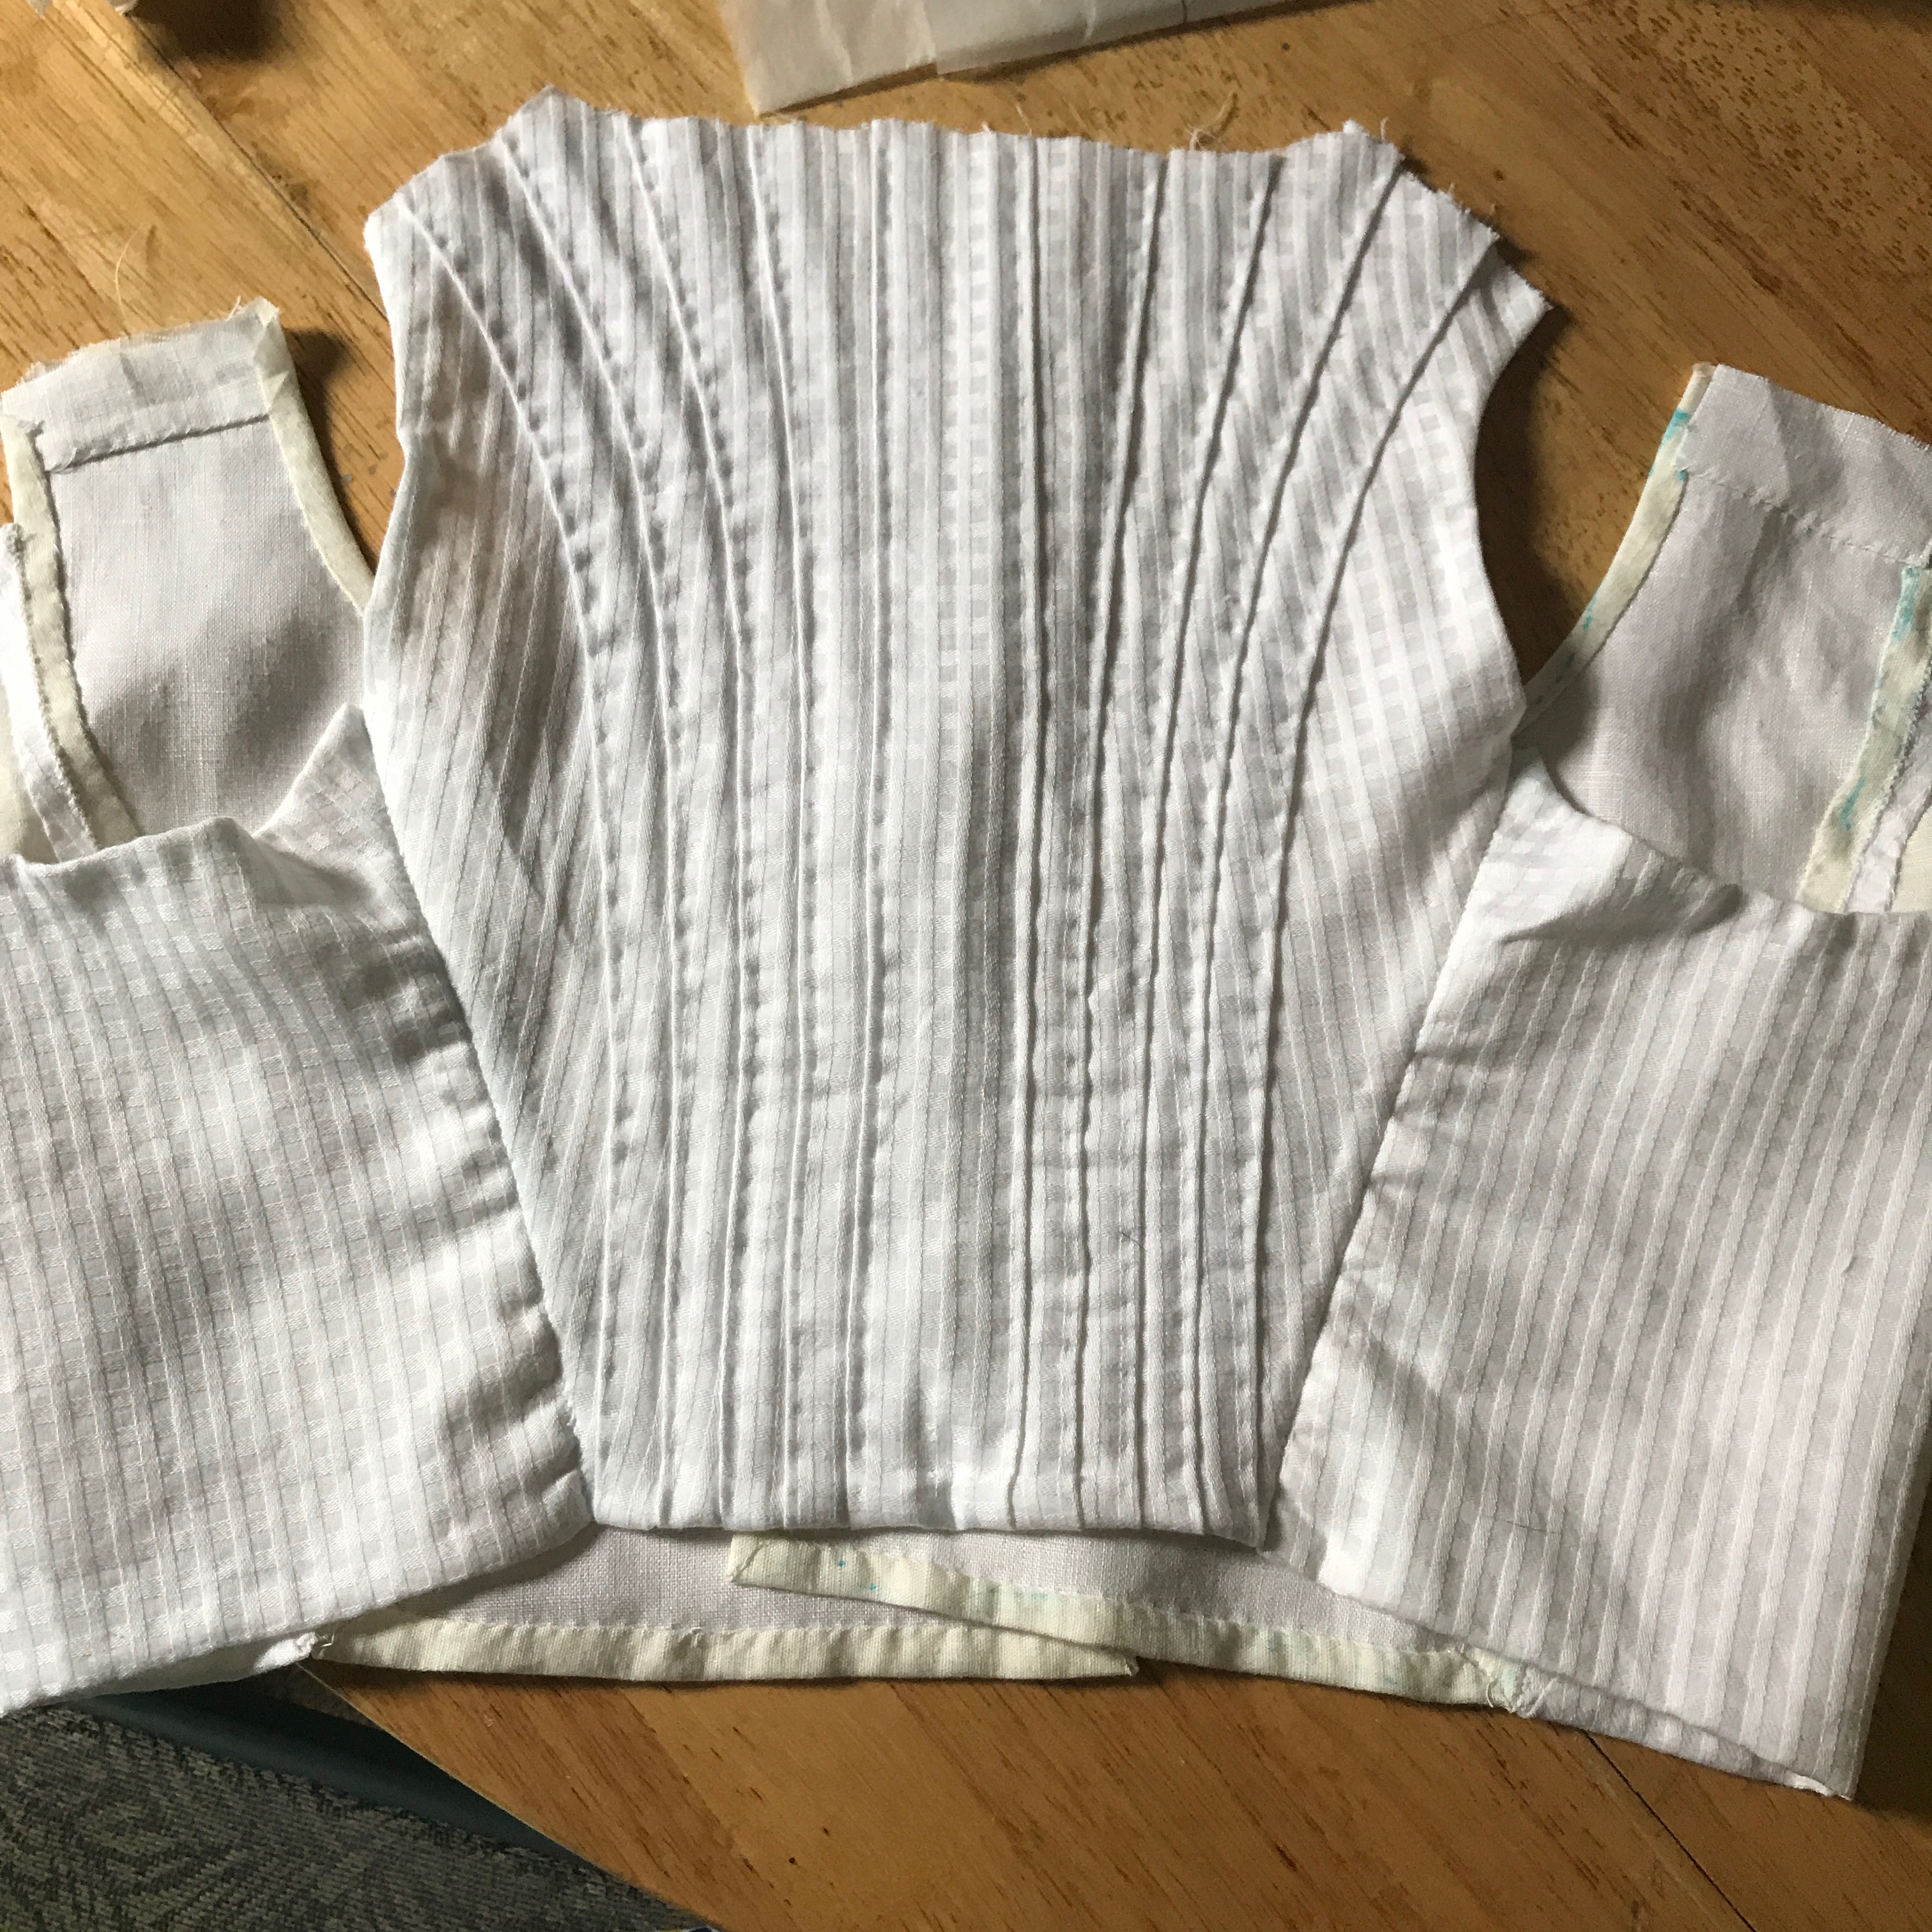
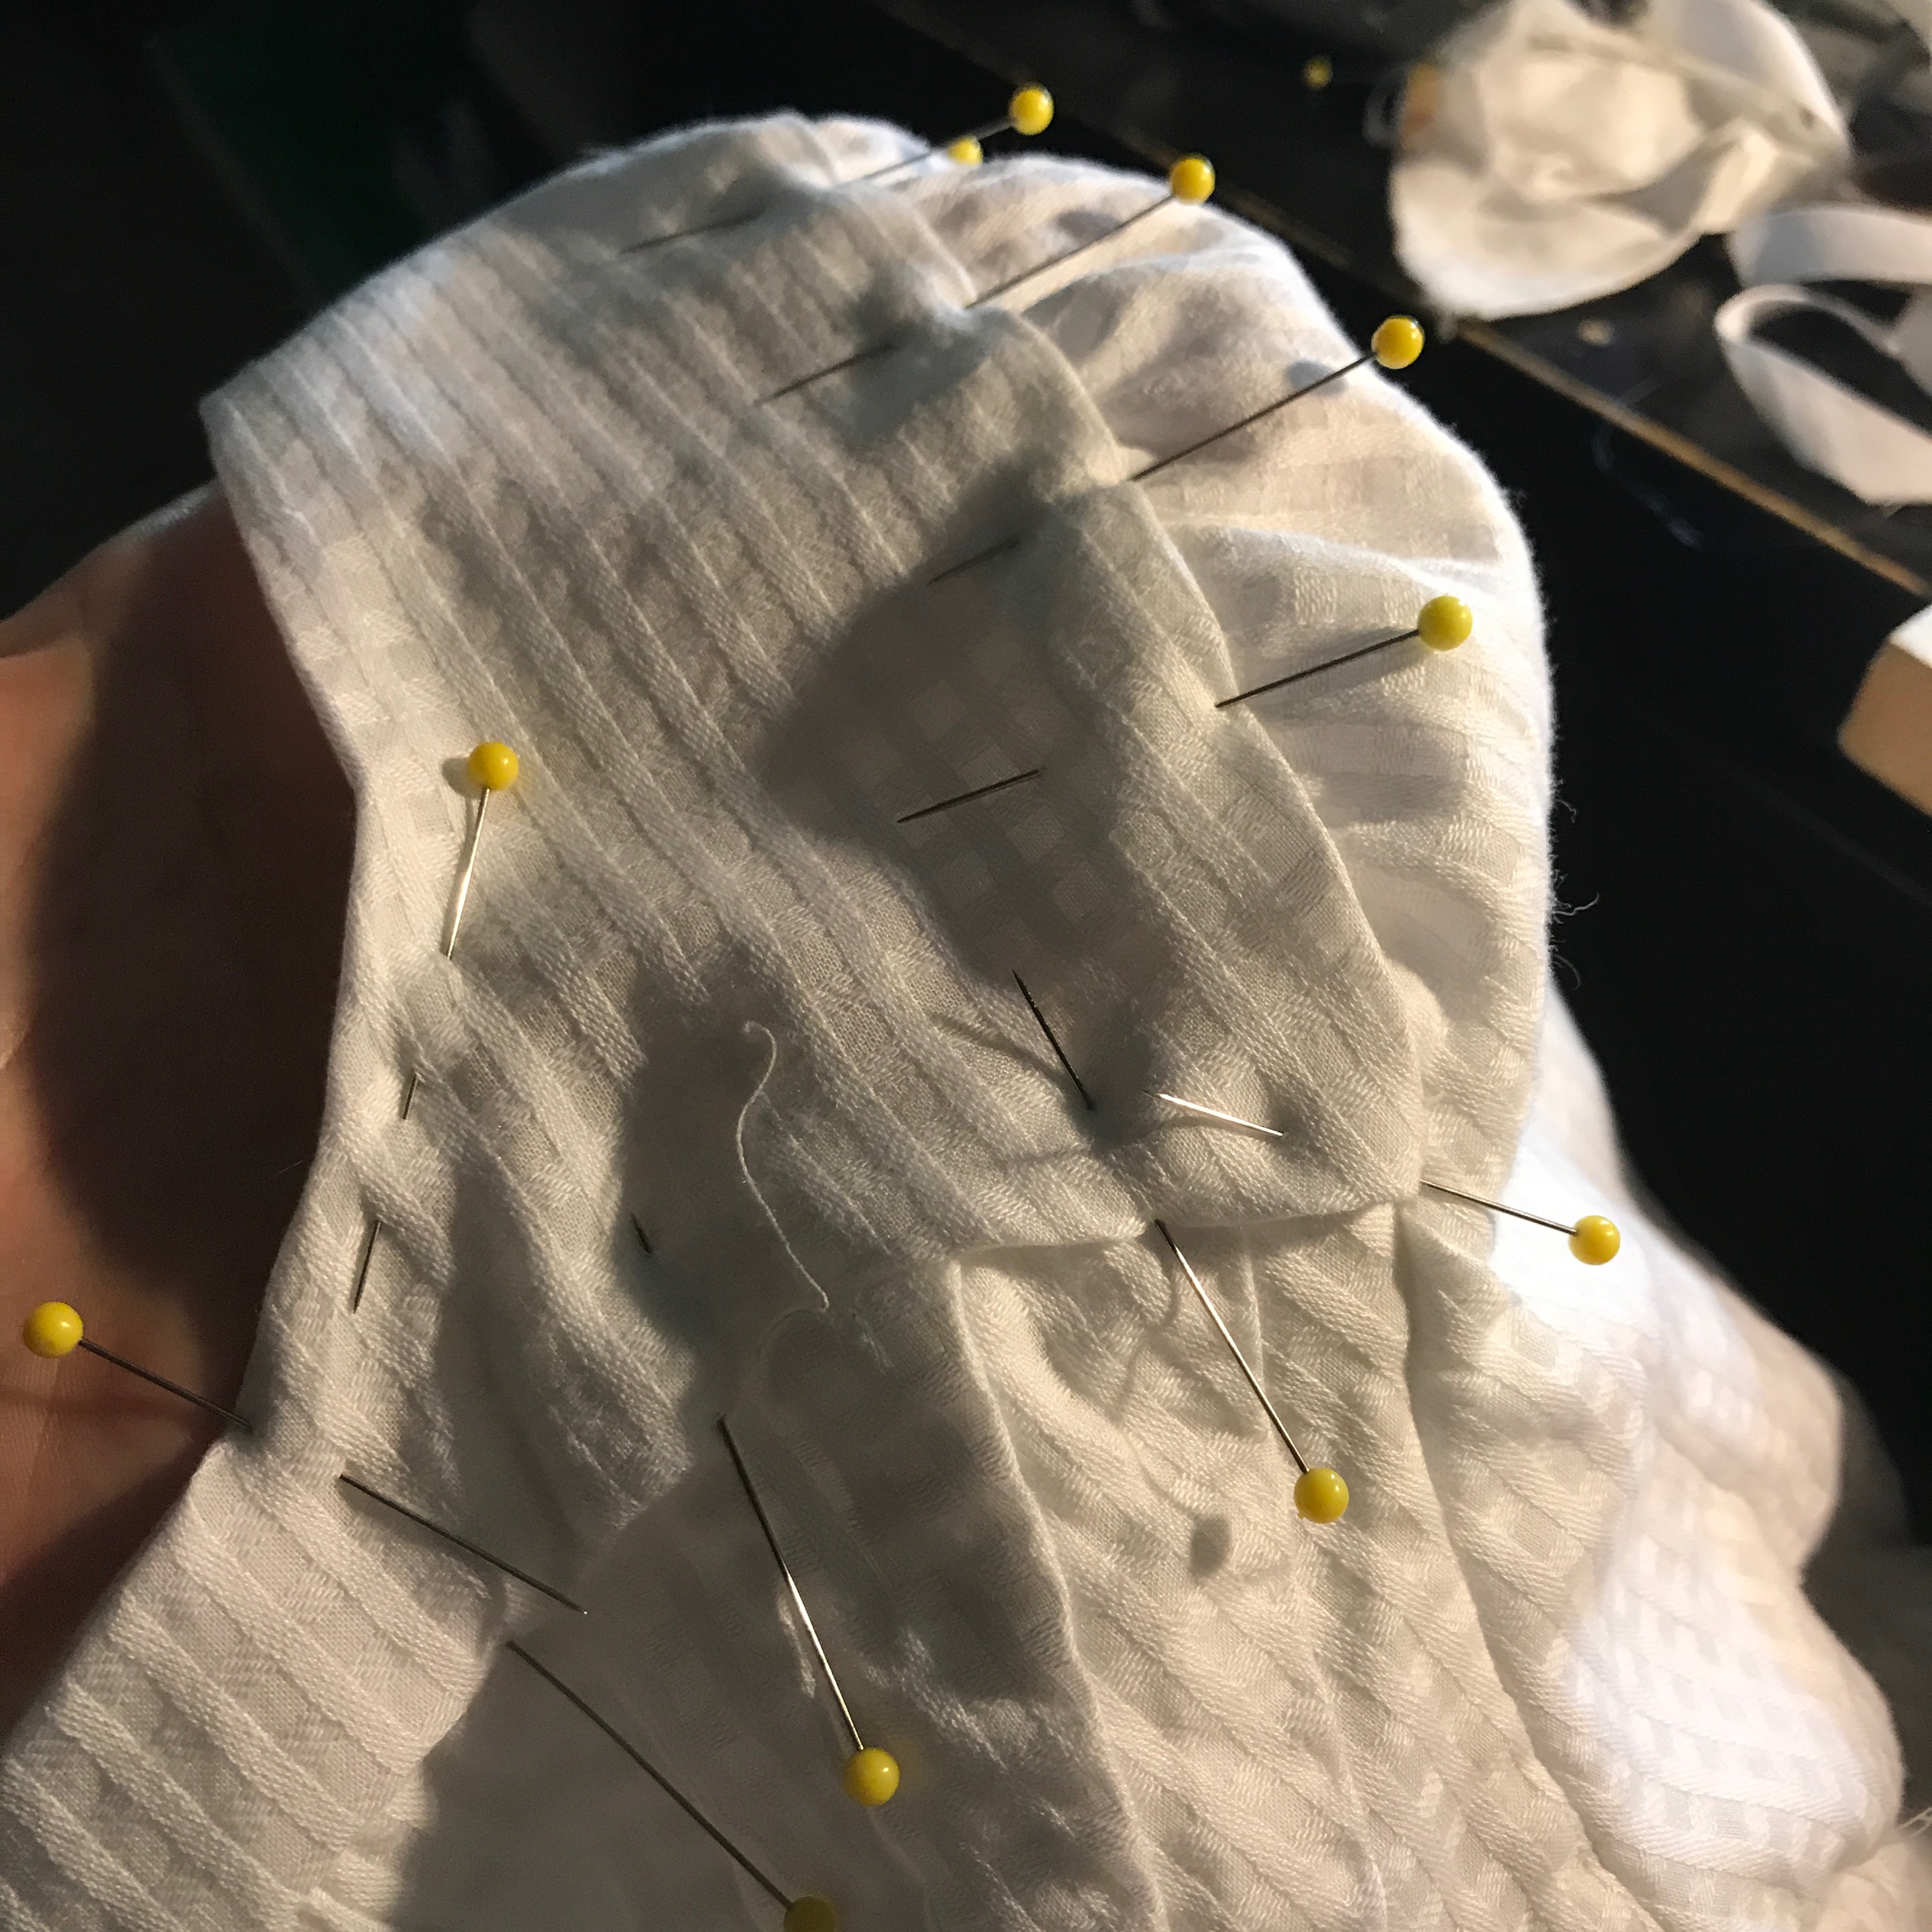
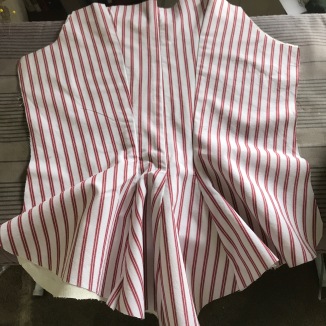
To make the pleated back, I cut the lining according to the pattern we draped, then cut a larger rectangle of my fashion fabric. I pleated the fashion fabric onto the lining and cut away the excess fashion fabric to leave just a hem allowance around the edges.

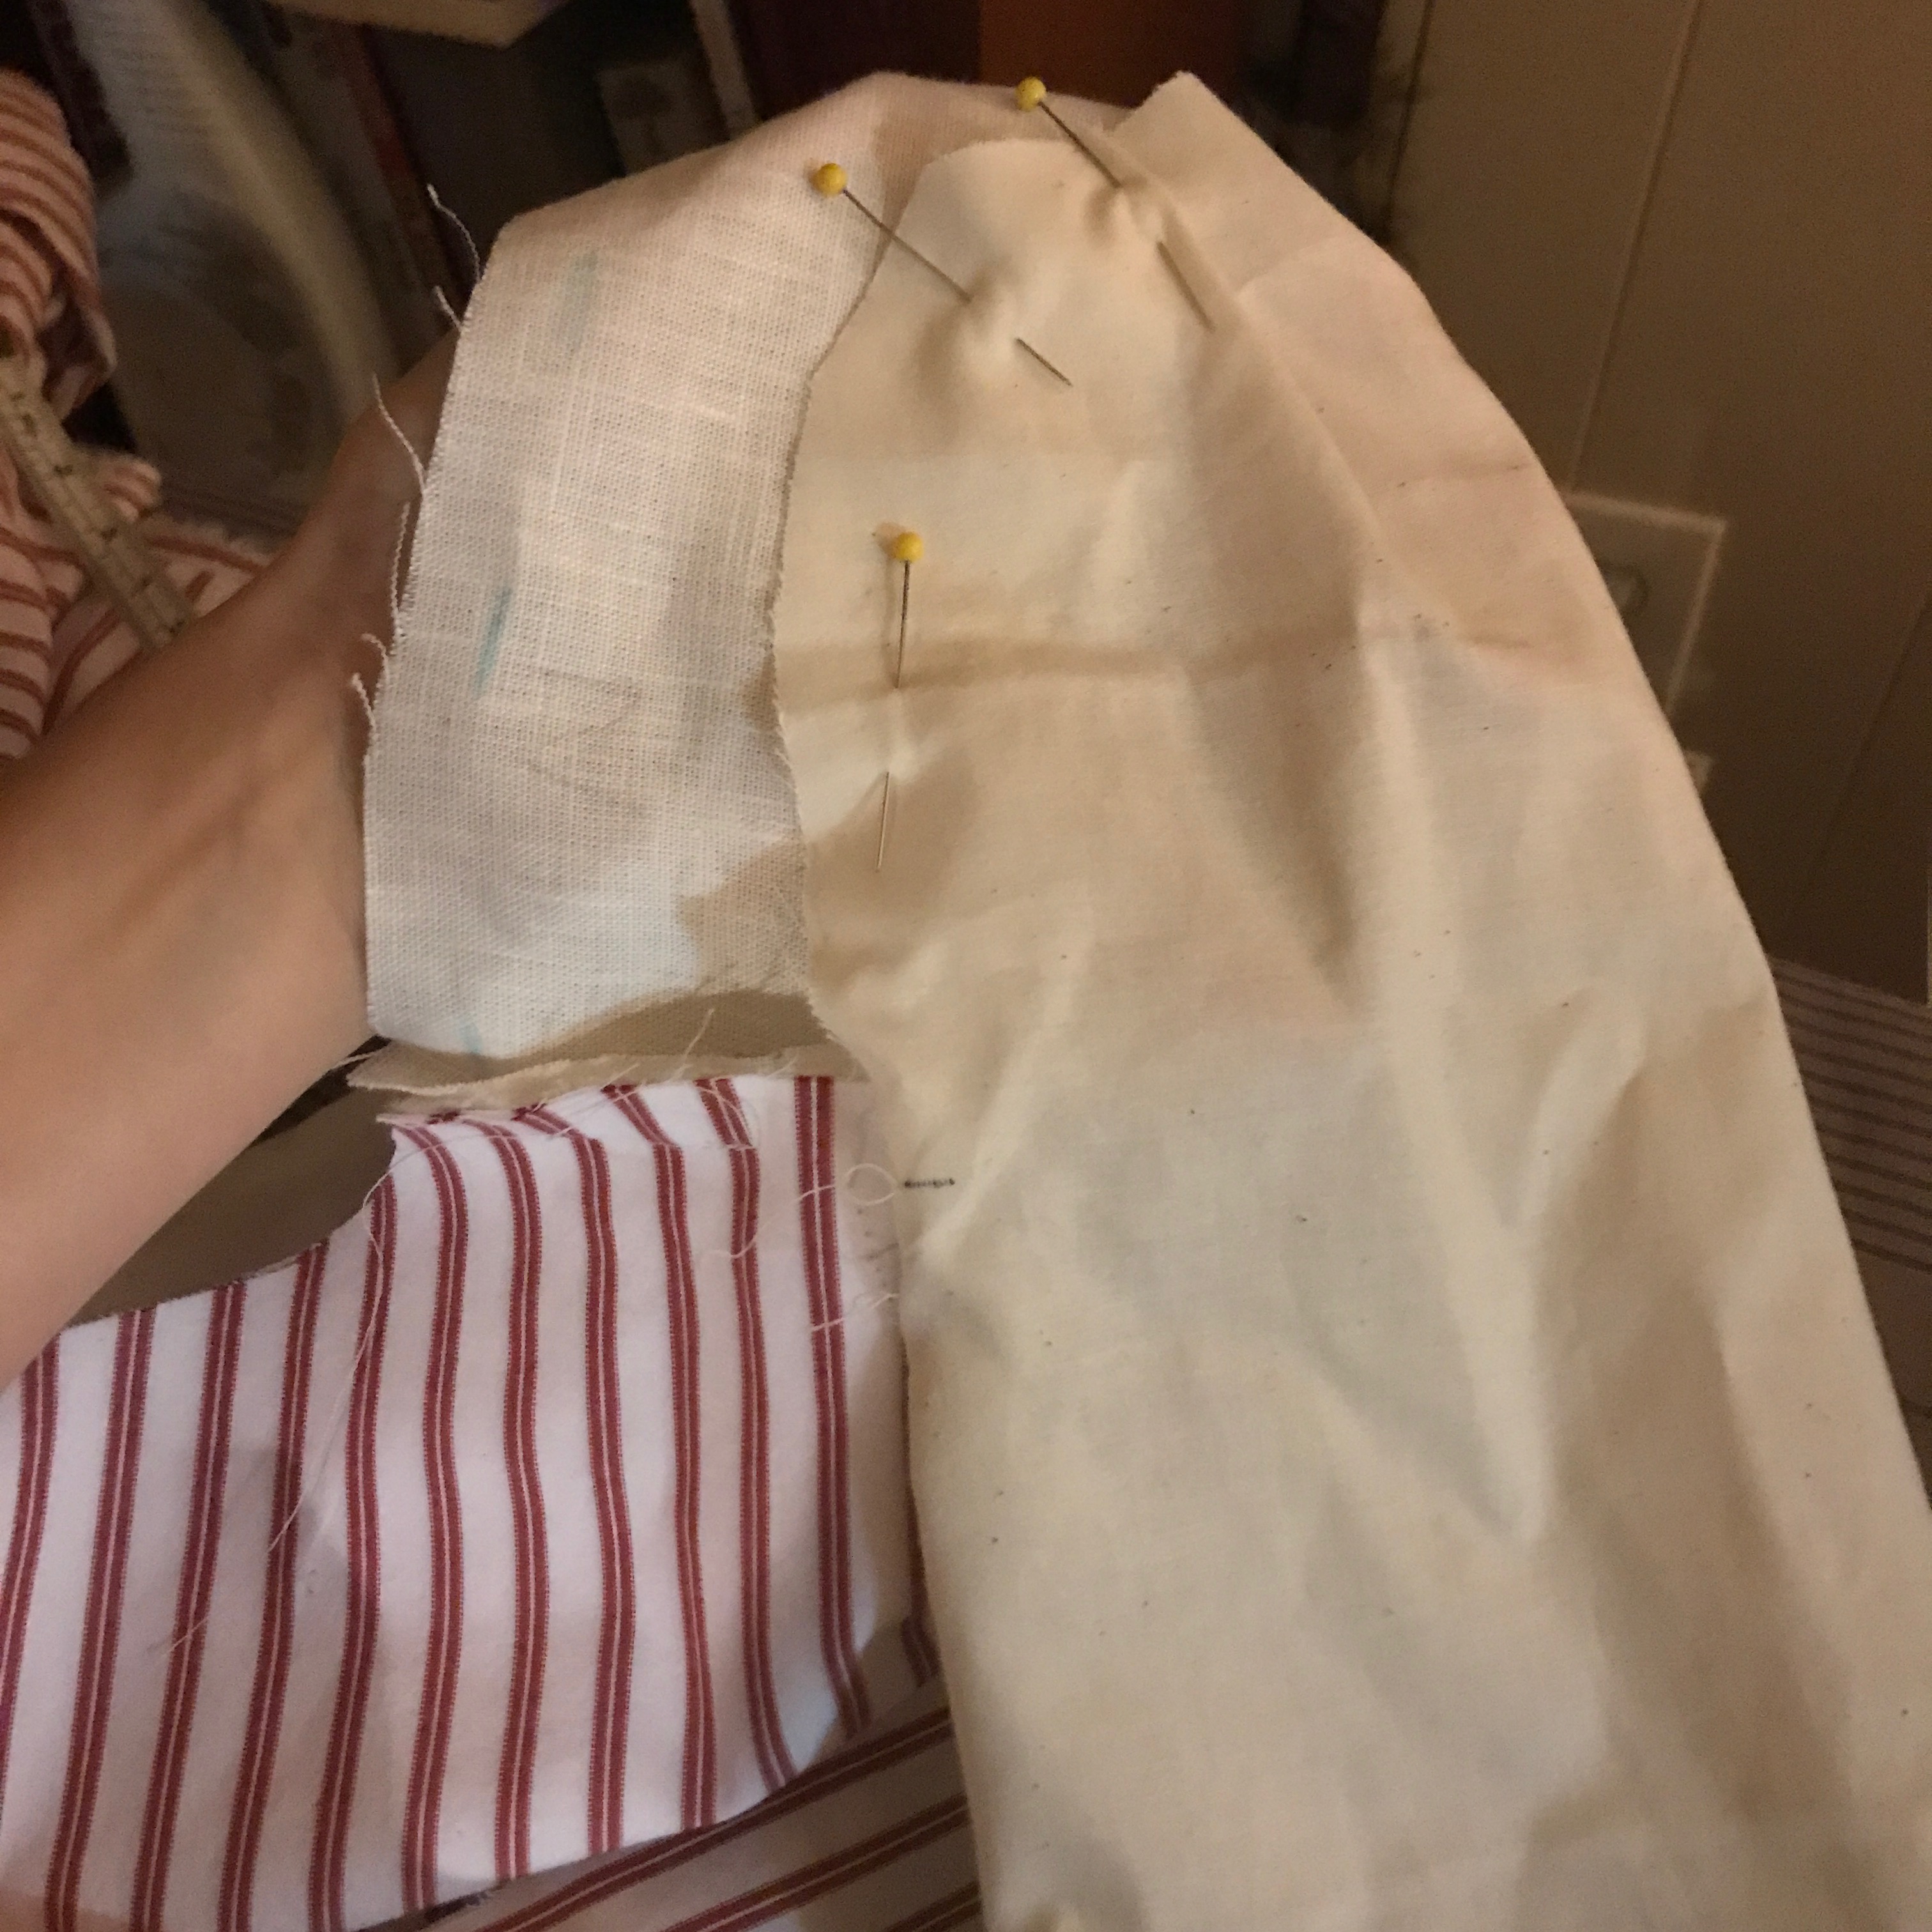
I made front pieces for the bodice out of two layers of plain linen. These will be pinned together at the front, underneath the gathered portion, which will give the gown structure that the gathered fabric alone couldn’t give.

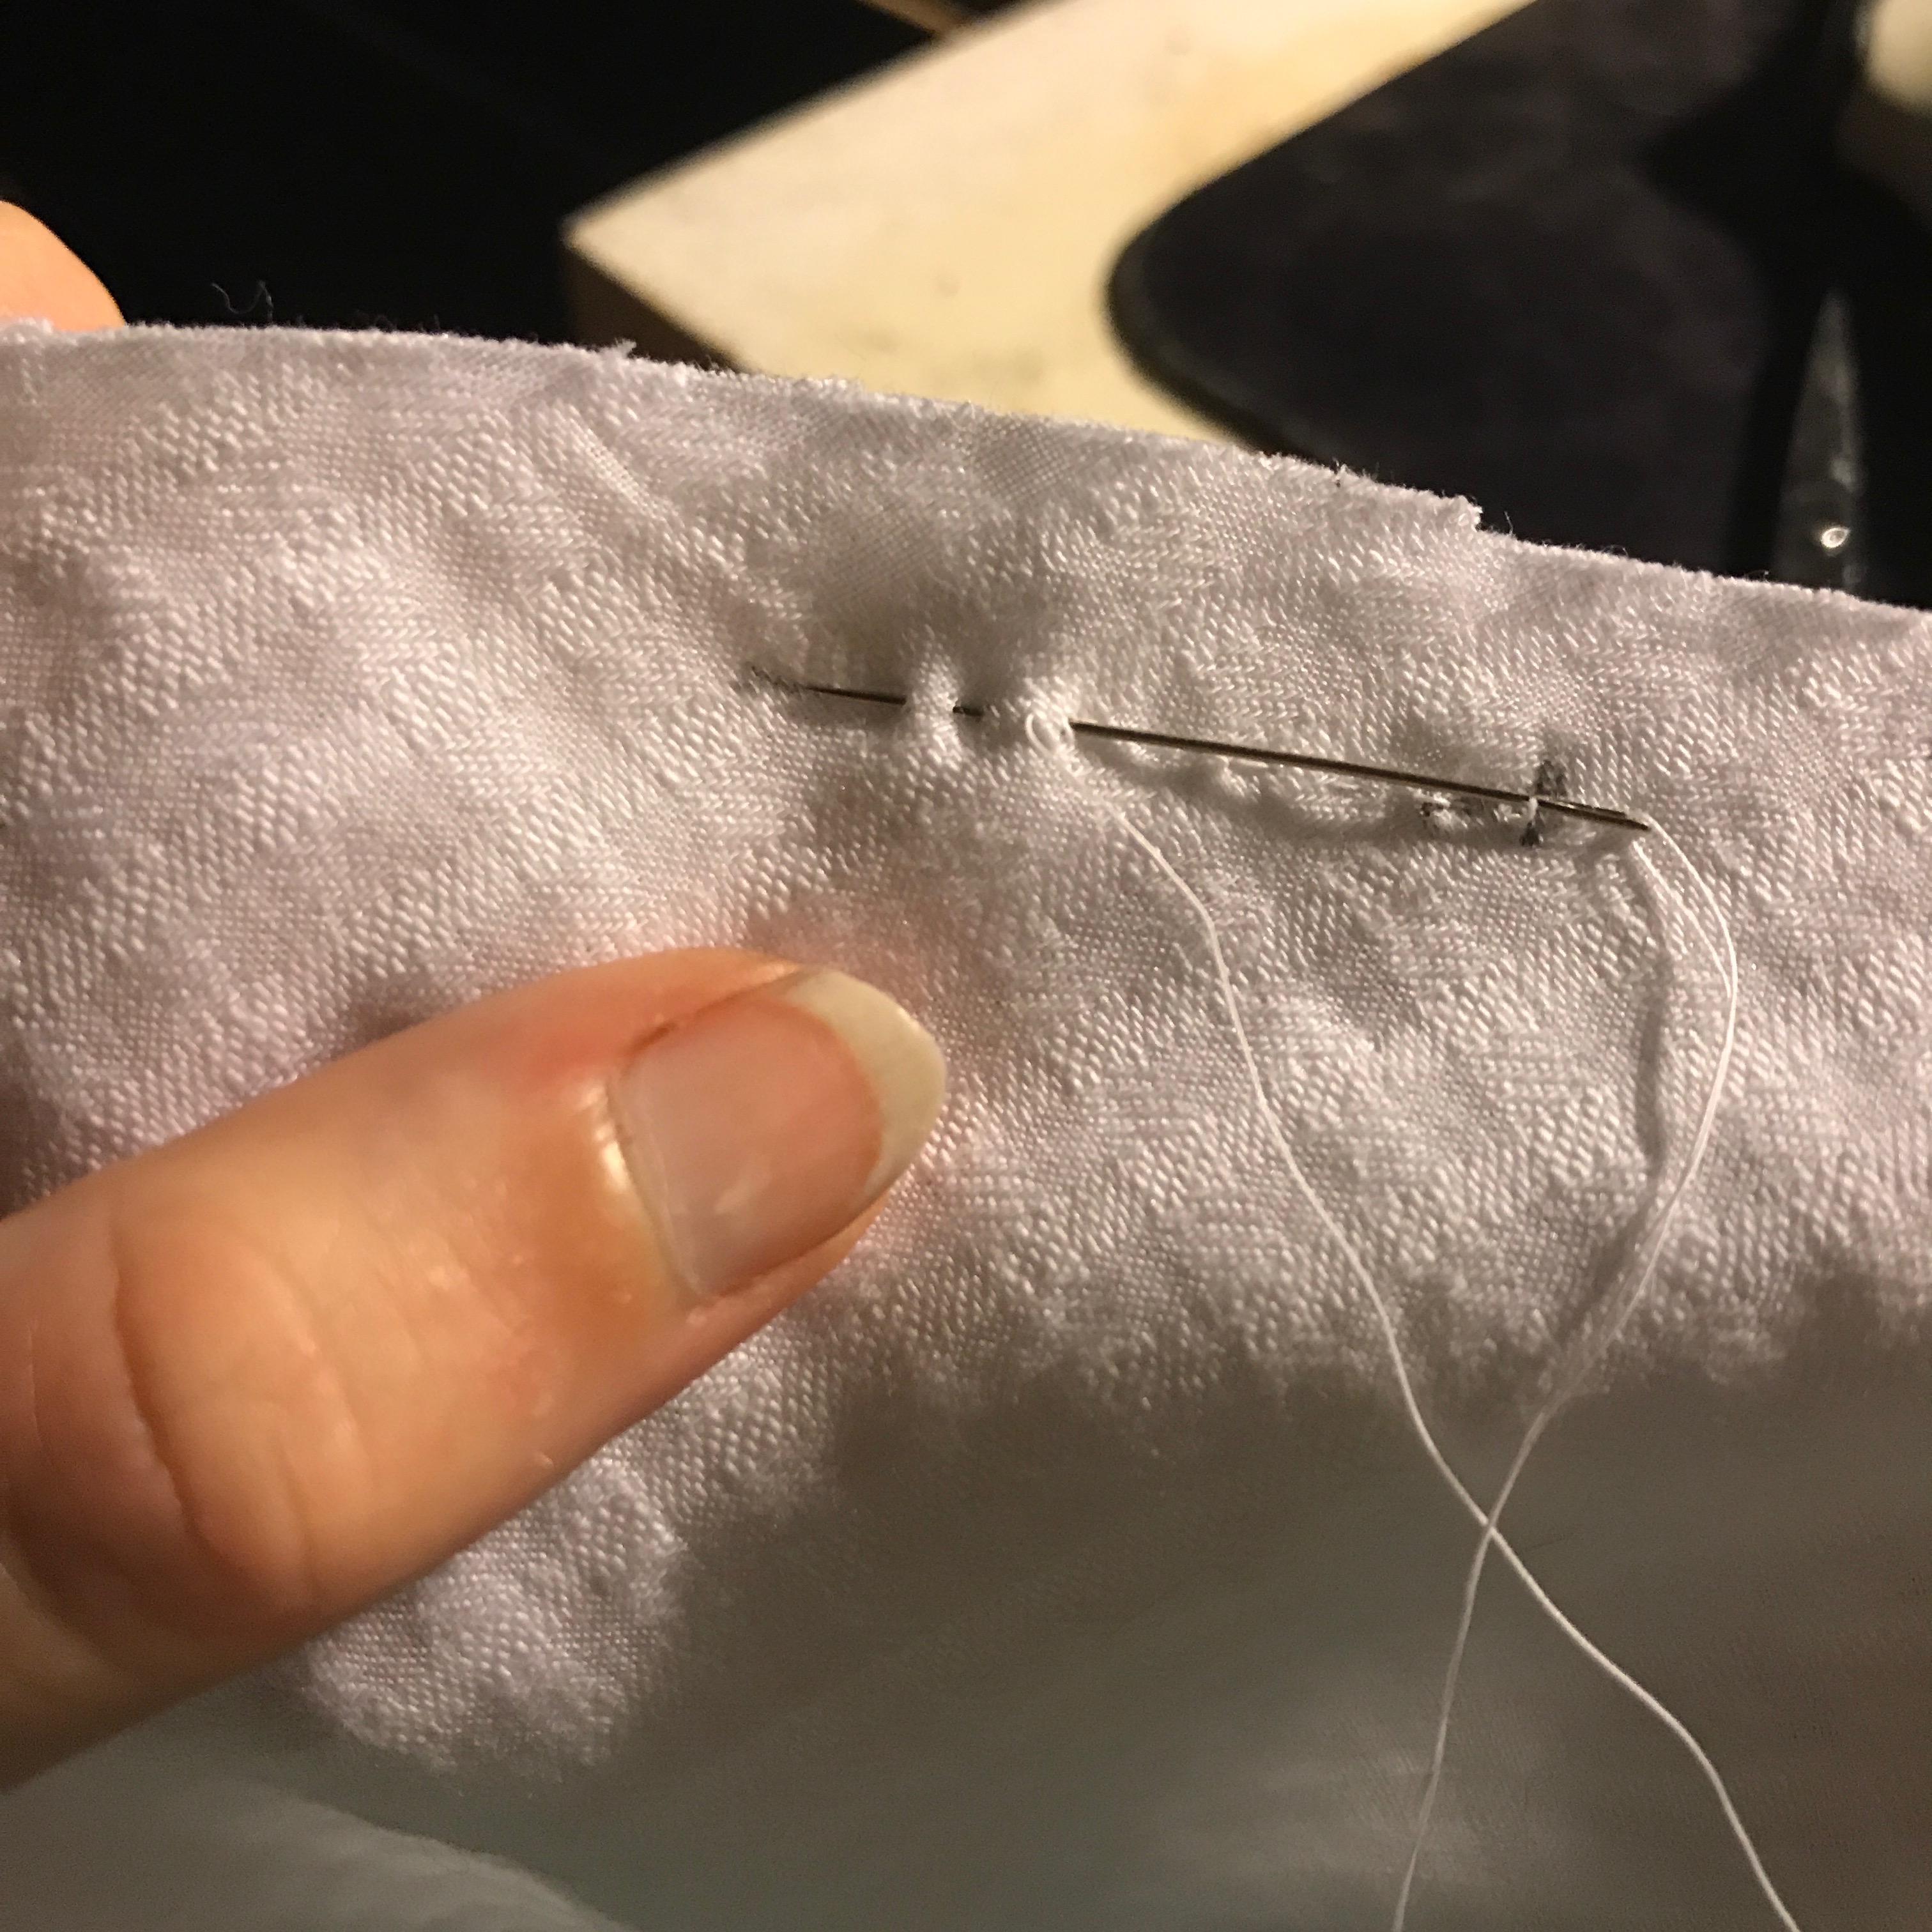
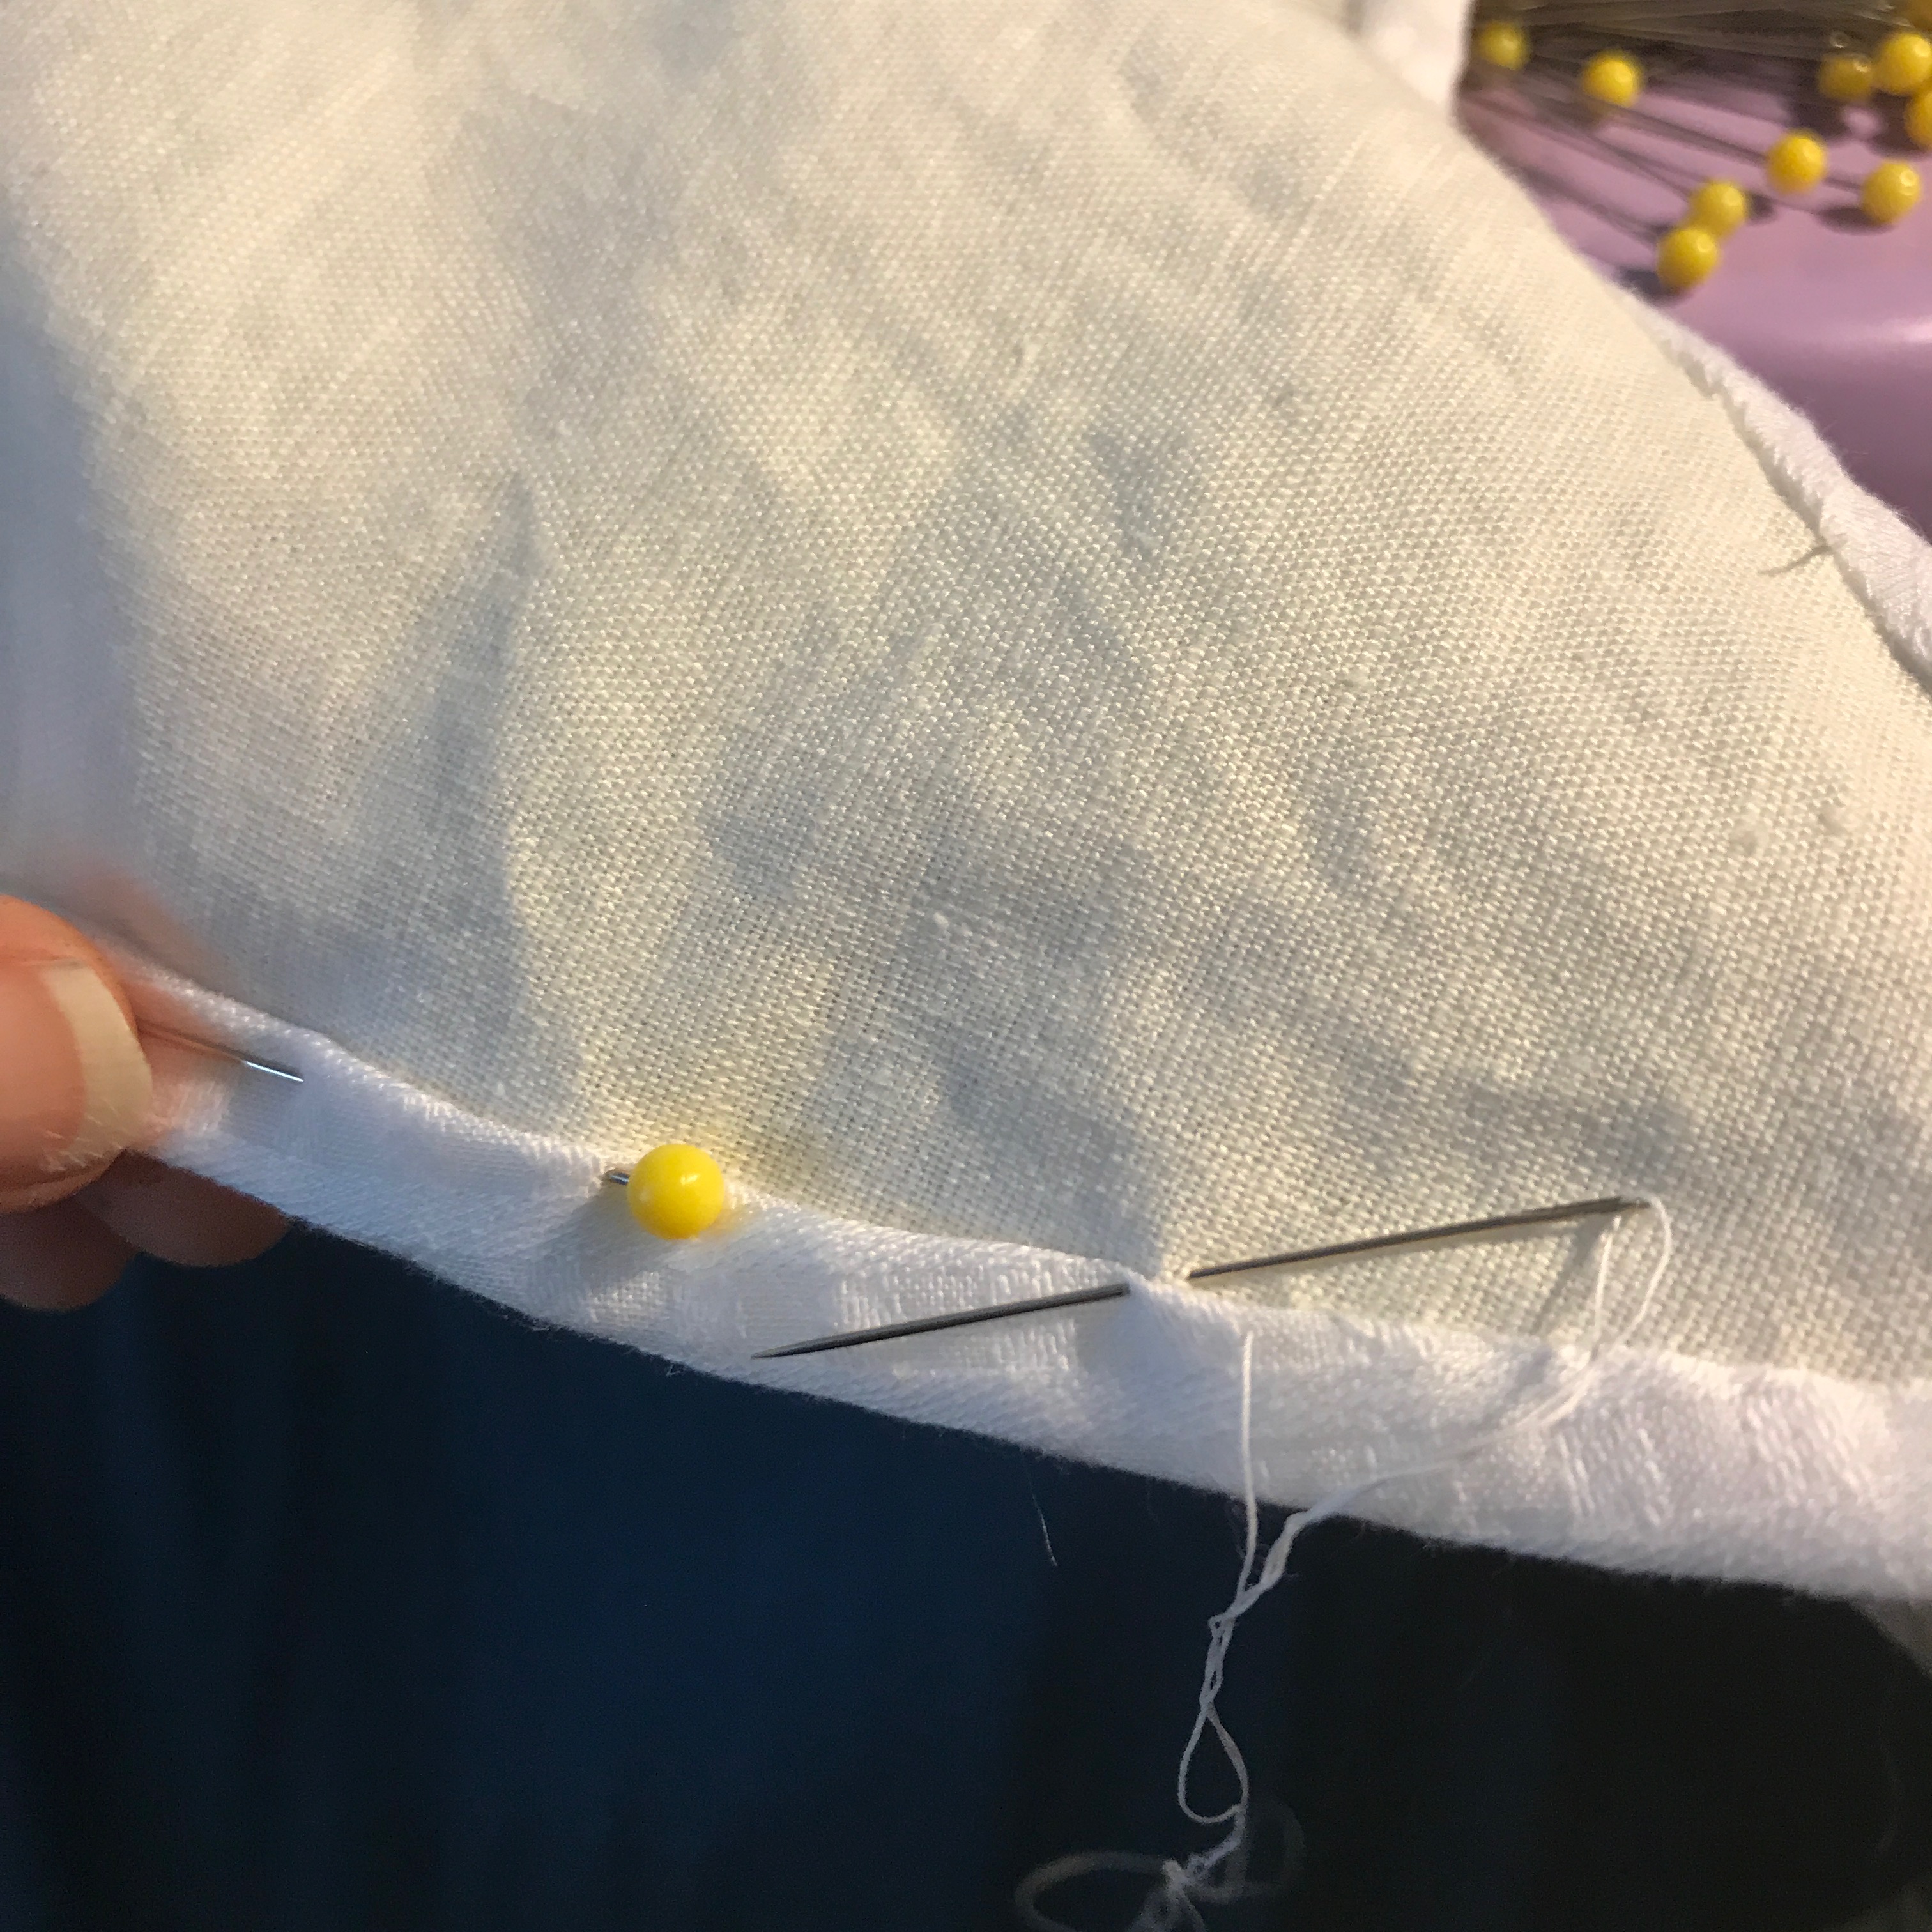
The bodice pieces are then stitched together. This could be done with a whip stitch, but I went with something like an English stitch, except that I was only dealing with one edge on each piece, rather than a lining and a fabric edge for each. I found that this fishbone-like stitch allowed the pieces to open out flatter than a whip stitch would.

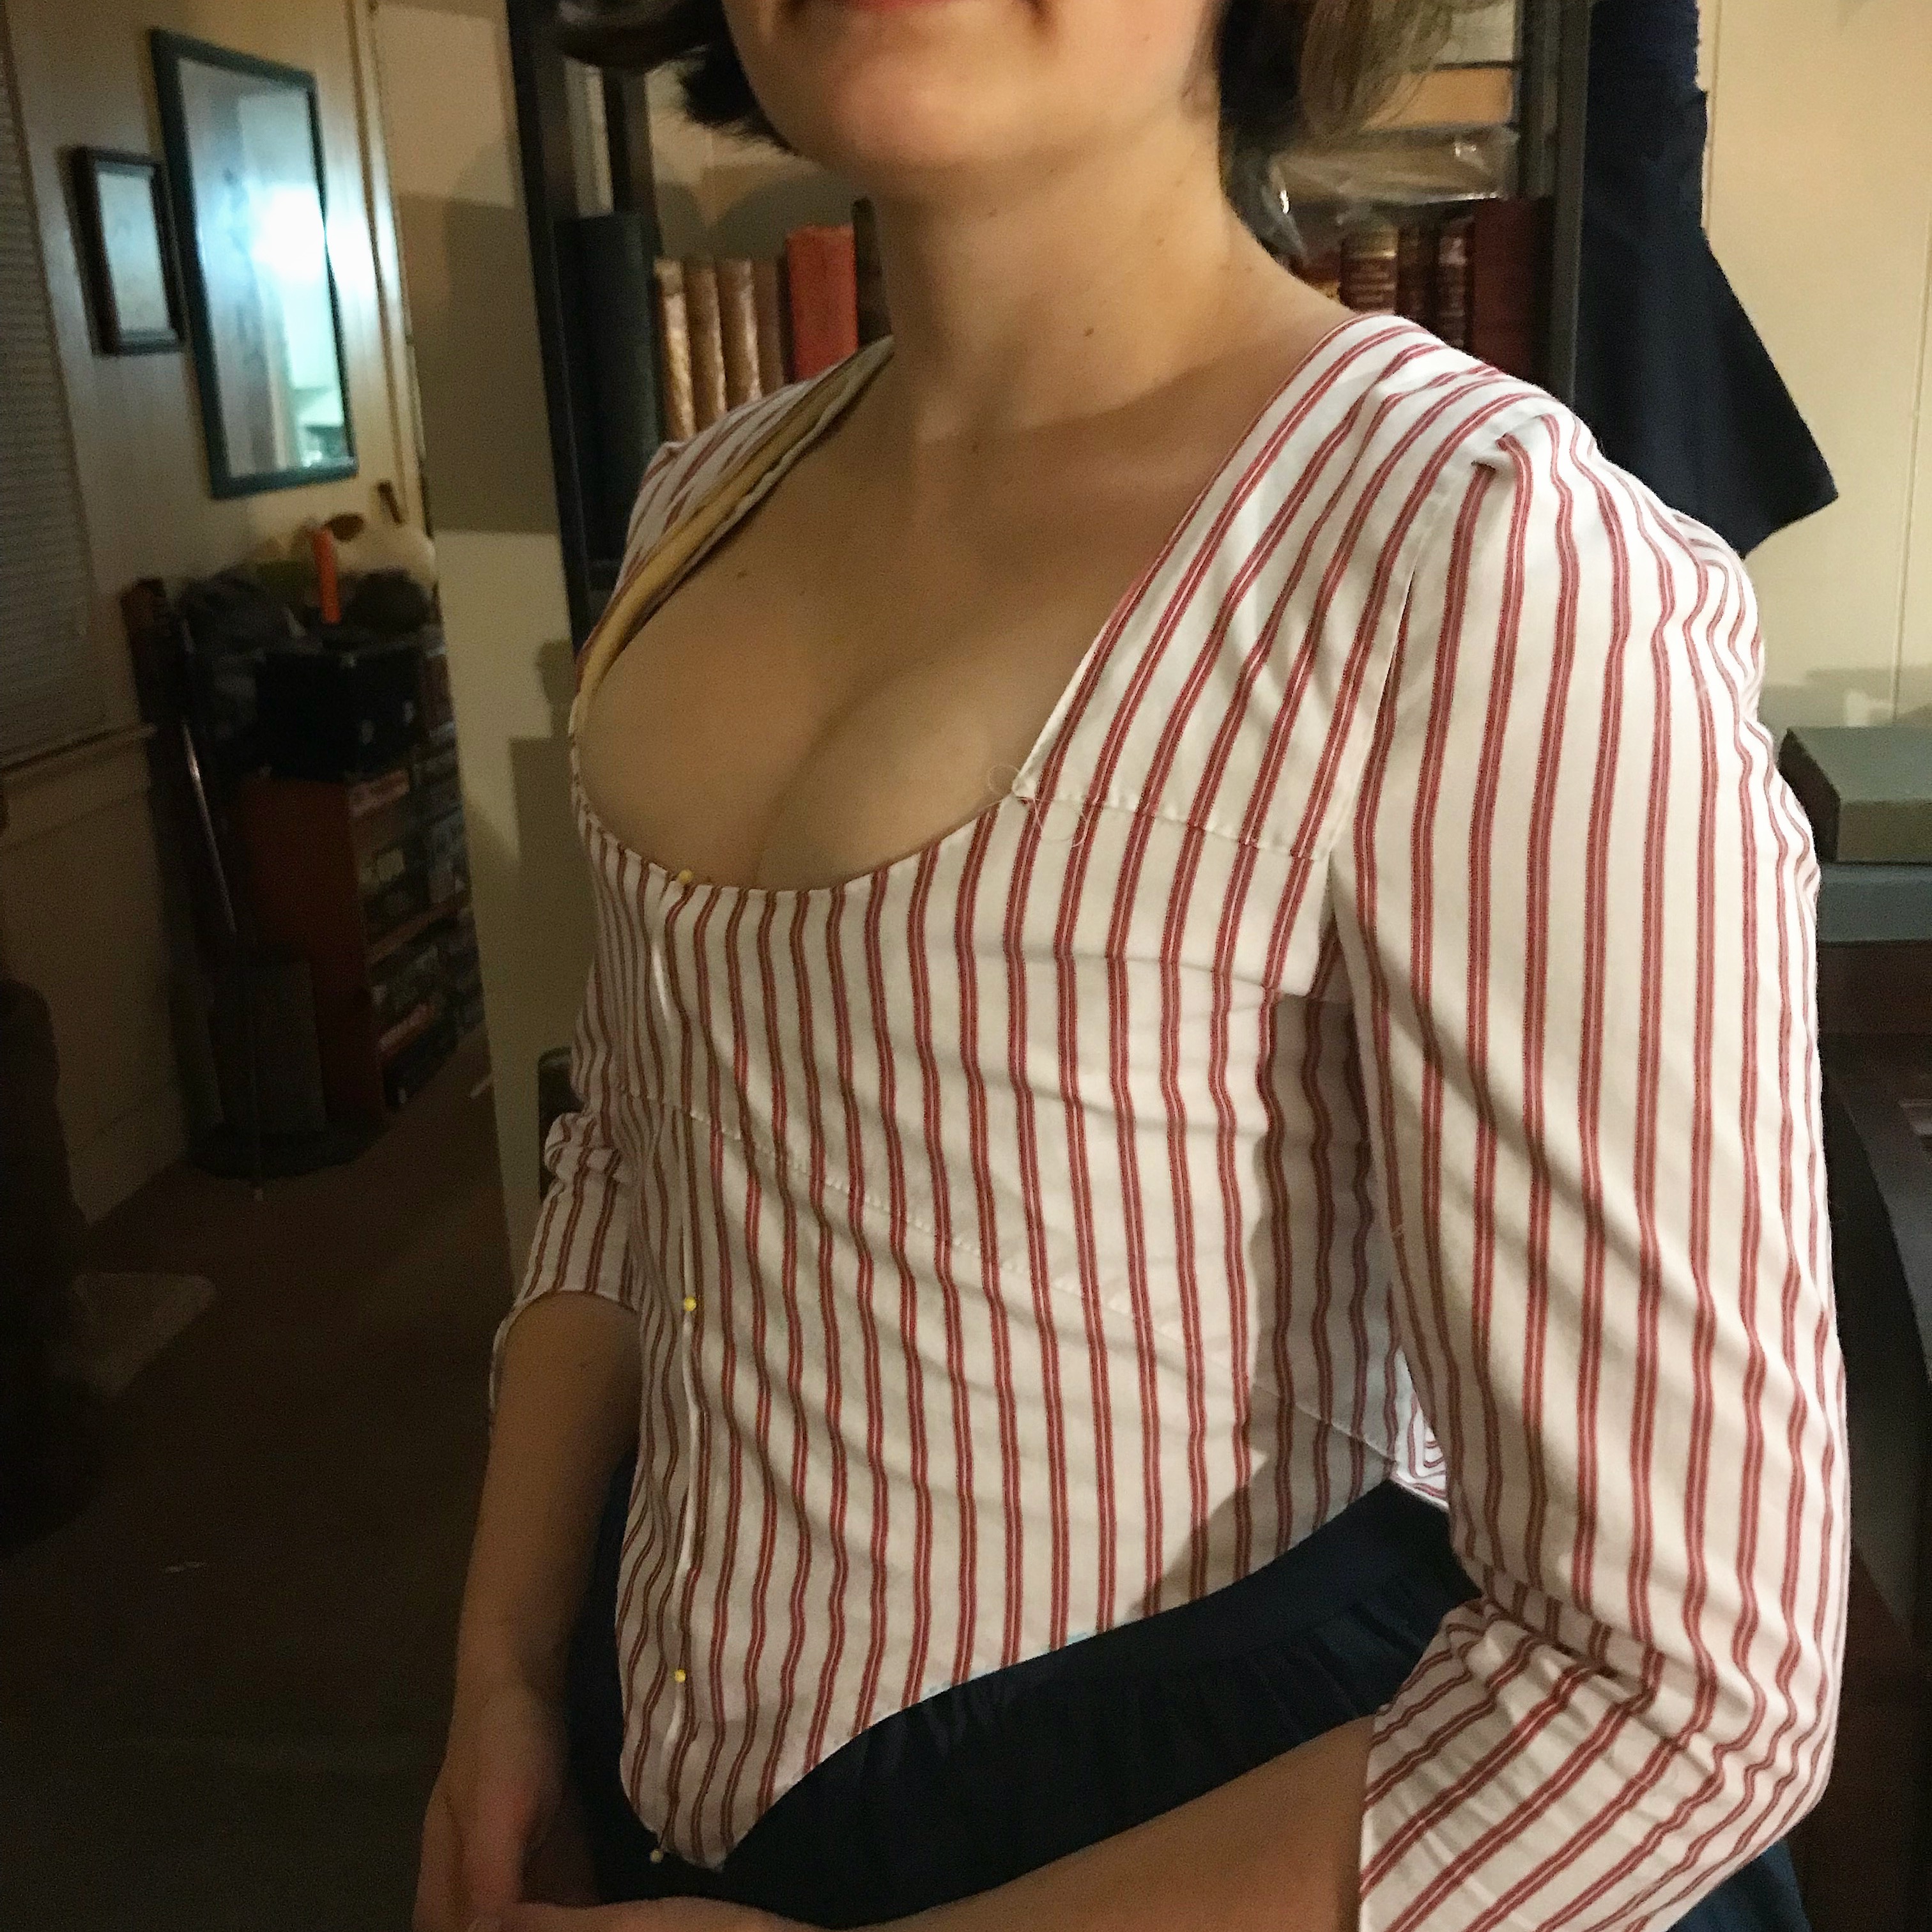
The shoulder straps on this gown are unusual. Rather than simply going from shoulder front to shoulder back, with a gap between, these ones come around the neck in the back and meet in the middle. I though it was an interesting element on the original dress, and decided to replicate it.
A lot of the work on the skirt was done during the Independence Day event at Locust Grove. The skirt is made in three panels: two back/side panels, and one front panel that includes the gathered portion of the bodice. On the 4th of July, I finished the side edges of the back skirt panels, hemmed them, and put the gathering stitches in half of the top.

Photo Credit: Historic Locust Grove
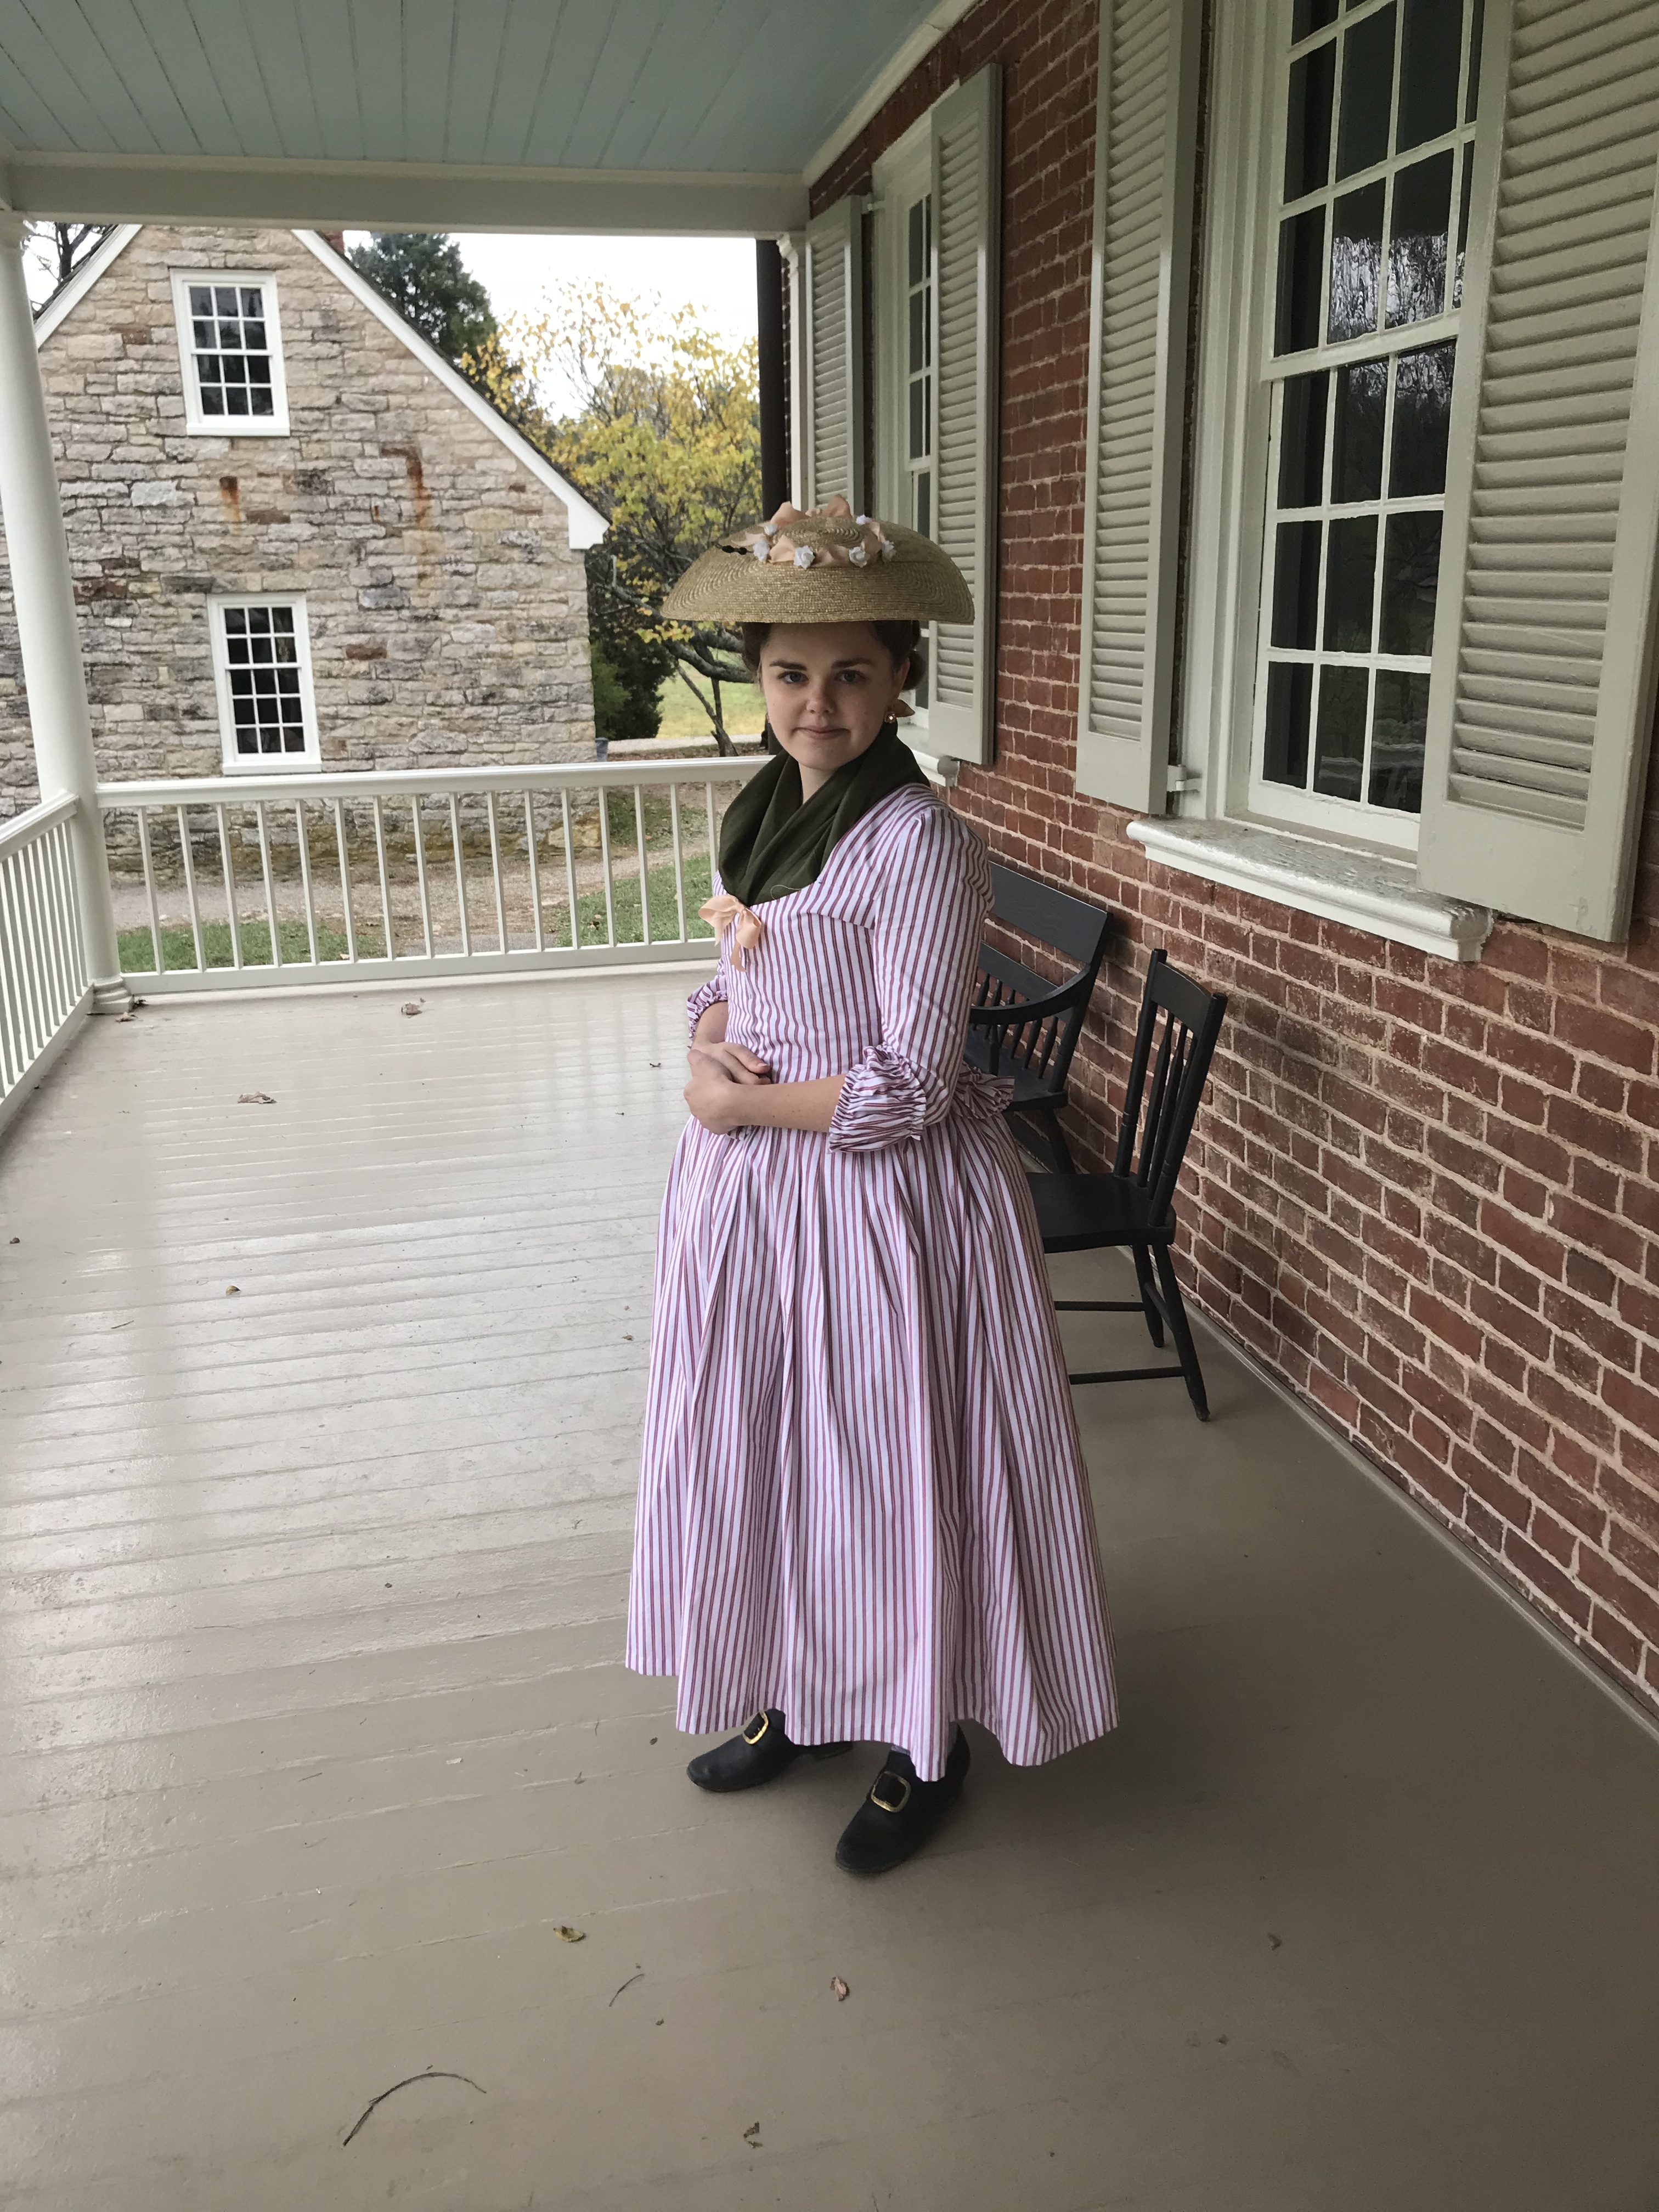
This is my Lydia Fast bonnet, and of course I’m wearing a Custom Wig Company wig! The jewelry is from Dames à la Mode.
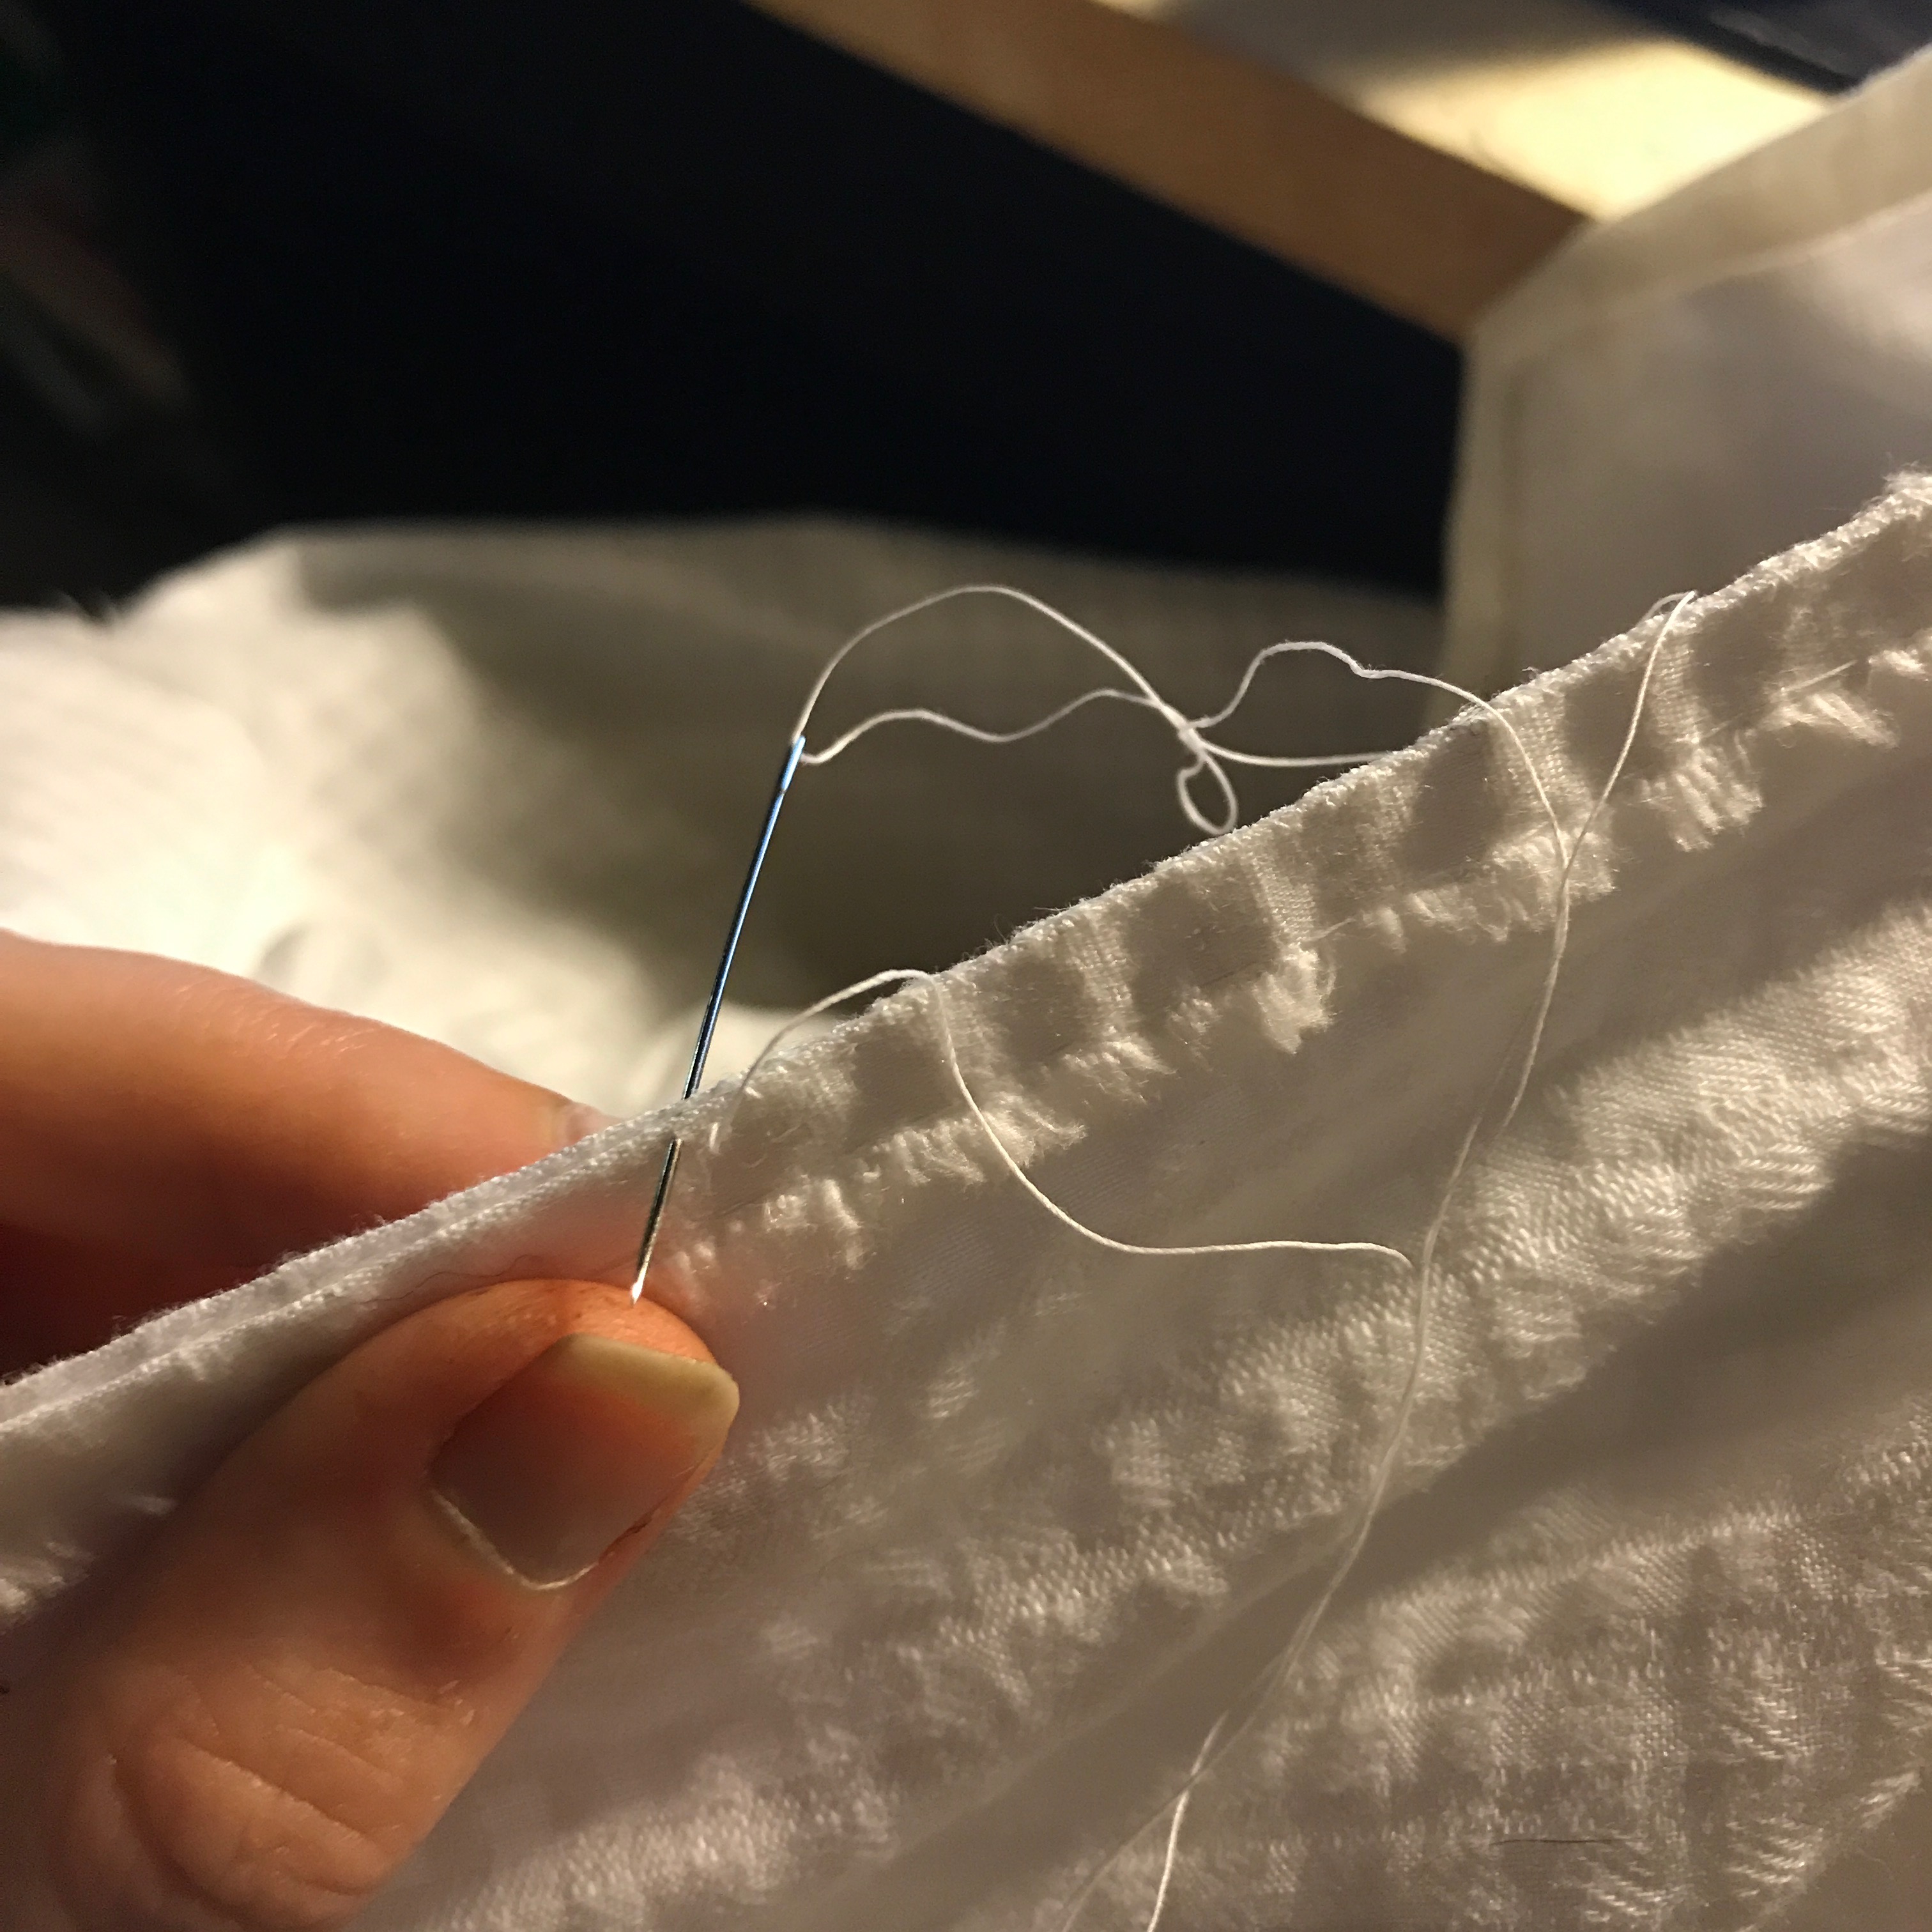
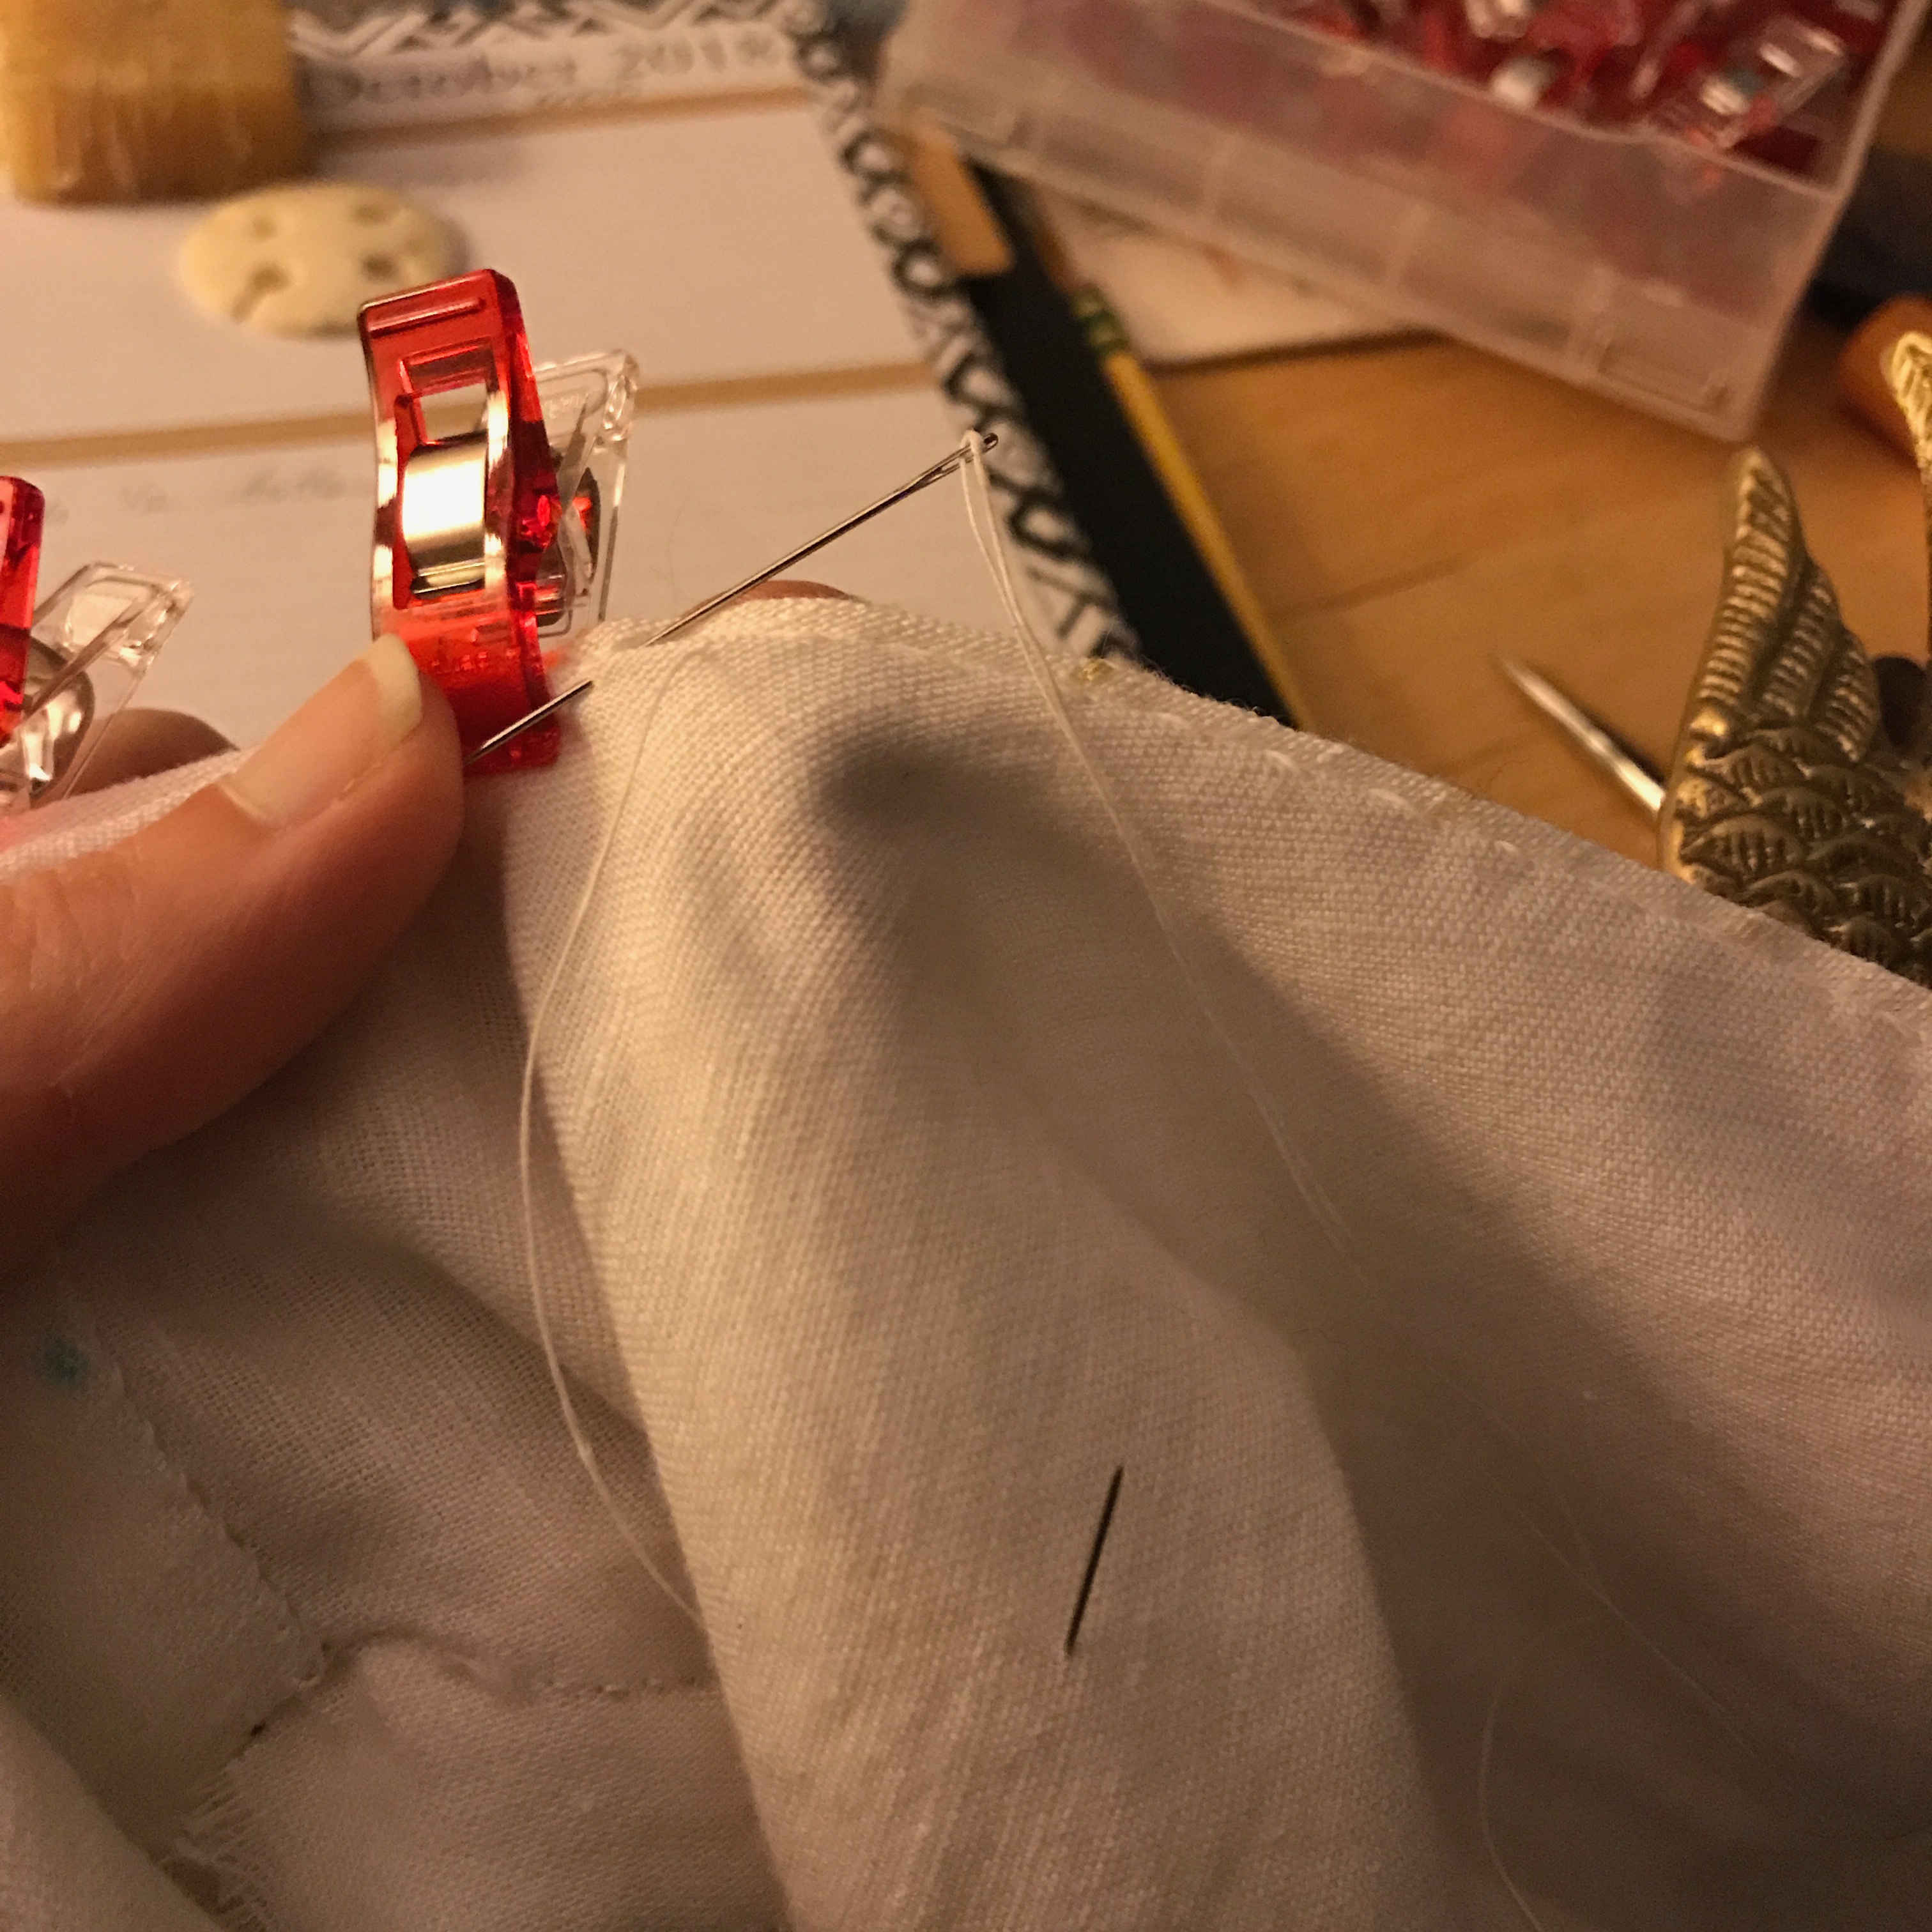
I put the final gathering stitches in the skirt at home. Checkered fabric is very convenient for making nice, even stitches that line up perfectly! Two rows of stitches are important if you want you’re gathers to be really neat and even.

I pulled up the gathers and stroked them to get them to line up nicely, then put the finished bottom edge of the bodice over the seamline. Then I stitched the skirt to the bodice, being careful to put a stitch through each gather. The two back skirt panels go from the front/side front seam on one side to the same seam on the other side.

Next, it was time to deal with the large panel that forms the front of the skirt and bodice. This is just a large rectangle with a slight dip in the top to make the shape of the neckline.

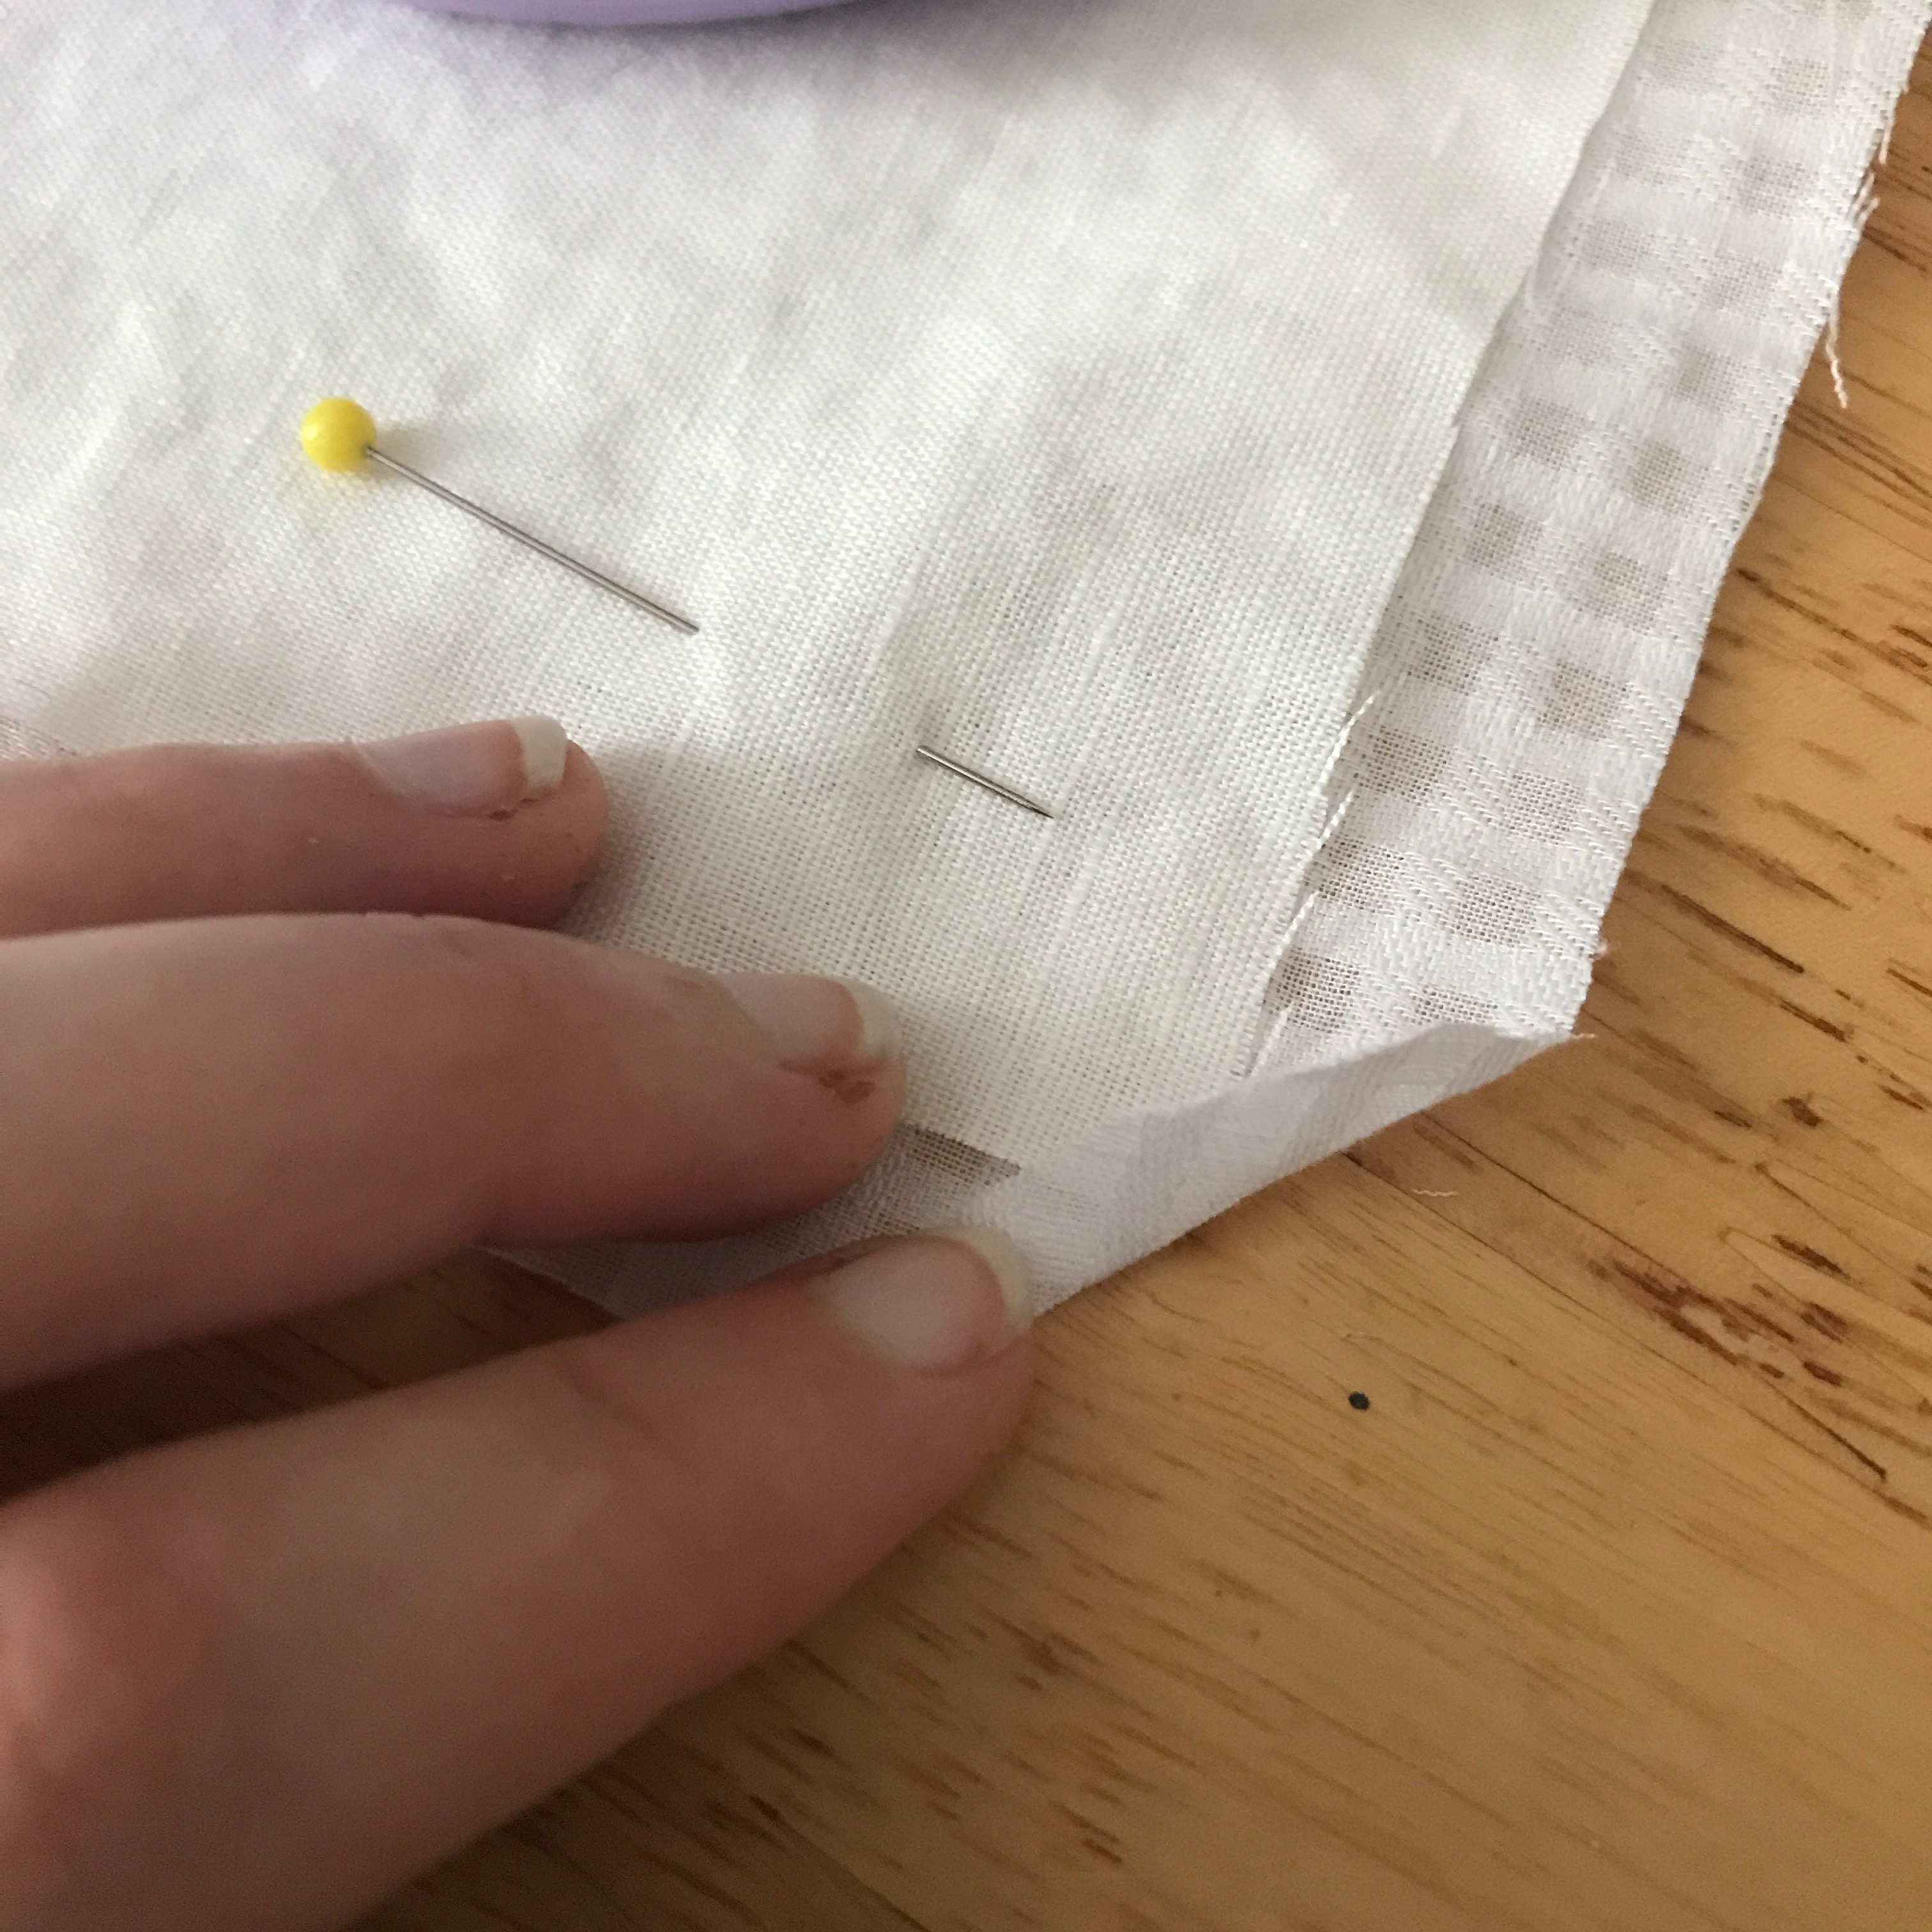
The sides are both selvedges, so they just got turned and stitched down. There is a slit cut in the center from neck to about hip level. This slit is what allows me to get in and out of the dress. It is finished with a narrow hem. The bottom of the slit is re-enforced with buttonhole stitches and a bar tack to prevent it from tearing.

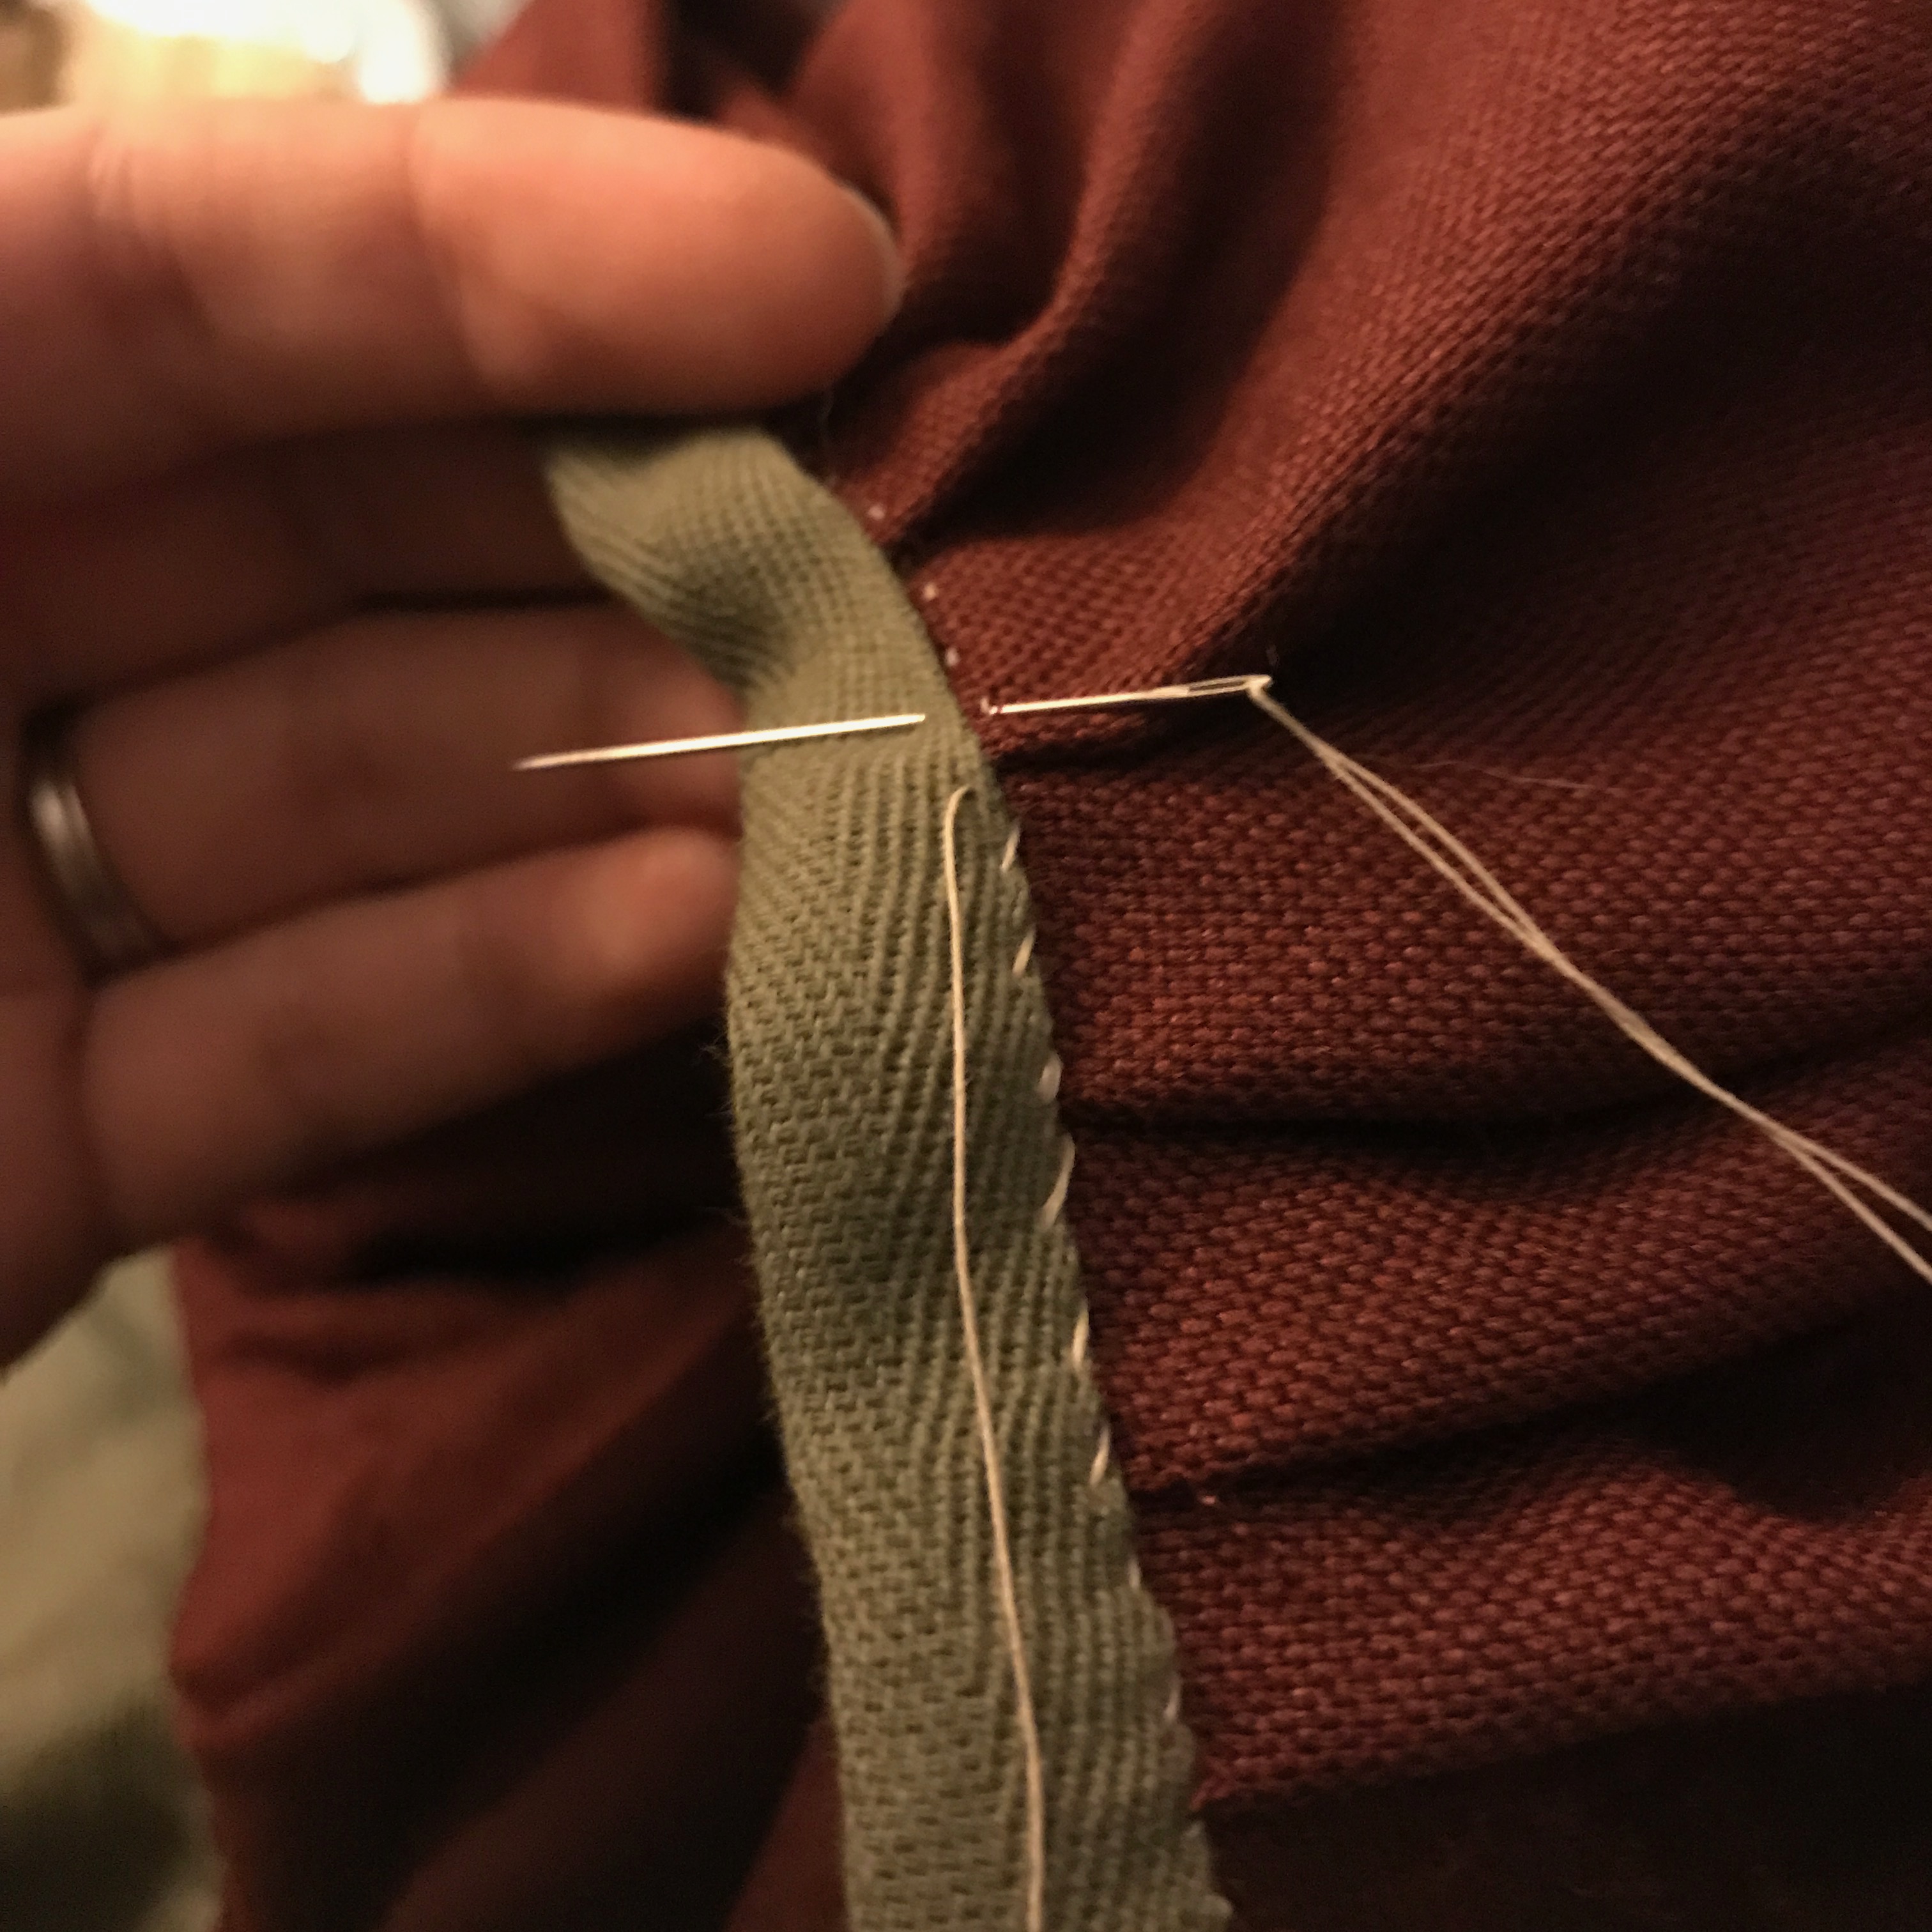
The top edge of the front piece is hemmed to make a drawstring casing, with a piece of narrow cotton tape from Burnley & Trowbridge tacked to the shoulder strap seam for the drawstring. The bottom of the piece also got a hem, though apparently not a picture.

The front piece is then whip stitched to the skirt back, and blind stitched along the front/side front bodice seam so that it will cover the plain linen, fitted portion of the bodice.

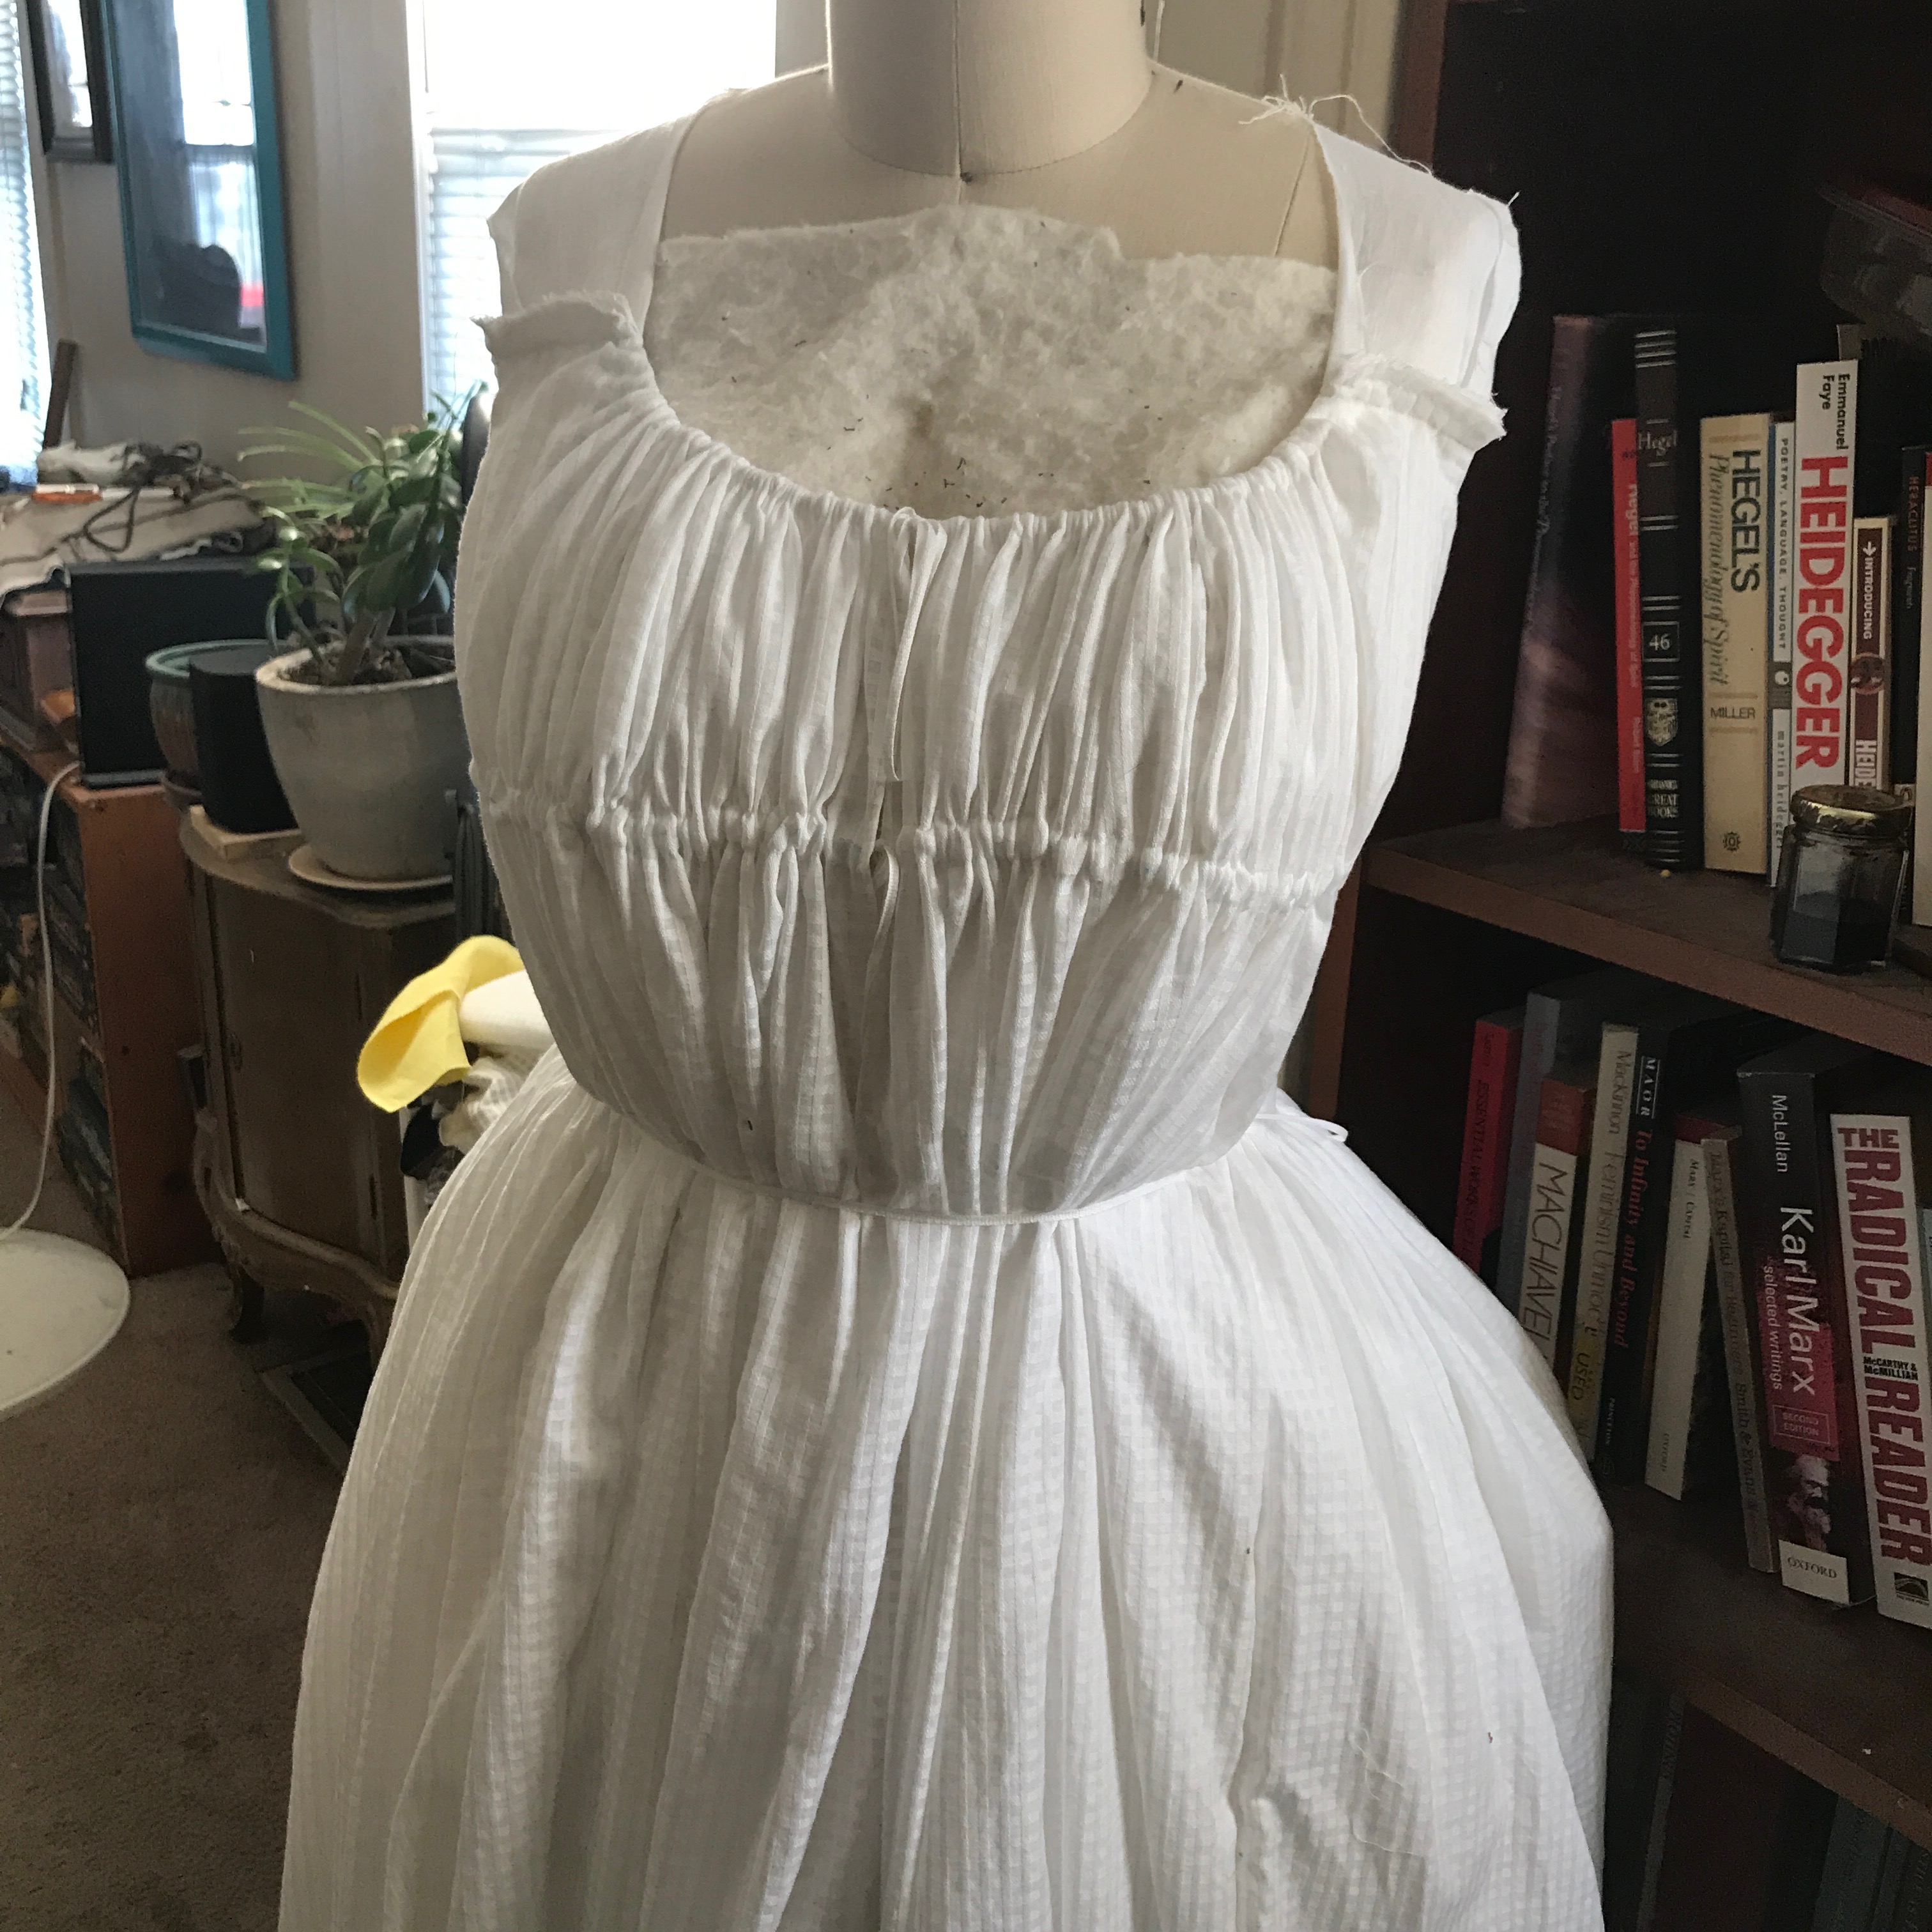
The waist and underbust drawstring cases are made of more cotton tape from Burnley & Trowbridge.
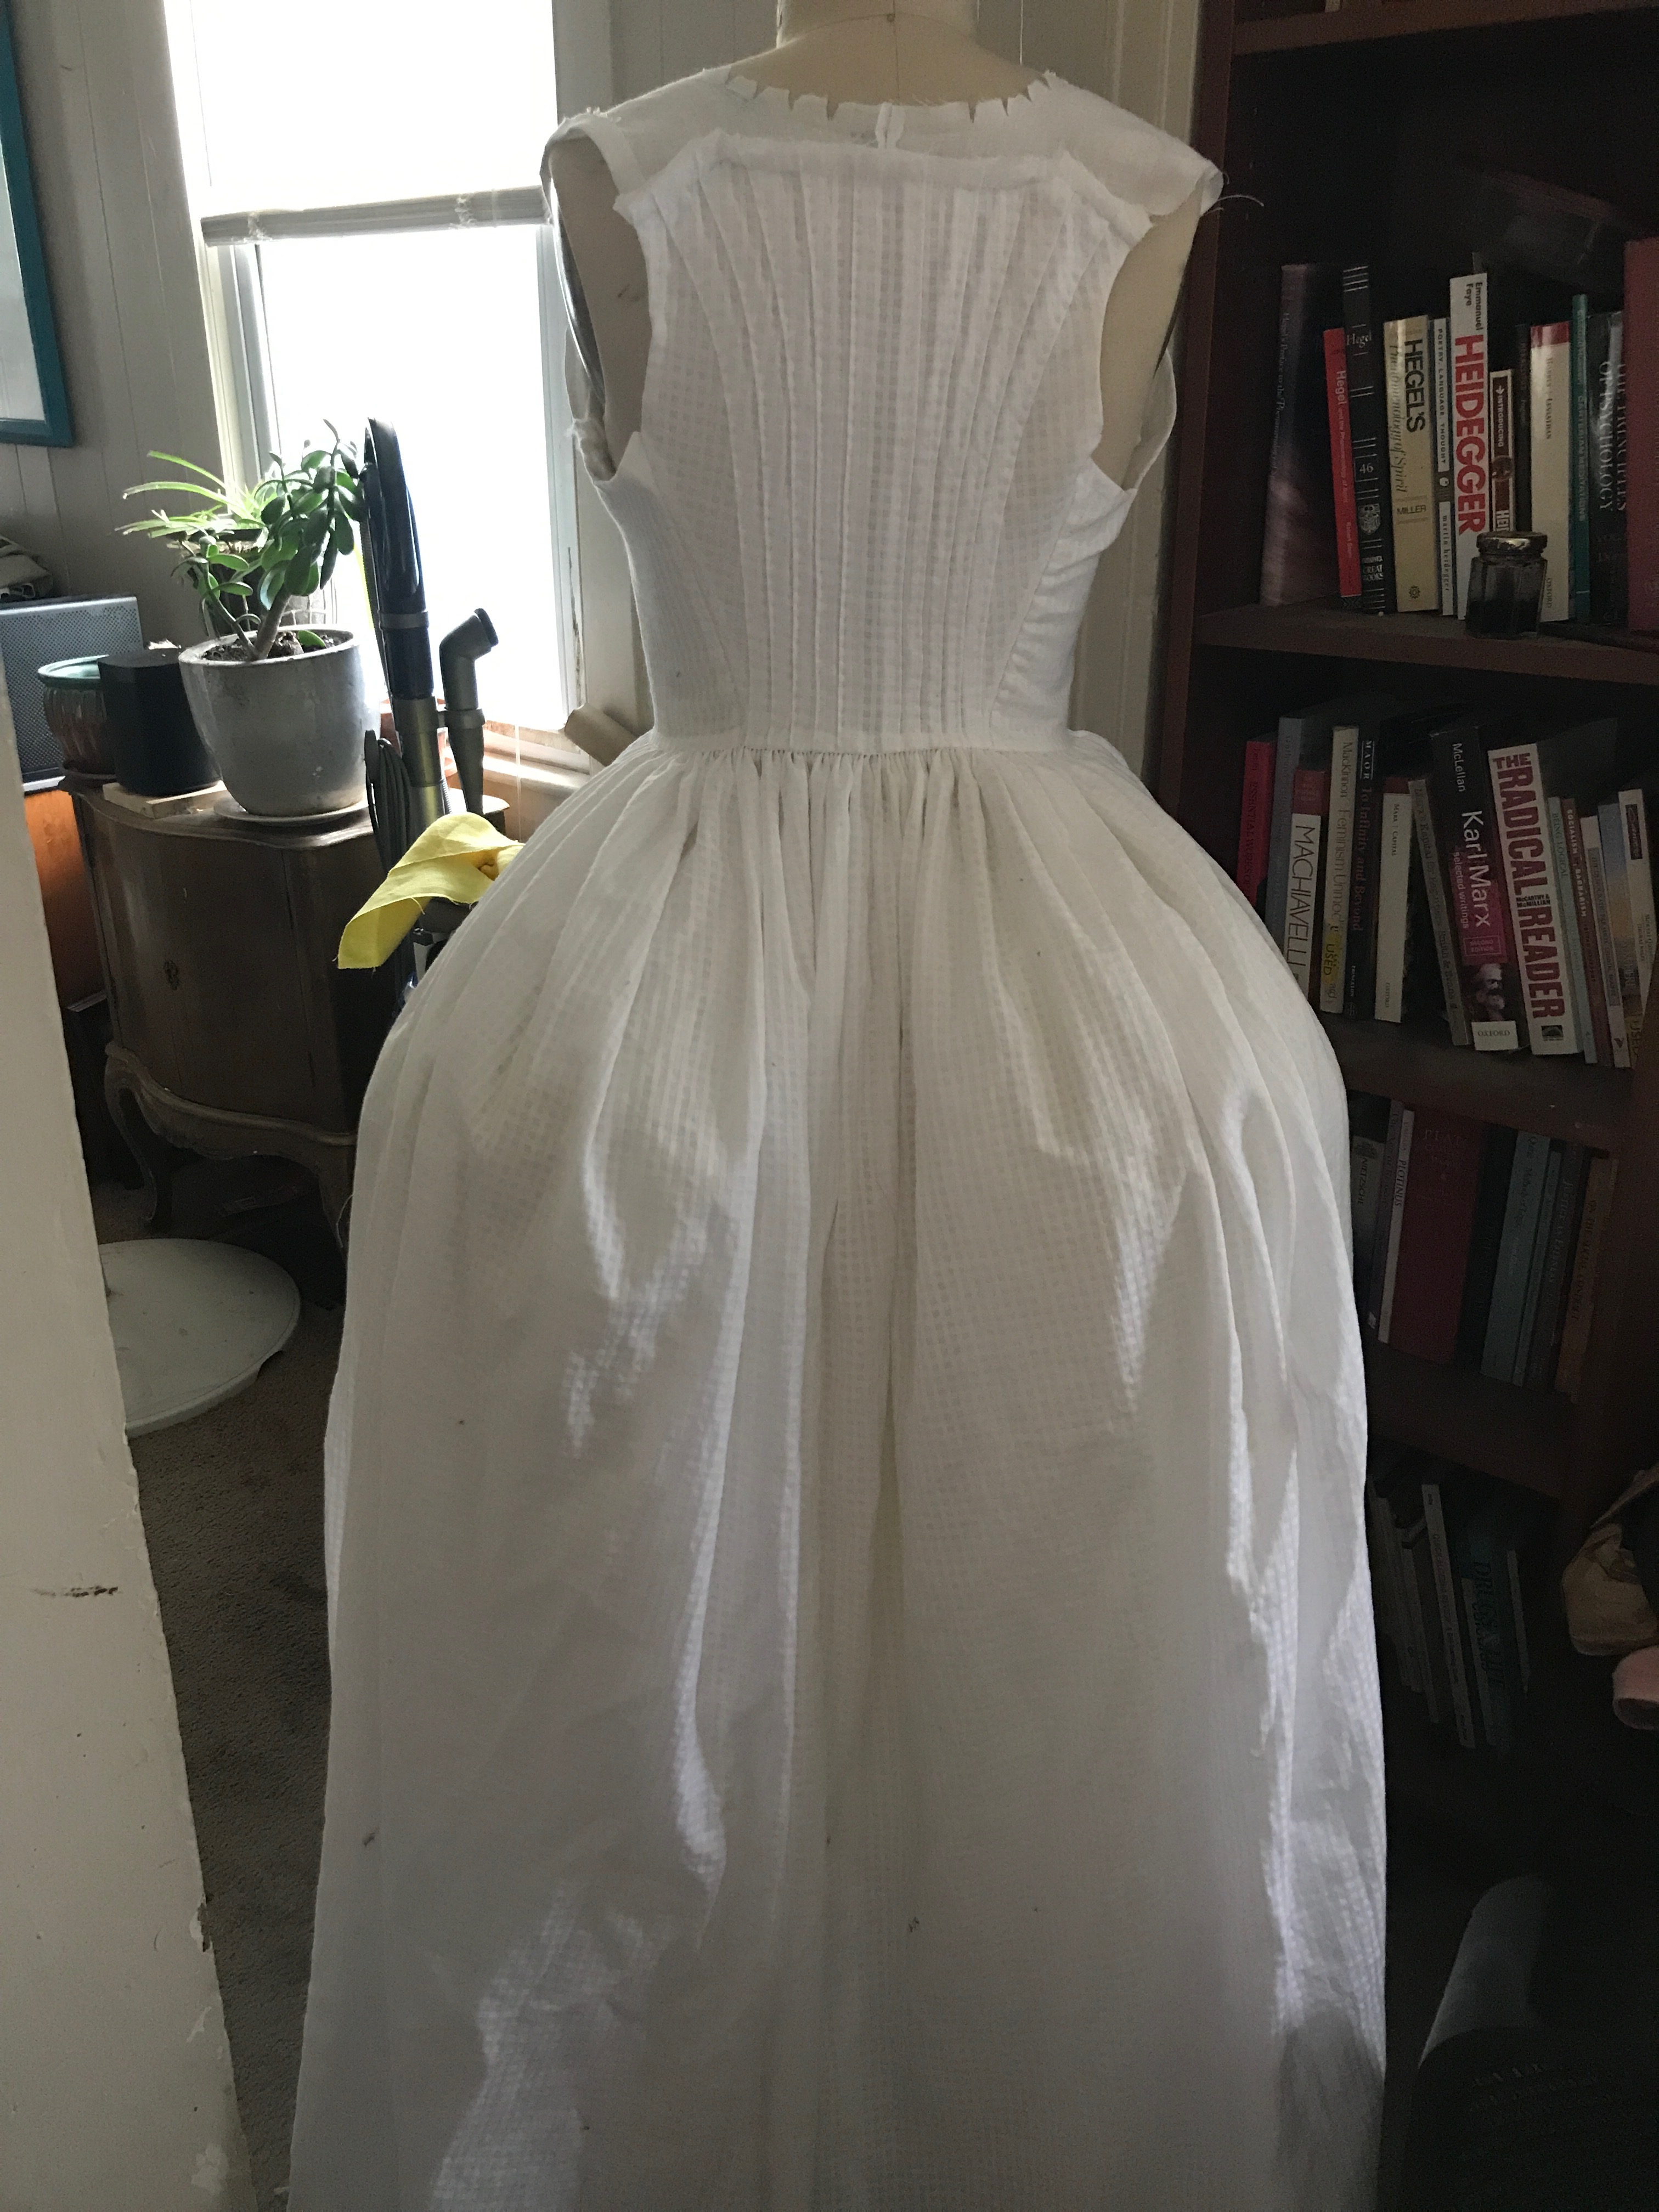
The dress so far. She looked a bit awkward because my dress form is still padded out for Daenerys’ underbust corset, not for 18th century stays.
I briefly considered doing a nice, simple straight sleeve, which I could draft in my sleep, but did end up drafting a shaped sleeve like the one on the original using one of the patterns from The Cut of Women’s Clothes as a guide, though it needed a good bit of adjusting to fit me.
The only plain seams in the whole dress! The sleeves and sleeve linings are sewn with running stitch, with a back stitch every few stitches for strength.

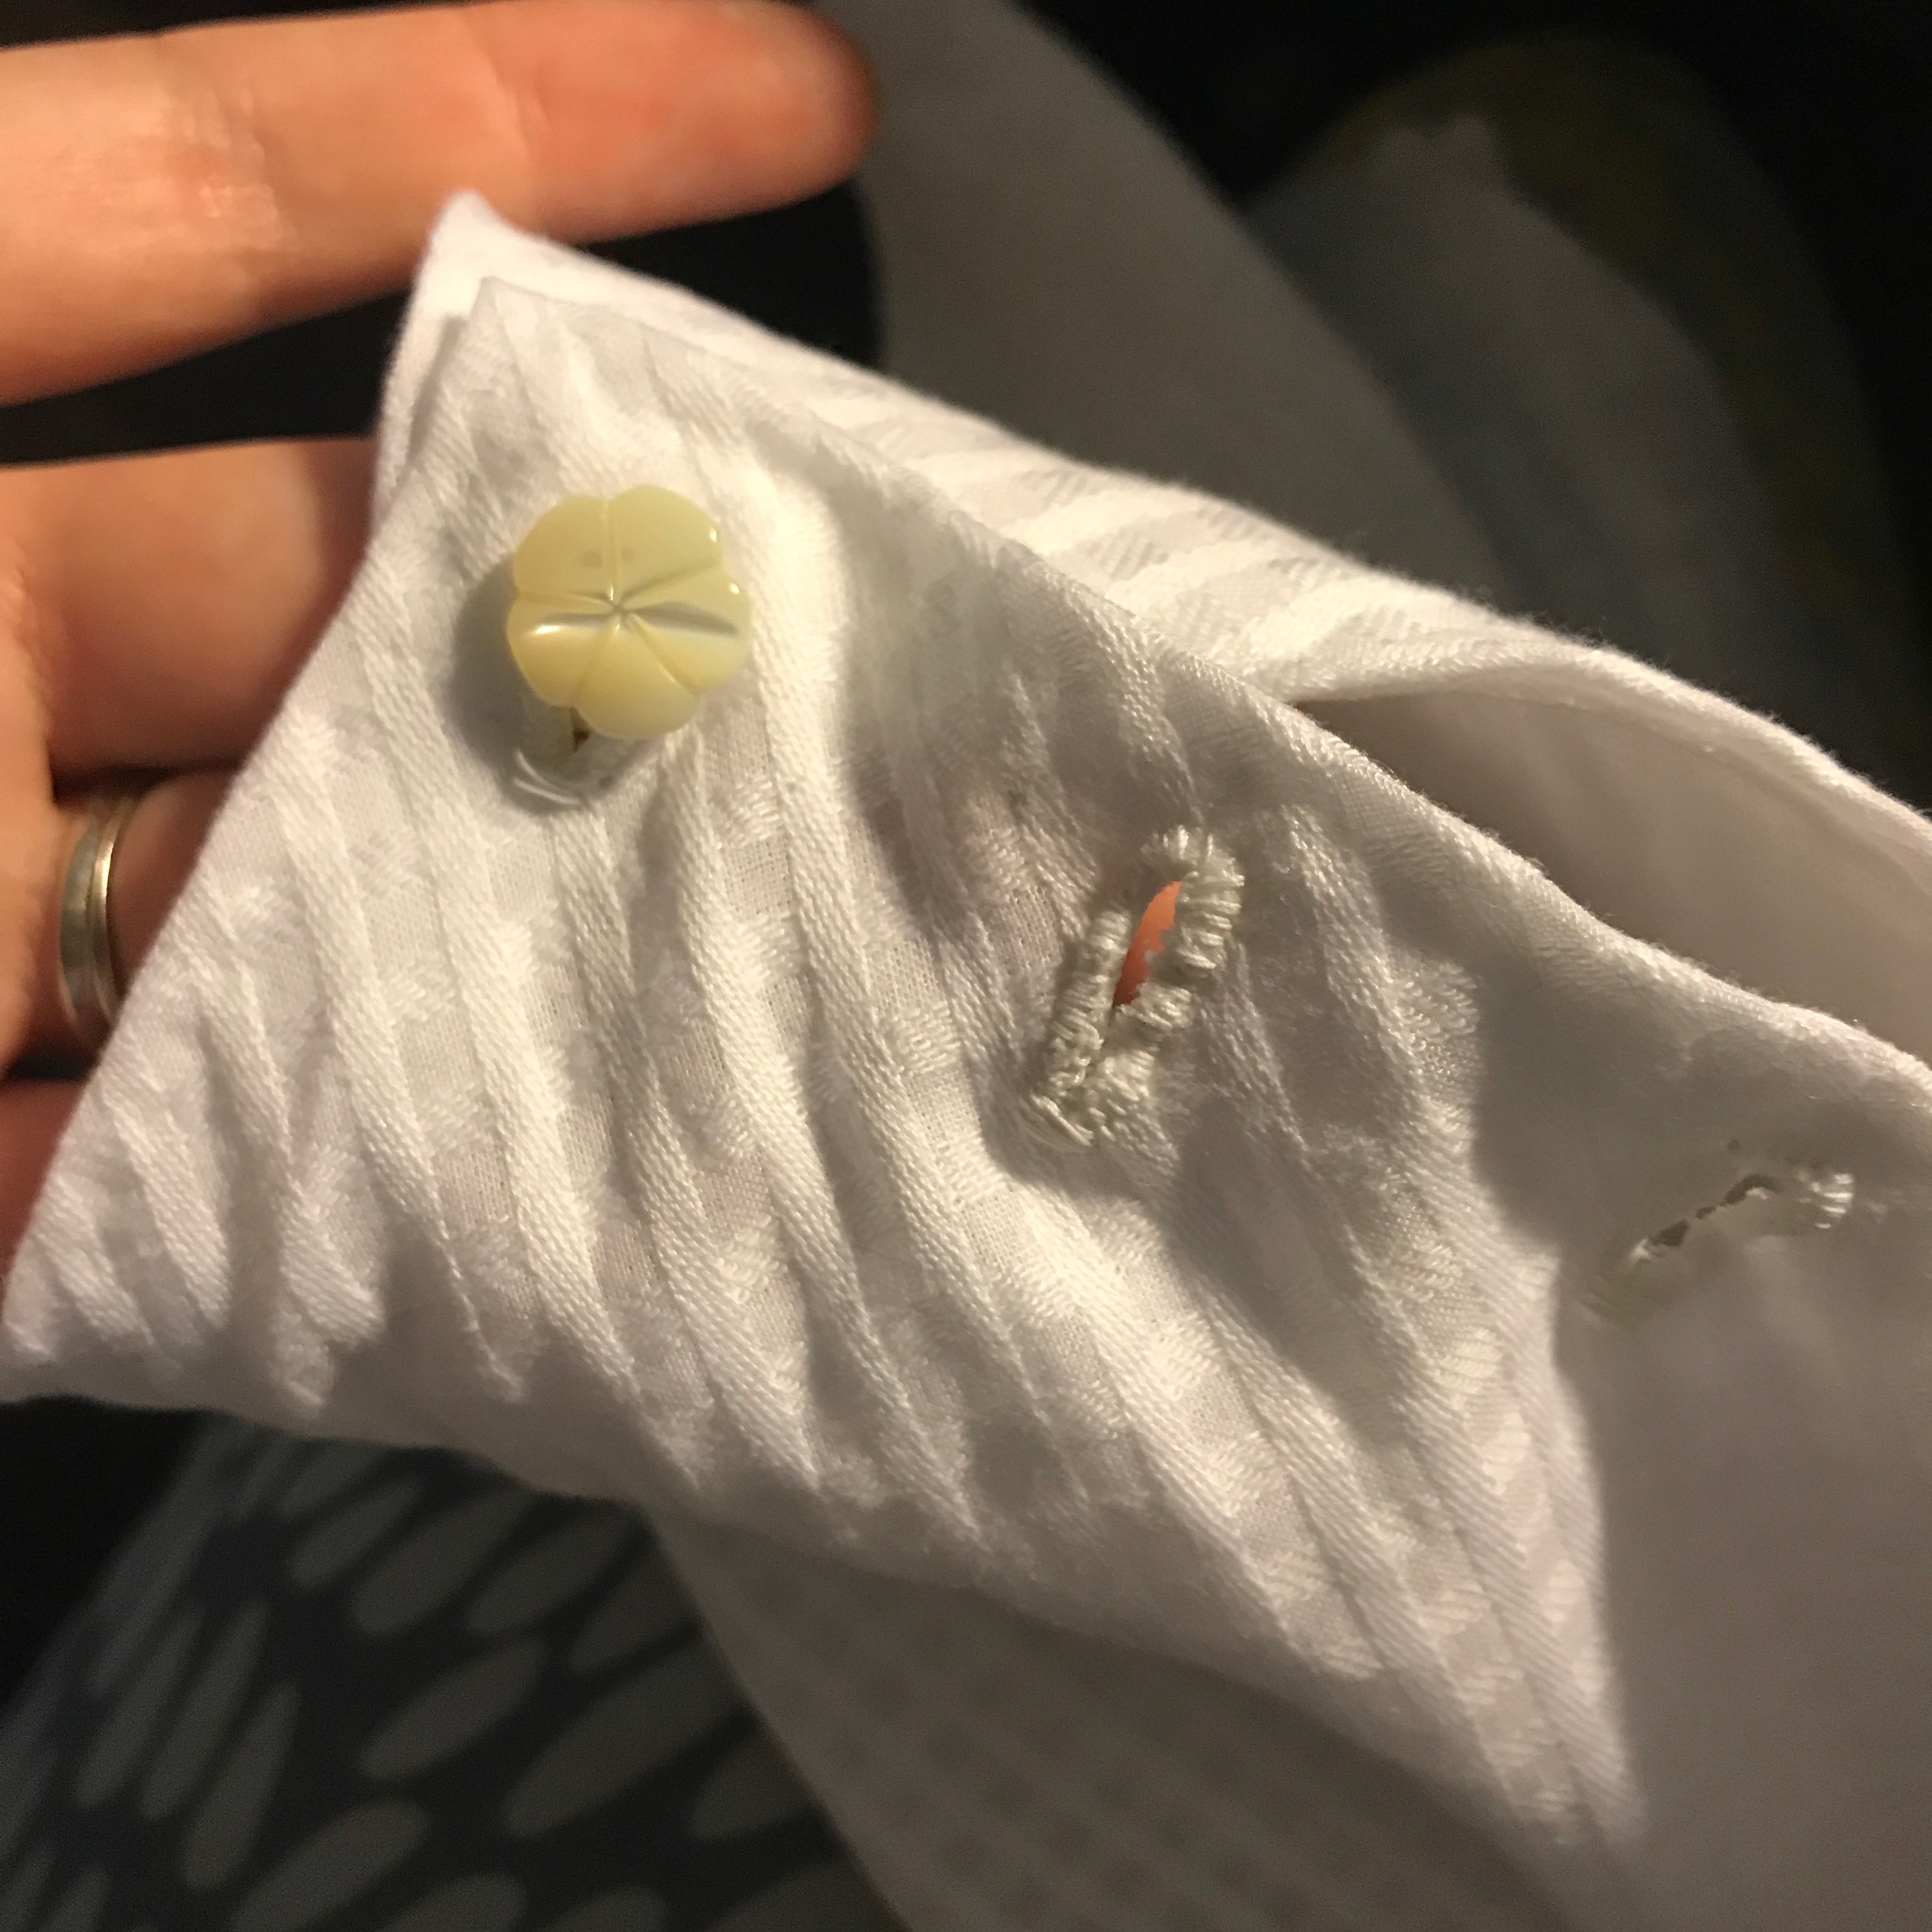
The back sleeve seams are open at the wrist to leave room for the hand to get through. These adorable flower-shaped mother-of-pearl buttons were left over from another project.

I was attaching the sleeves on Friday night at the Jane Austen Festival! Down to the wire for a dress I planned to wear on Saturday!

The final step when I got home Friday night was to stitch the fabric shoulder straps over the top–blind stitched along the seams, and prick stitched at the neckline edge.

I’m head over heels with this dress; I really am. It really reminded me why I love hand sewing, and why I try to do it on any garment from before sewing machines were widely available. I just enjoy hand construction so much more than machine. Machine sewing is all about the end goal for me, but when hand sewing I love the process as well. Loving the outcome is just the cherry on the cake! The jewelry in these photos is from Dames à la Mode, the wig from Custom Wig Company, and the makeup from LBCC Historical.

Here are some comparisons of the original dress from the Musée de la Toile de Jouy and mine. I didn’t have enough fabric (or enough time!) to do the skirt ruffle, and Wm. Booth is sold out of this fabric now! But, I wasn’t sure that I wanted to do it anyway, so that’s okay.

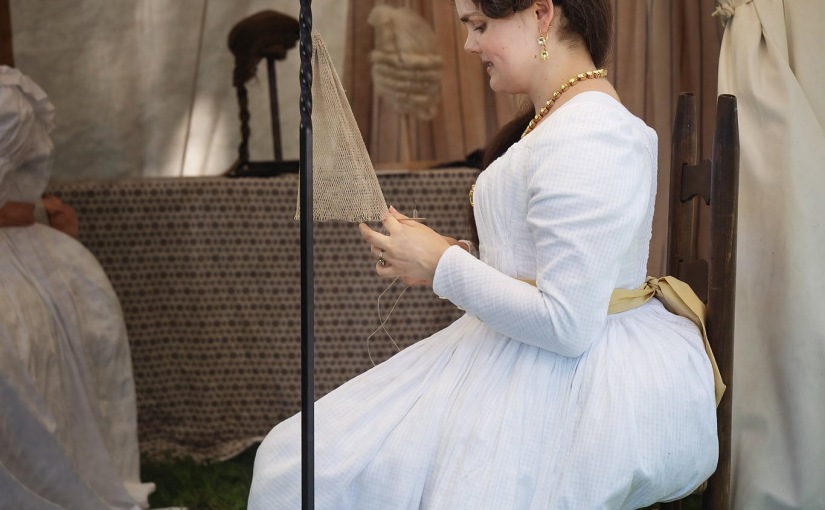
And here are a couple of photos by Fox & Rose Photography, which show me at work netting the cap for an 18th century men’s wig.
Daisies and Bluebells: A New 18th Century Jacket

Since I started building 18th century wigs using period techniques at work, I’ve been doing more and more 18th century events. And you know what that means: I need more 18th century clothes! 

In preparation for 18th Century Market Fair at Locust Grove this year, I set other projects aside to give myself time to build a new jacket and petticoat so that I wouldn’t have to wear the same outfit both days. When I bought this jacket fabric, I had hoped to get enough for a gown, but sadly by the time I bought it there were only two yards left, so I could only make a jacket. But I do love a smart 18th century jacket, so no real harm done! 

This was a quick project, and I didn’t take as many photos as usual, so this will be a bit of a short post for me, but I love the way my new outfit turned out!

I was loosely inspired by this plate from Galerie des Modes 1778.

I started with the petticoat while at a cabin getaway with some friends. It is made from a lovely dark red wool from 96 District Fabrics.

Making an 18th century petticoat is incredibly simple: just sew the side seams, leaving them open at the top for pocket slits. Hem the bottom (which I didn’t take a photo of).

Pleat the top so that both the front and the back measure a few inches longer than half your waist measurement. Pleat the front away from the middle, the back towards the middle.
Bind the pleats at front and back with tape long enough to tie around your waist. You put the petticoat on by tying the back waistband in front, and the front waistband in back. You can also wrap the back waistband all the way around and tie it in back as well if your tape is long enough.

And now, the fun bit: my new jacket! This is made from white linen with a woven yellow stripe from Renaissance Fabrics.

I was a dingus, and completely forgot to take photos of cutting and putting the main pieces together. Luckily, the body is basically the same as this jacket, except that I modified the back to a swallowtail, and sewed it all by hand.

My first photo is of the sleeves, all sewn together with their lining, and ready to be set. Since my other striped jacket has vertical stripes on the sleeves, I went with horizontal on these ones just to shake things up.

Setting 18th century sleeves is a fascinating process, in which you sew the bottom of the sleeve to the body, and then sandwich the top of the sleeve between the fabric and lining of the shoulder straps. This lets you really play with the pleats on the shoulder until you get a look you really like.

Brandon helped me drape the shoulder straps for this, and you can see his sense of humor in the notes to tell me which strap is for which side.

The edges are finished by pressing the fabric and lining towards each other and topstitching.

I pleated some lovely blue ribbon from Wm. Booth Draper to trim the neckline and sleeves, accented with bows.

And here’s the finished product in action at Market Fair! 

Wig by Custom Wig Company. Photo by Wayne Tuckson.

Wig by Custom Wig Company.

Wig by Custom Wig Company.

Wig by Custom Wig Company.

Tutorial: Death’s Head Buttons

I have another button tutorial for you today! This is for Death’s Head Buttons, a lovely kind of thread-covered buttons that can be seen on clothes through the 18th and into the 19th century. They mostly appear on menswear, but I have also seen what look to be Deaths’ Heads on a woman’s spencer (the resolution on the photo isn’t perfect, so I can’t be 100% sure), most likely part of a riding habit. I particularly like them for waistcoats.

img_2614
A Death’s Head button on Brandon’s linen waistcoat.

These are a bit fiddly, so don’t give up if you have trouble the first few times. I have made plenty of these, and I still find myself starting over! Be patient, and you will be making your own thread-covered buttons in no time!

What you’ll need:

  • Thread–you’ll want an attractive thread on the heavier side. My example is made with silk quilting thread. Don’t try to use an all-purpose or fine thread, or you may be wrapping until the end of the universe!
  • Scissors
  • A needle
  • A pin
  • A bone, wood, or pasteboard button mold with a hole in the center. I buy mine from William Booth, Draper, or Burnley & Trowbridge.

Enlight4.jpg

Step 1: Wrap the thread in an ‘X’ shape

Cut a piece of thread long enough to wrap your entire button. For my 3/4″ button, I used about 4 yards. You can actually cut it when you get close to done wrapping, but I find that I get more annoyed by the thread twisting because it is still attached to the spool than I am by the propect of running out of thread if I didn’t calculate well.

img_5363.jpg
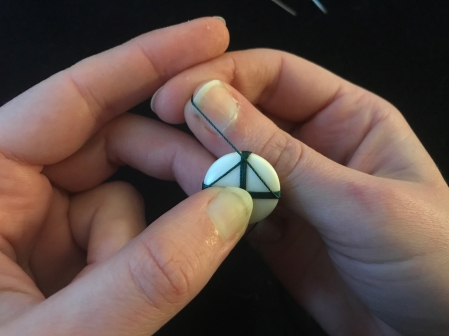
Put the end of your thread through the hole in the center of the button. You want a couple of inches of tail at the back, and the rest of your long thread at the front.

img_5364.jpg
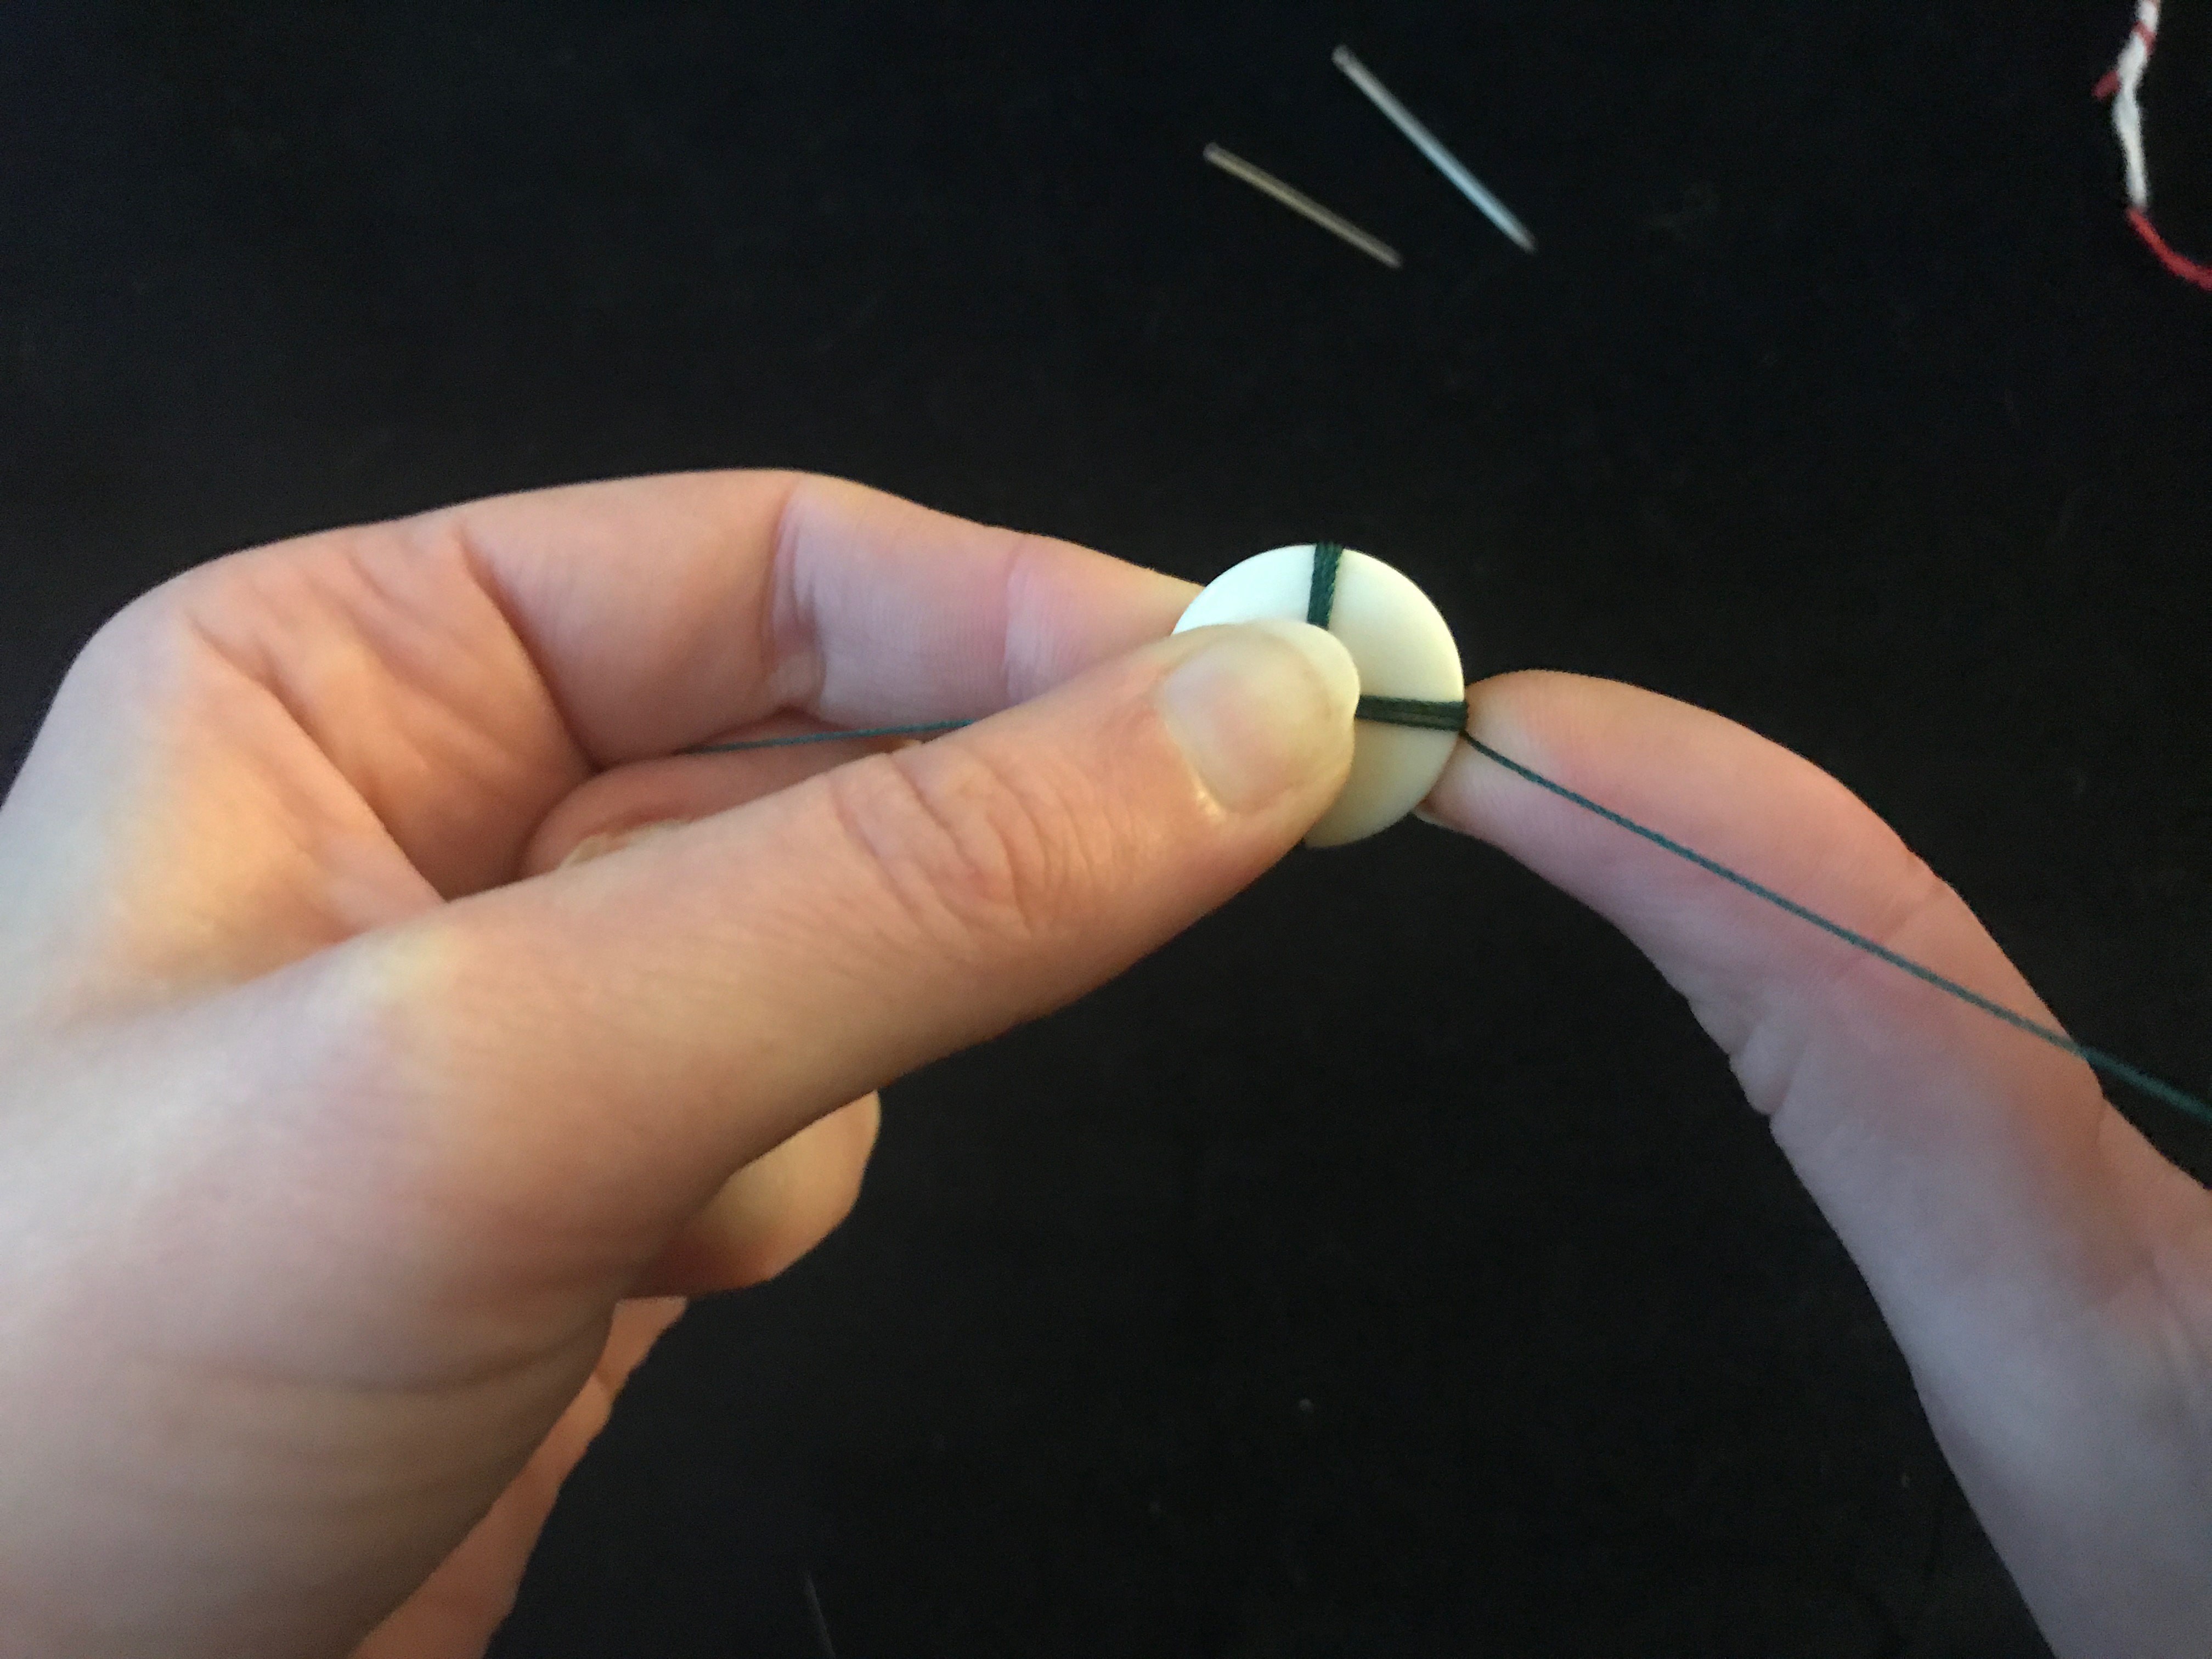
Wrap your thread three times around the button. You want the threads to sit neatly next to one another, not to overlap. Use one of the fingers of your left hand to hold the tail still at the back.

img_5365.jpg
Turn the button over, and rotate it so that the tail end and the main thread twist around each other like the ribbon on a present. Move slowly and carefully so that the wrapped thread remains in place.

img_5369.jpg
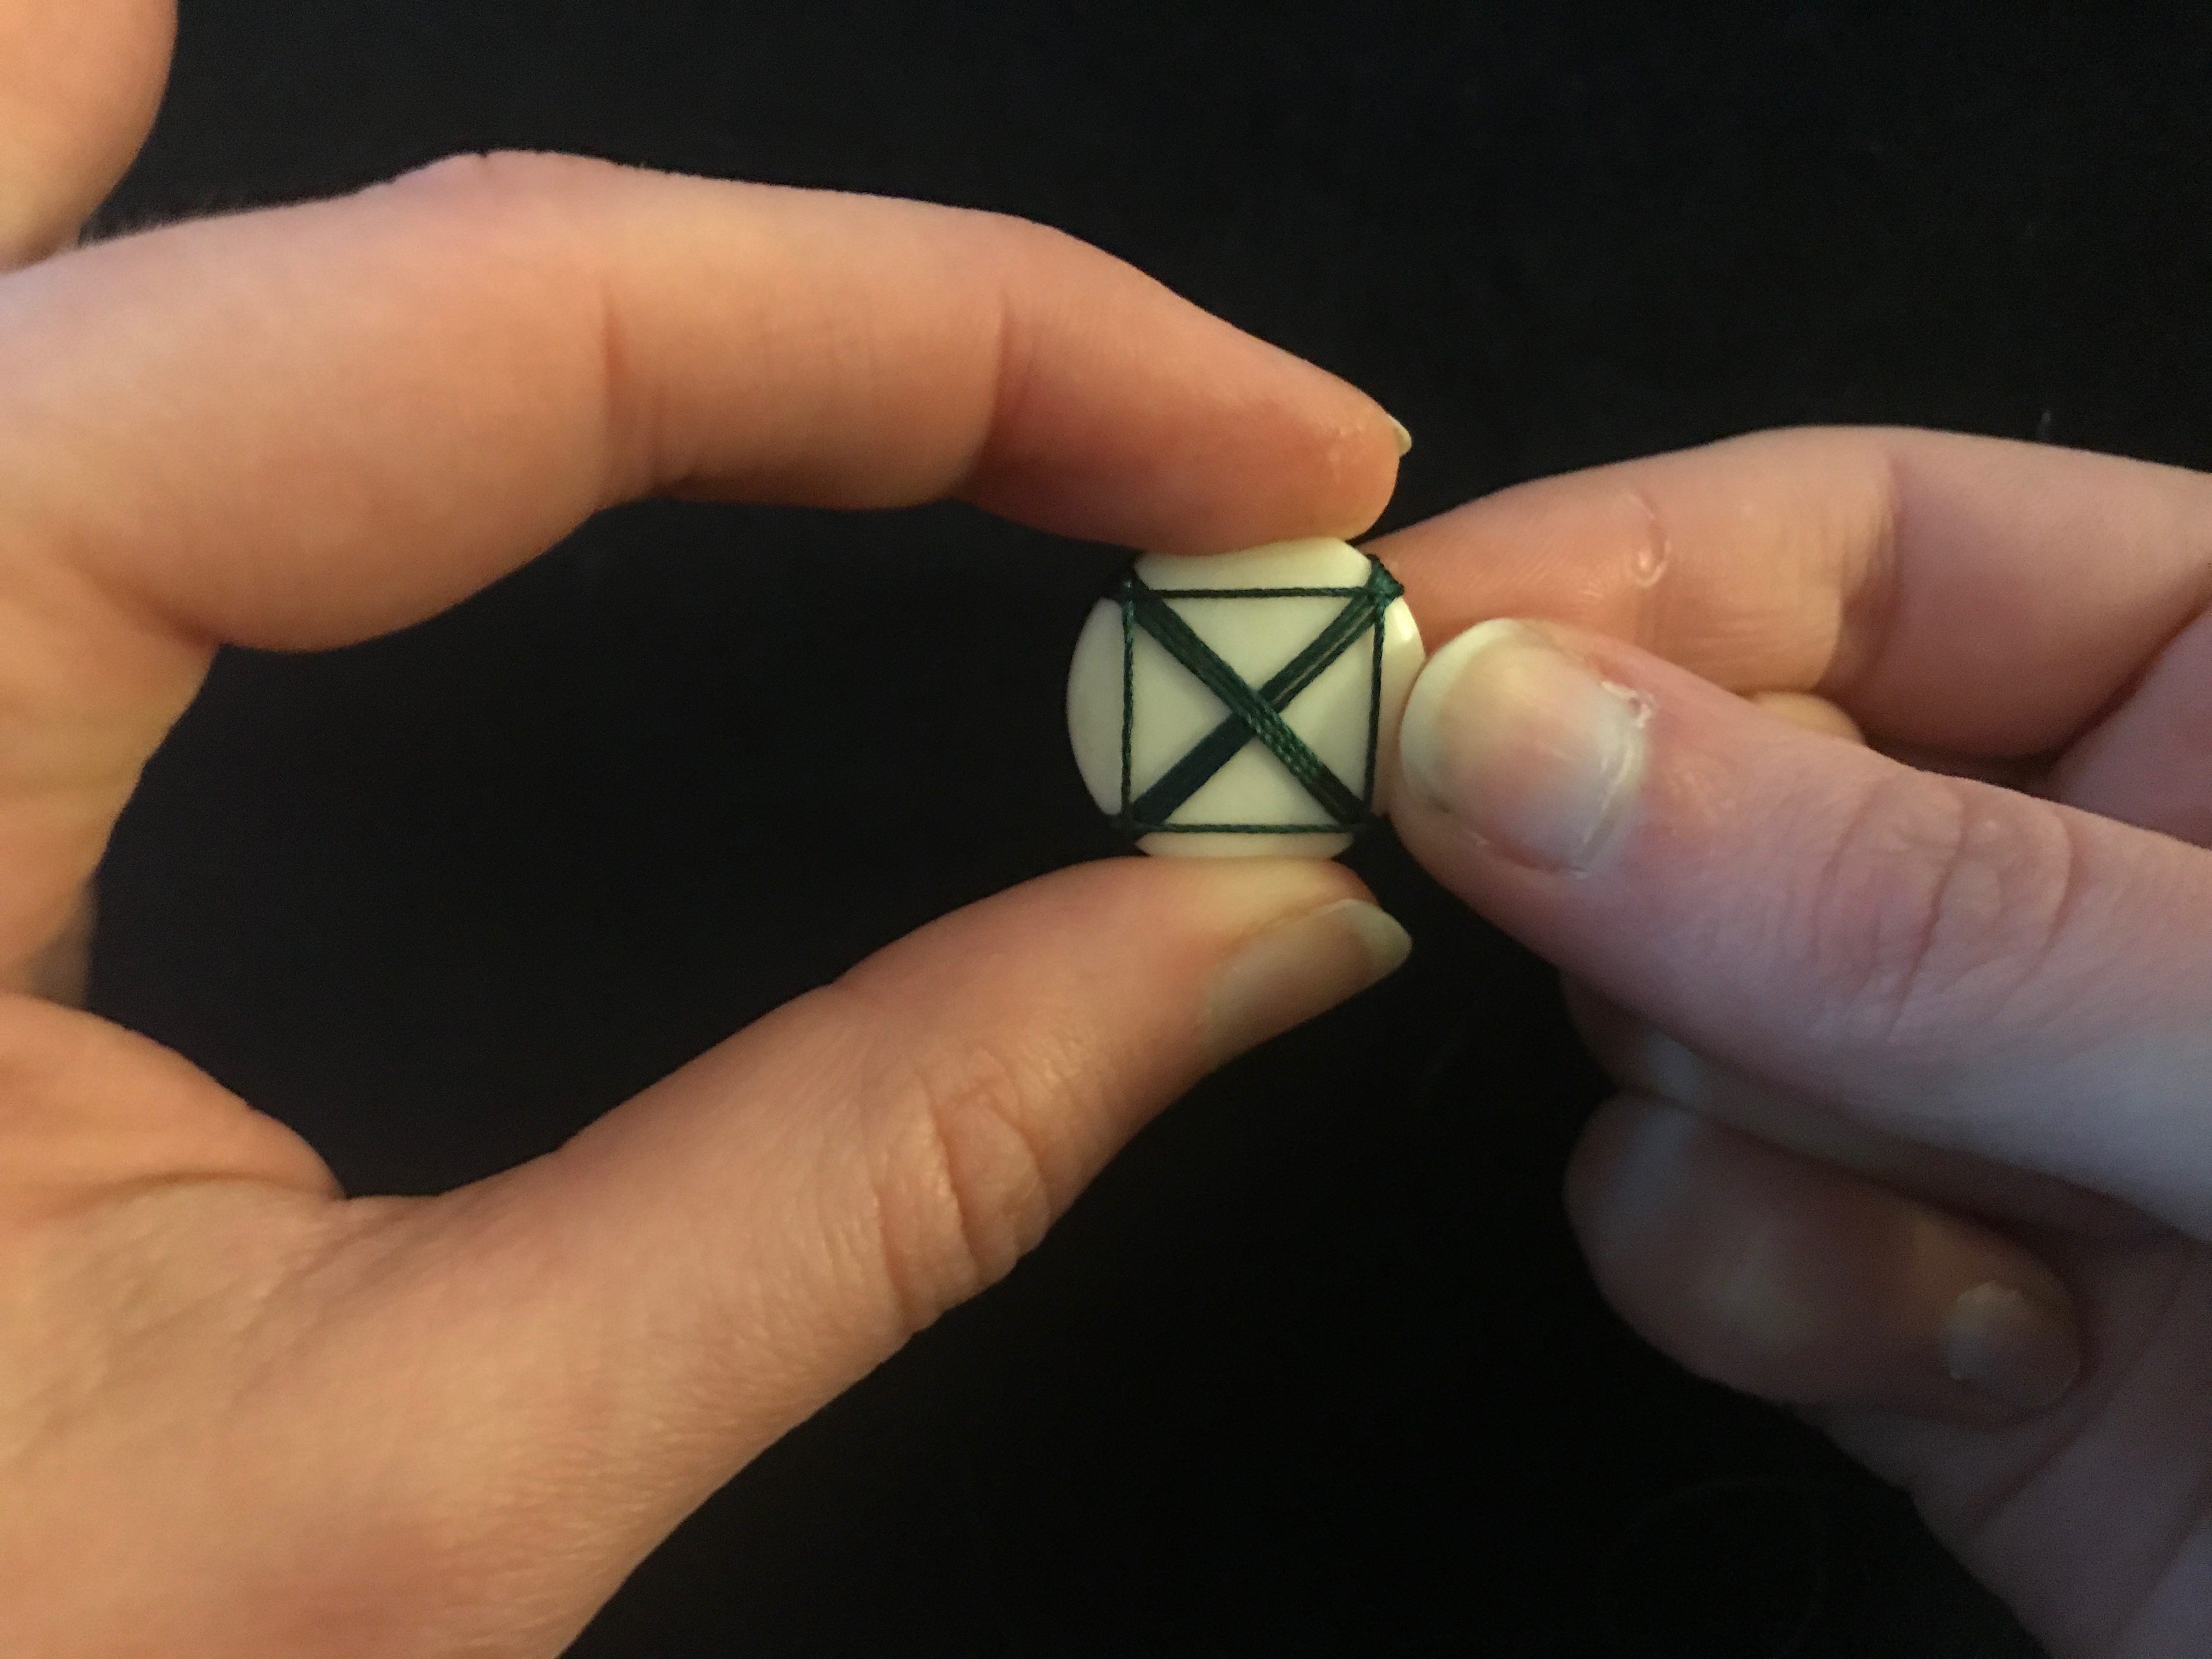
Turn your button carefully back to the front and wrap it three times in the other direction. Make sure that your button is divided into neat quarters. You want them to be as even as possible. You can use your fingers to carefully scooch the ends of your wraps in order to make the quarters more even. If your quarters are wonky now, they will only get worse from here!

IMG_5370.jpg
At the back of the button, tie the two thread ends together to keep everything still at the center back.

Step 2: Begin your wrapping.

This is the part of the process where it is easiest to drop things. Work slowly and carefully, and be patient. Try not to be frustrated if you have to start over a couple of times. Whenever possible, support the wraps with your fingers while rotating and wrapping.

IMG_5373.jpg
Hold your button so that the threads make a “+”. Bring your thread up below the threads on the right. (If you are left-handed, you will probably want to begin on the left instead.)

IMG_5374
Wrap the thread up and over the upper right hand quarter. You want to go very slowly, and keep careful tension in the thread. If you pull too hard, you will pull the wraps out of shape, but if you do not keep it taut enough, it will not stay in place.

IMG_5375
Rotate the button counter-clockwise and bring the thread up below the next arm of the X. Here I am holding the wrap from the previous step in place with my left pointer finger.

IMG_5376
Again, wrap the thread up and over the next quarter, and bring it down on the other side of the vertical arm.

Rotate and wrap the thread twice more, so that there is one wrap across each quarter of the button. Make sure that the threads on the edge of the button are sitting neatly next to one another, not overlapping.

IMG_5377.jpg

Continuing in the same pattern, wrap a second layer of threads.

Step 3: Place your pin.

DO NOT let go of your thread while you are doing this. Make sure you keep your tension.

IMG_5378.jpg
When you have two layers of thread wrapped, put your pin through the center hole so that it is sticking out at both sides.This will help keep things in place, and will make the threads at the back of the button stack up in a convenient shank.

Step 4: Continue Wrapping

IMG_5383.jpg
Continue wrapping in the same pattern. As you keep going, this will become easier, and you will begin to see the woven pattern building up. The triangular shapes at the corners will continue to grow. They are what will become the final thread pattern on the button.

IMG_5391.jpg
This is what you back should look like as you keep wrapping. you can see how the threads are piling up at the center to become a shank. Don’t mind the extra thread on the upper left. It is just the tail of the thread from the beginning. I really should have just trimmed it, but for some reason I didn’t until the end.

IMG_5392.jpg
Keep wrapping until your button is entirely covered. At the very center, the threads will pile up slightly around the pin. Don’t worry about this, you can smooth them out later when the pin is removed.

Step 5: Anchor the wraps at the back.

IMG_5393.jpg
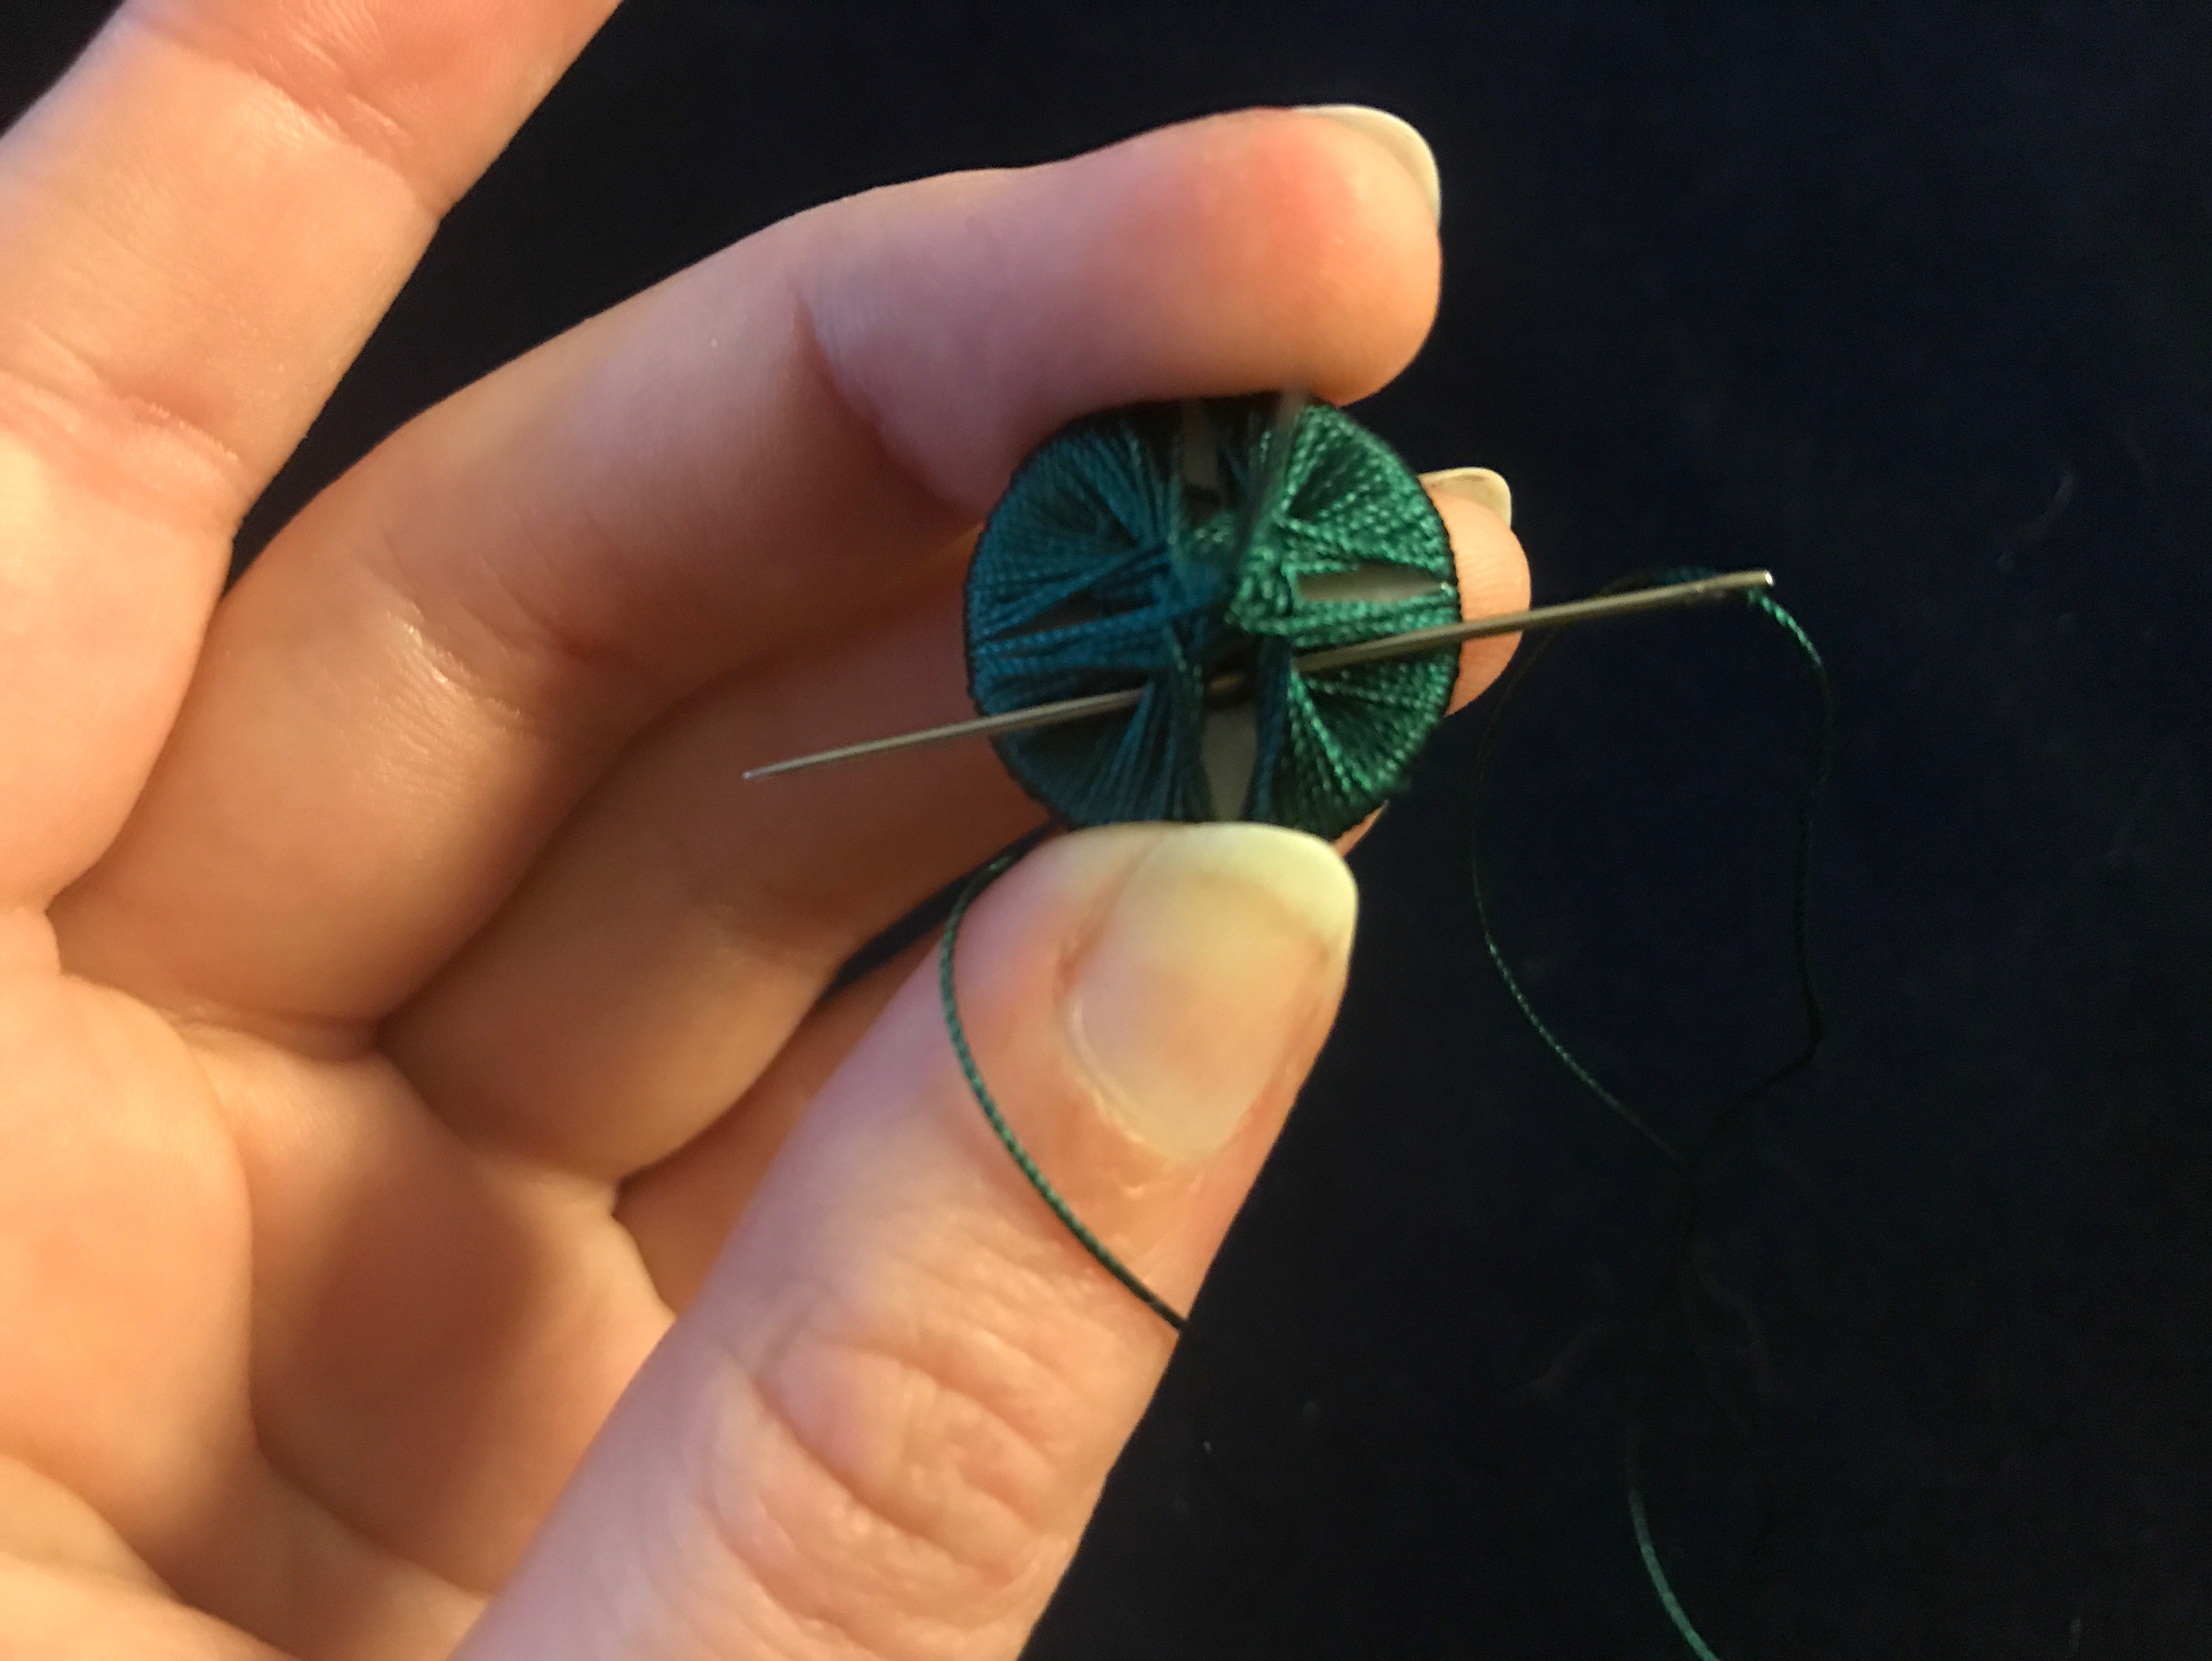
Thread the rest of your thread onto your needle.

IMG_5406
Wrap the thread behind and around the thread leading from the edge of the button to the shank.


IMG_5407
Rotate the button and bring the needle under the next section of threads. Keep rotating and sewing around the threads until you have gone around several times, you want to make sure that the threads stay nice and still. Try to close up any gaps where the button mold shows through.

Once you are sure that things are anchored well, you can remove the pin.

Step 6: Anchor the final wraps at the front.

Because the final few wraps at the center front of the button didn’t get woven into the rest of the wraps like the earlier ones do, you need to anchor them in place at the center.

IMG_5398
Starting beside the shank (don’t try to go through the middle of it), bring the needle up through the center hole. You want the point of your needle to come up beside the final couple of thread wraps in the center of the button.

At this point, make sure that everything is laying nice and smooth,

img_5409.jpg
Bring your needle back down through the hole so that you have made a stitch across the center threads that were your final wraps back in Step 4.

IMG_5400.jpg
The needle isn’t doing anything in this photo, I’m just using it as a pointer to the stitch that we just made.

You can now tie your thread off at the back of the button, and you’re finished!

Remember: Be Patient, Move Slowly, and Don’t Give Up!

2017 in Review

I never feel as if I’ve done much in a year until I go back through the blog and see everything all in one place. Somehow at once 2017 flew by, but completing Snow White and Luna seem to have happened years ago. I was actually surprised when I looked back at the beginning of the year and saw them there! Go Figure. Here I’m going to look back at what I’ve done in the past twelve months, and tell you a bit about what’s coming in the next twelve!

What I did in 2017:

Snow White

IMG_2874IMG_4039

Photos by Ben Marcum Photography

I’m absolutely thrilled with how this cosplay came out! I’m going to add some wires to the front at some point so that the collar can be shaped more. It looks good in these photos because this is the first time I wore it, but it has gotten a bit crushed now. I did enter this one in the costume contest at Cincinnati Comic Con, but no luck! I may try it again elsewhere.

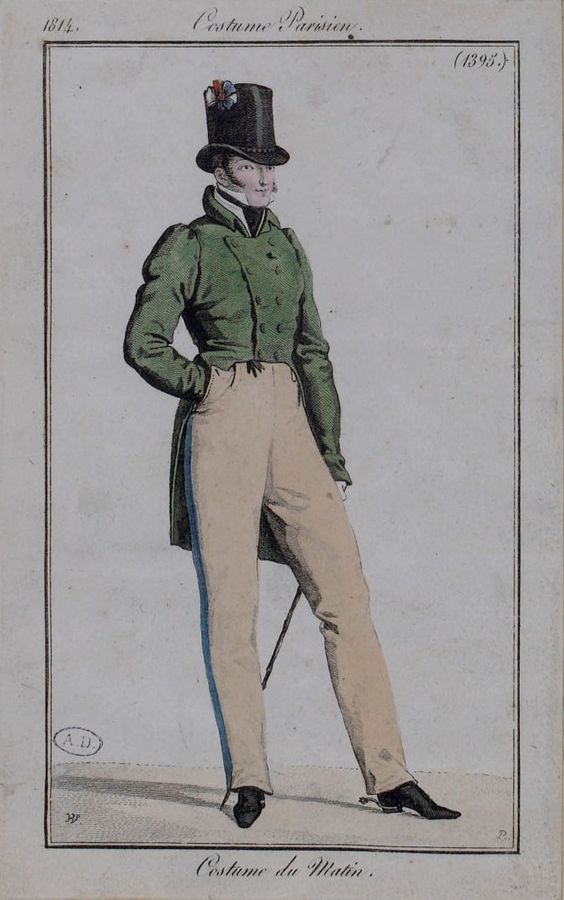
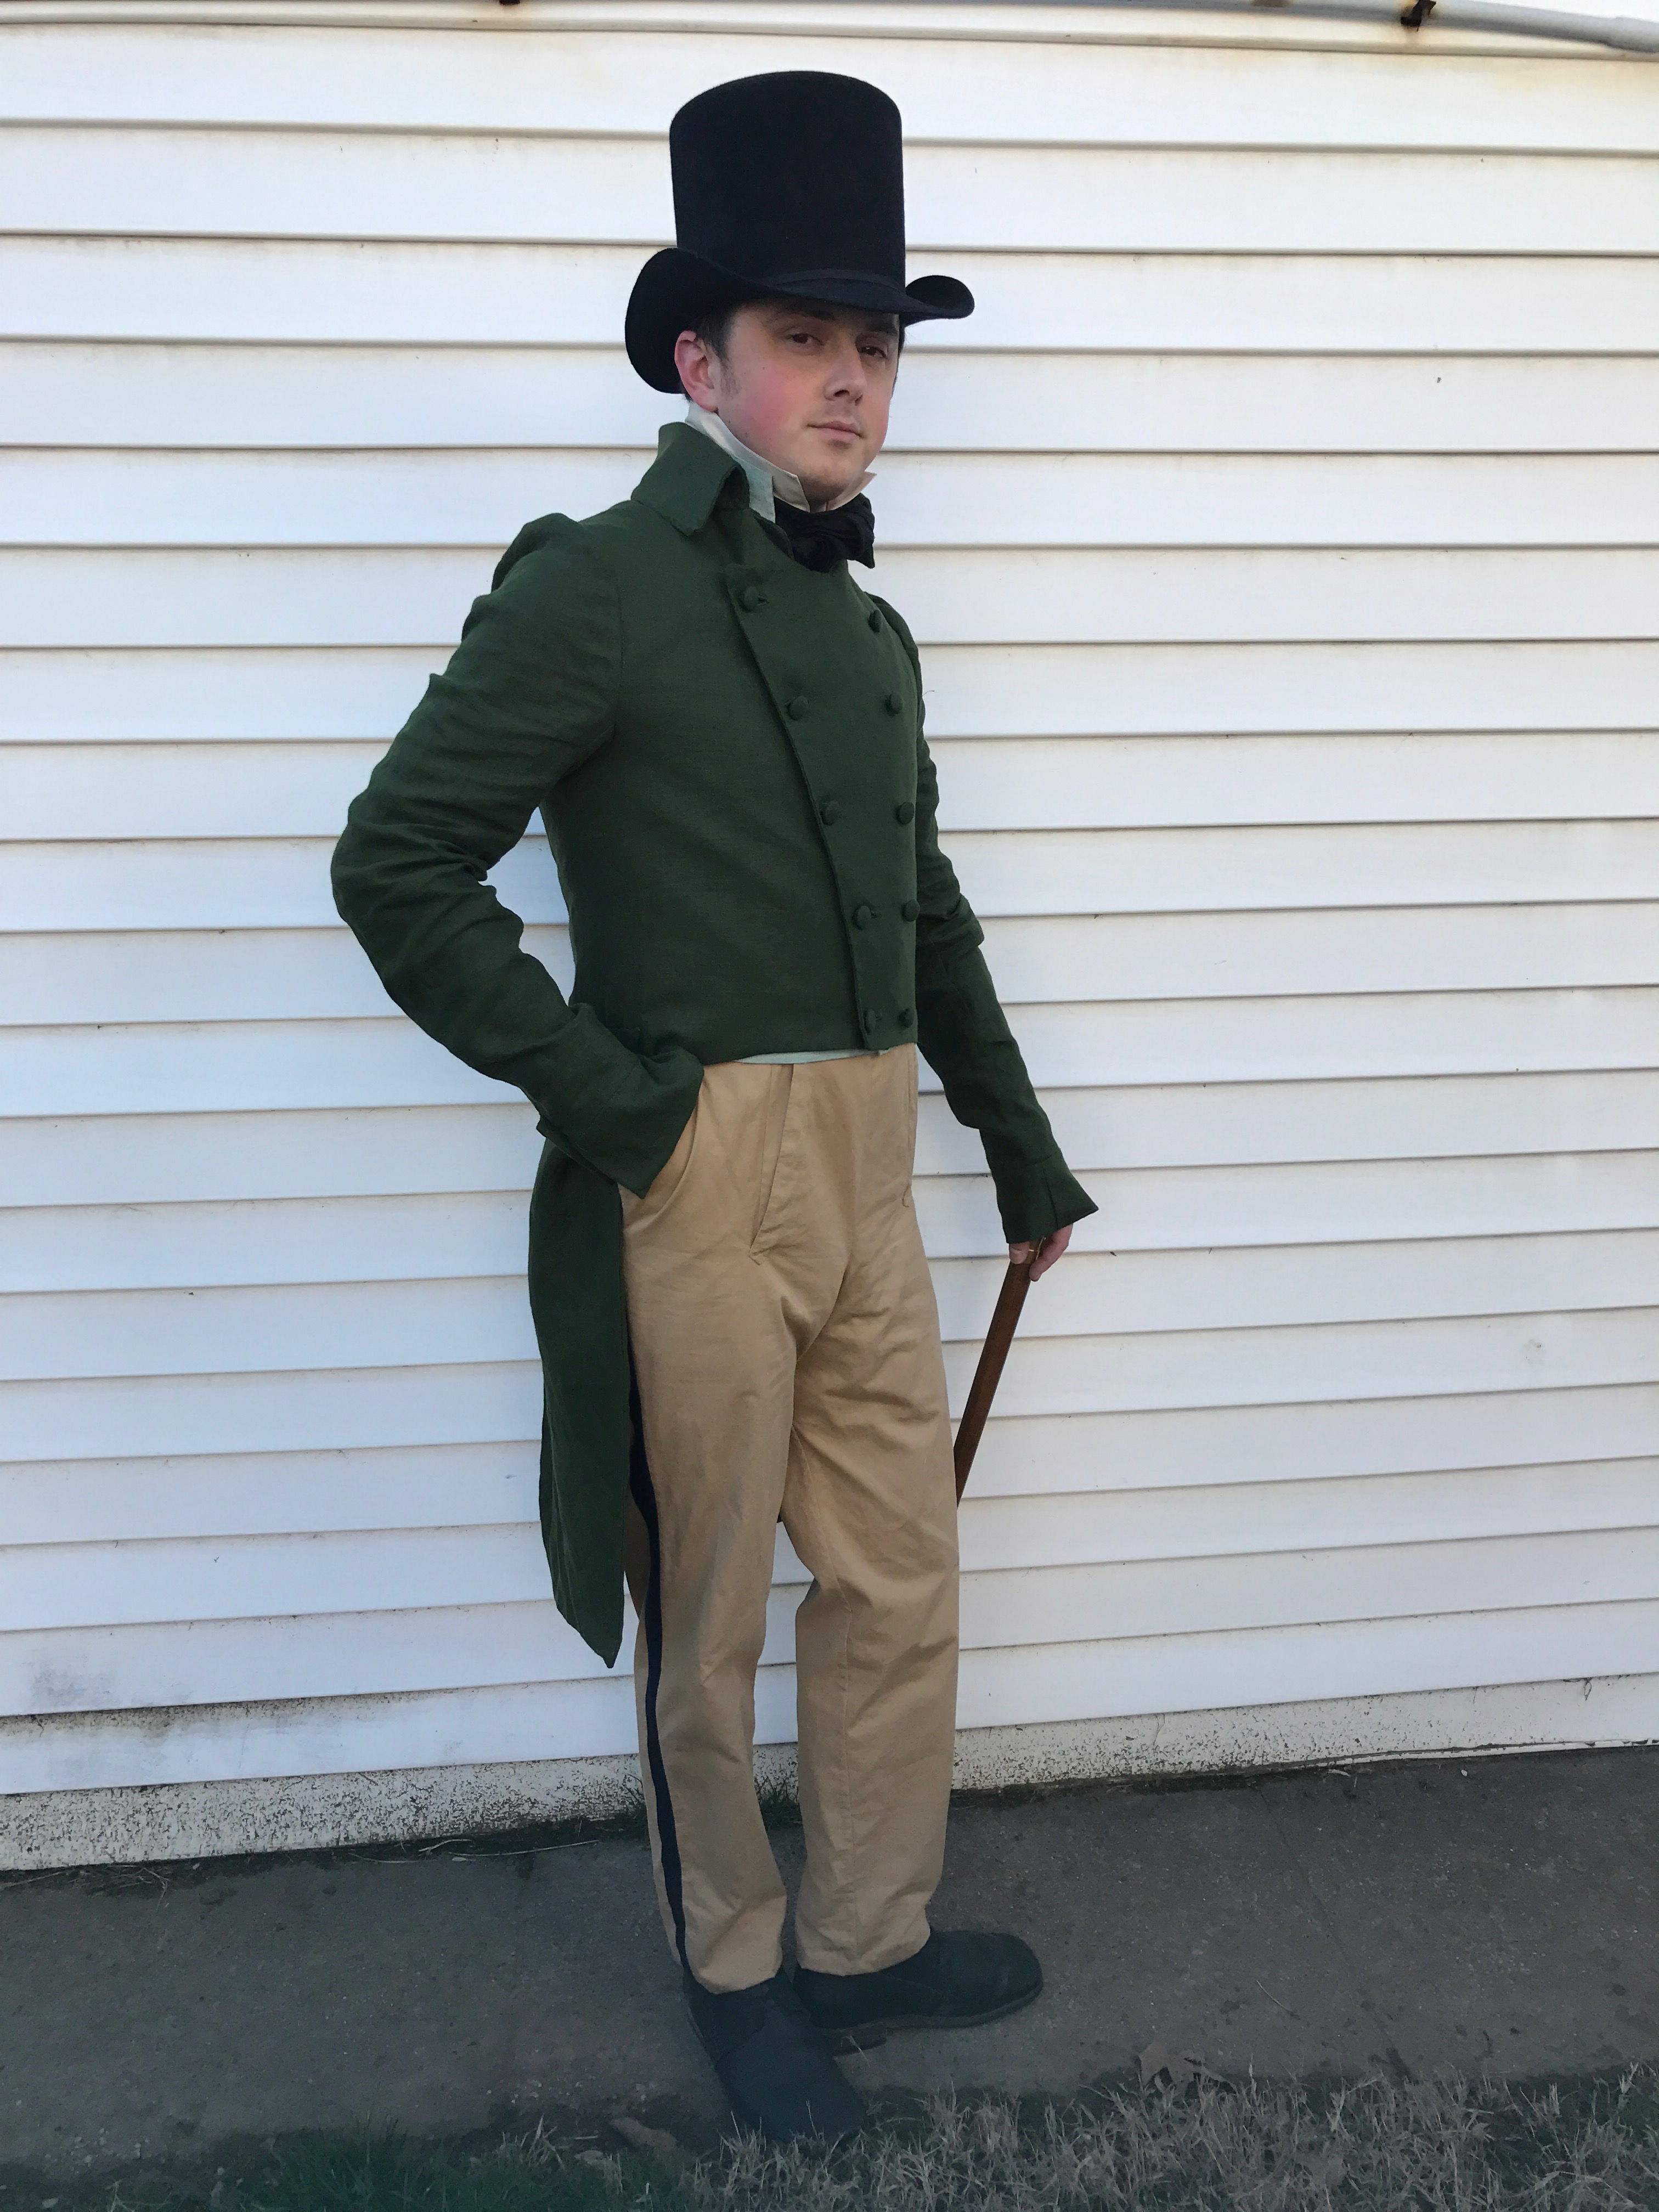
Brandon’s Regency Fashion Plate

green-coatimg_279819260647_10209214040849386_7917985655439016741_n

Brandon’s Christmas present from 2016! I finished the pants and made the coat in January 2017. We do have plans to add another row of buttonholes to the jacket so that it can be worn folded open as well as closed. Still adore that blue stripe down the pants. I’ve seen fashion plates with a red one too, so I’m tempted…

Luna Lovegood (Half-Blood Prince)

IMG_2940IMG_2997

The second legwarmer is actually finished now! No good photos of this one yet, but we’re waiting to do a photoshoot until Meredith’s (you may remember her as Margaery) new Hermione wig is done so that we can do photos together!

1870s Underthings

IMG_3228IMG_3506IMG_3509

All ready for beautiful things to be made over them! I do already have plans for a new Victorian corset, but the way my schedule is looking, it will be 2019 before that happens!

Two Tambour Lace Pieces

Tambour is my favorite demo to do while interpreting the early 19th century. I have big plans for the upcoming year, so stay tuned below!

1870s Ravenclaw Underskirt

IMG_3760

The problem with bucket list projects that aren’t for any specific event, is they get shunted aside for things that are more time-sensitive. But Ravenclaw is back in gear this month, expect progress soon!

Adora Belle Dearheart & Moist Von Lipwig

IMG_4119IMG_4013IMG_4125IMG_4149

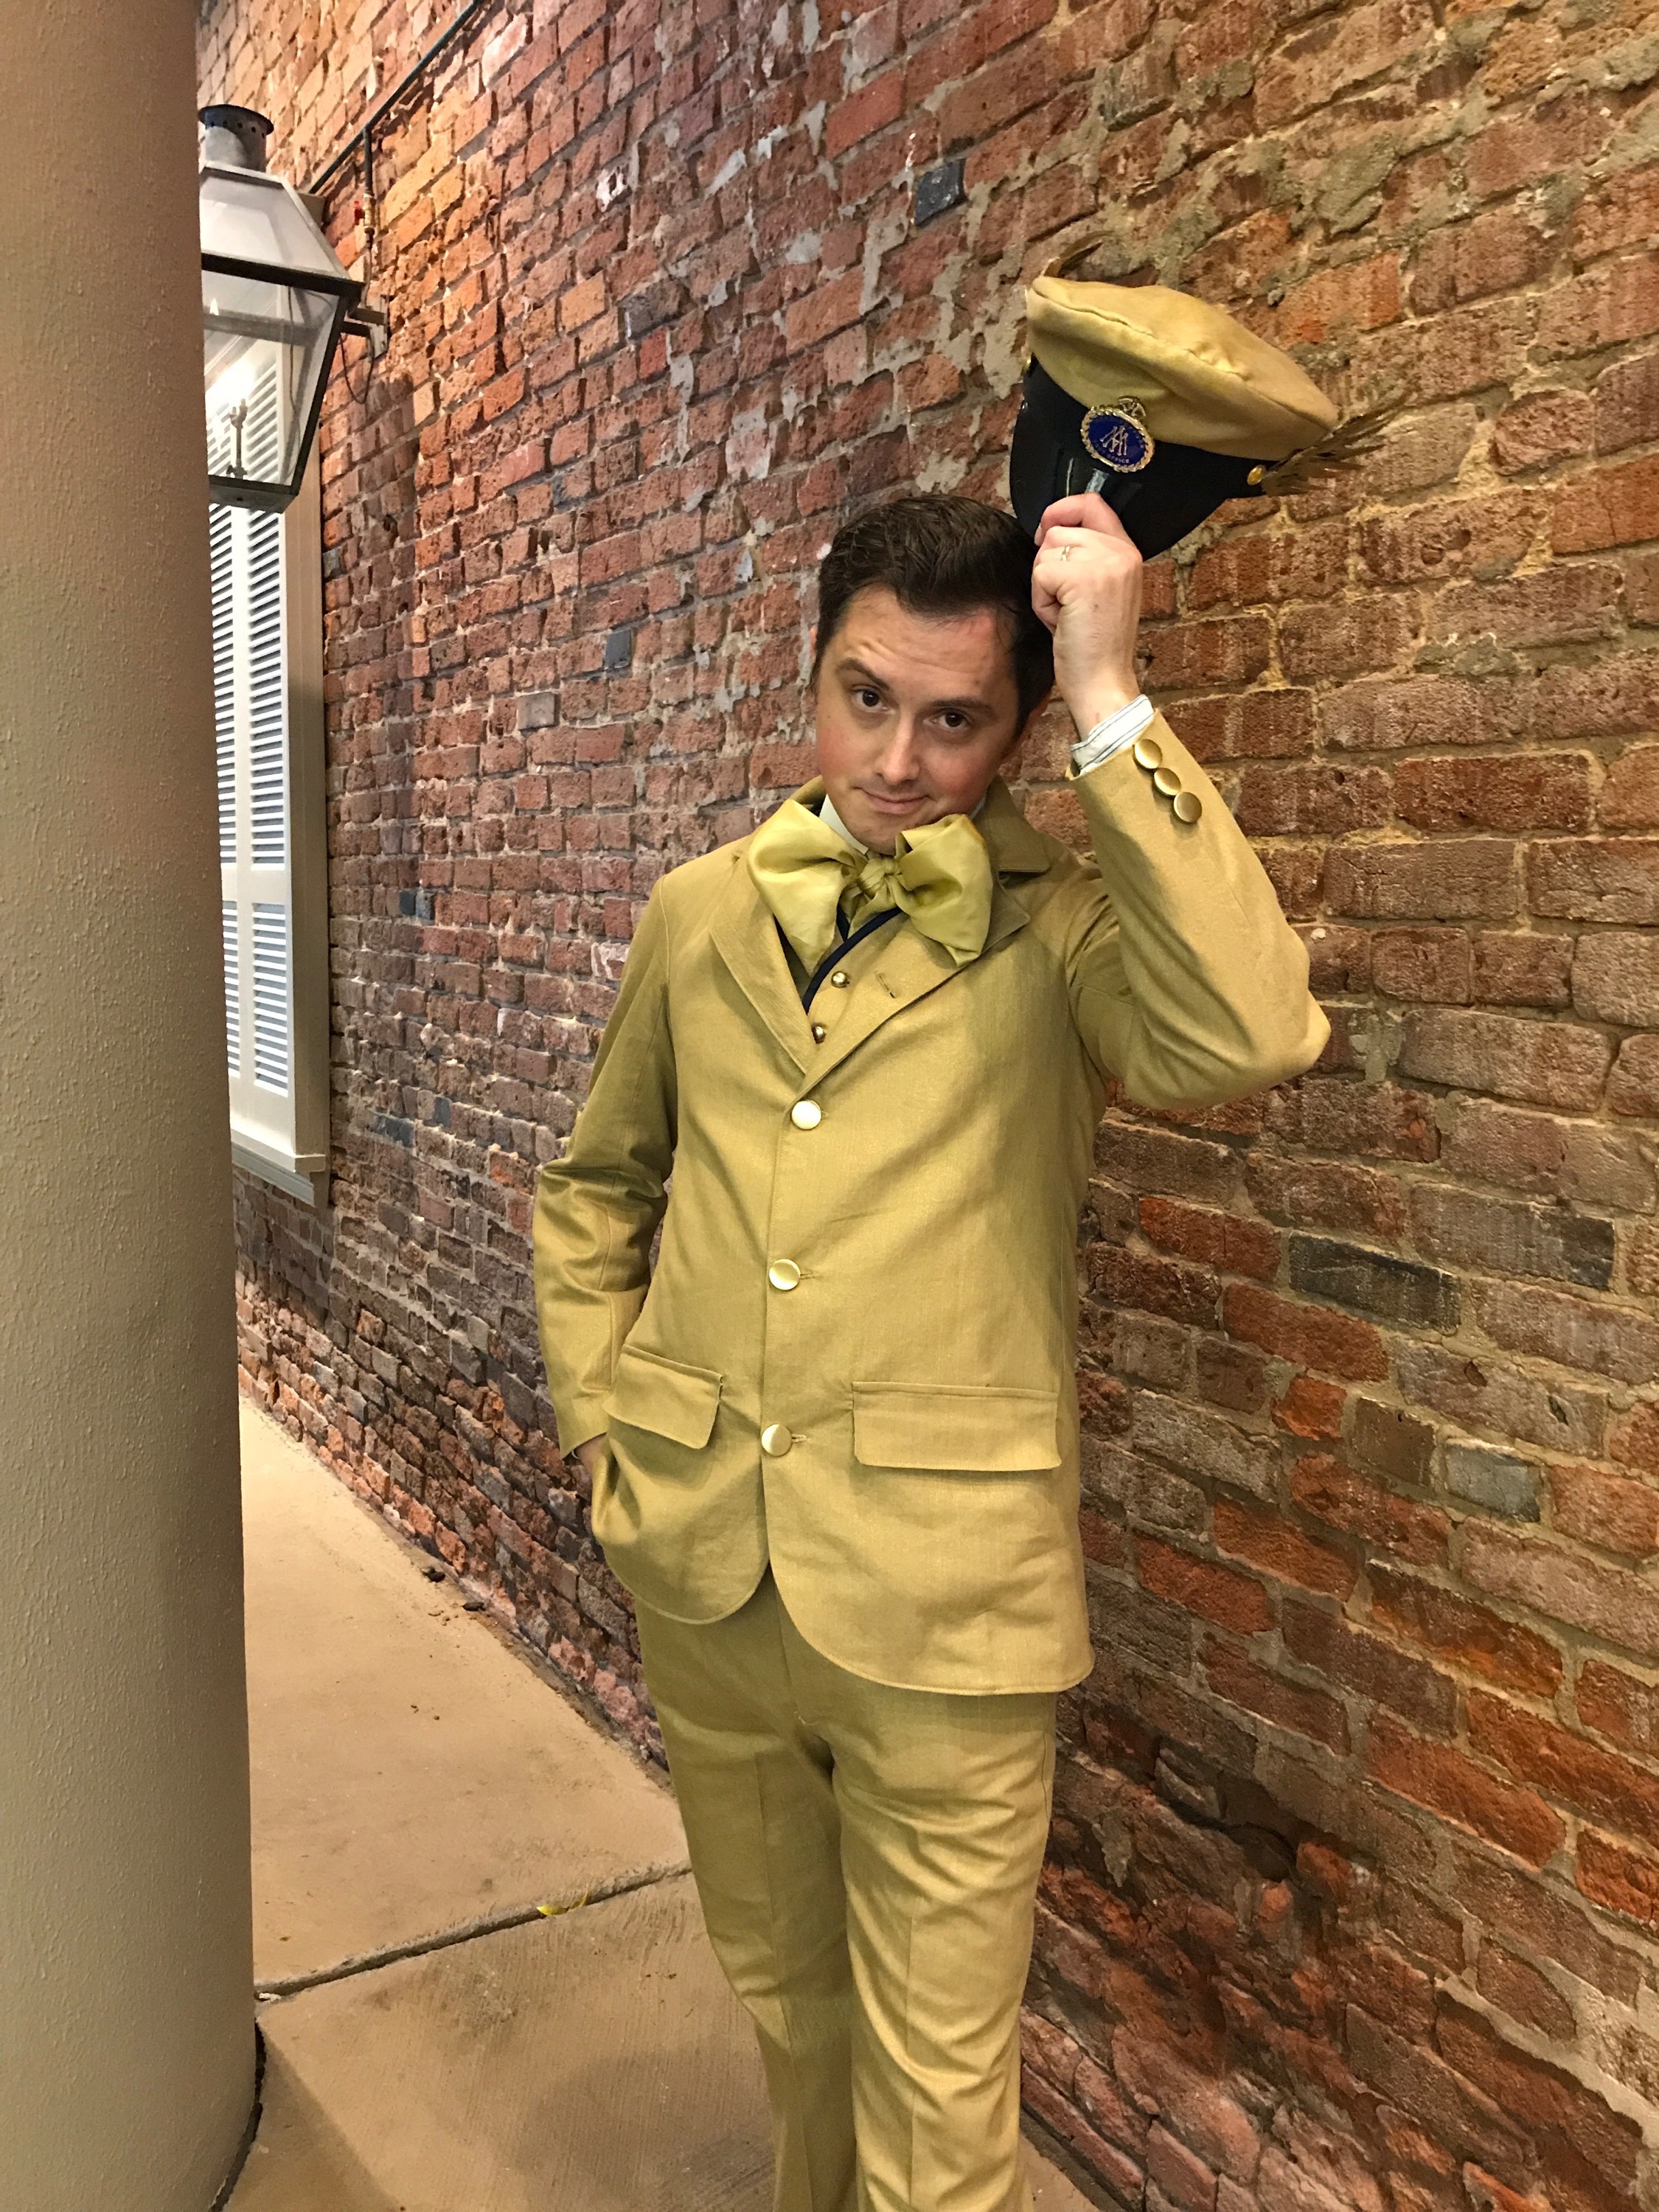
In preparation for the best 1st Anniversary we could ask for (The North American Discworld Con in New Orleans), Brandon and I cosplayed as two of our favorite characters! (Though I didn’t blog about it, I made Brandon’s coat and altered his hat, while he made his trousers and waistcoat.) We won Best Workmanship and Best Overall in the costume contest, and the Hall Contest as well! We can’t wait to hear where the next one will be!

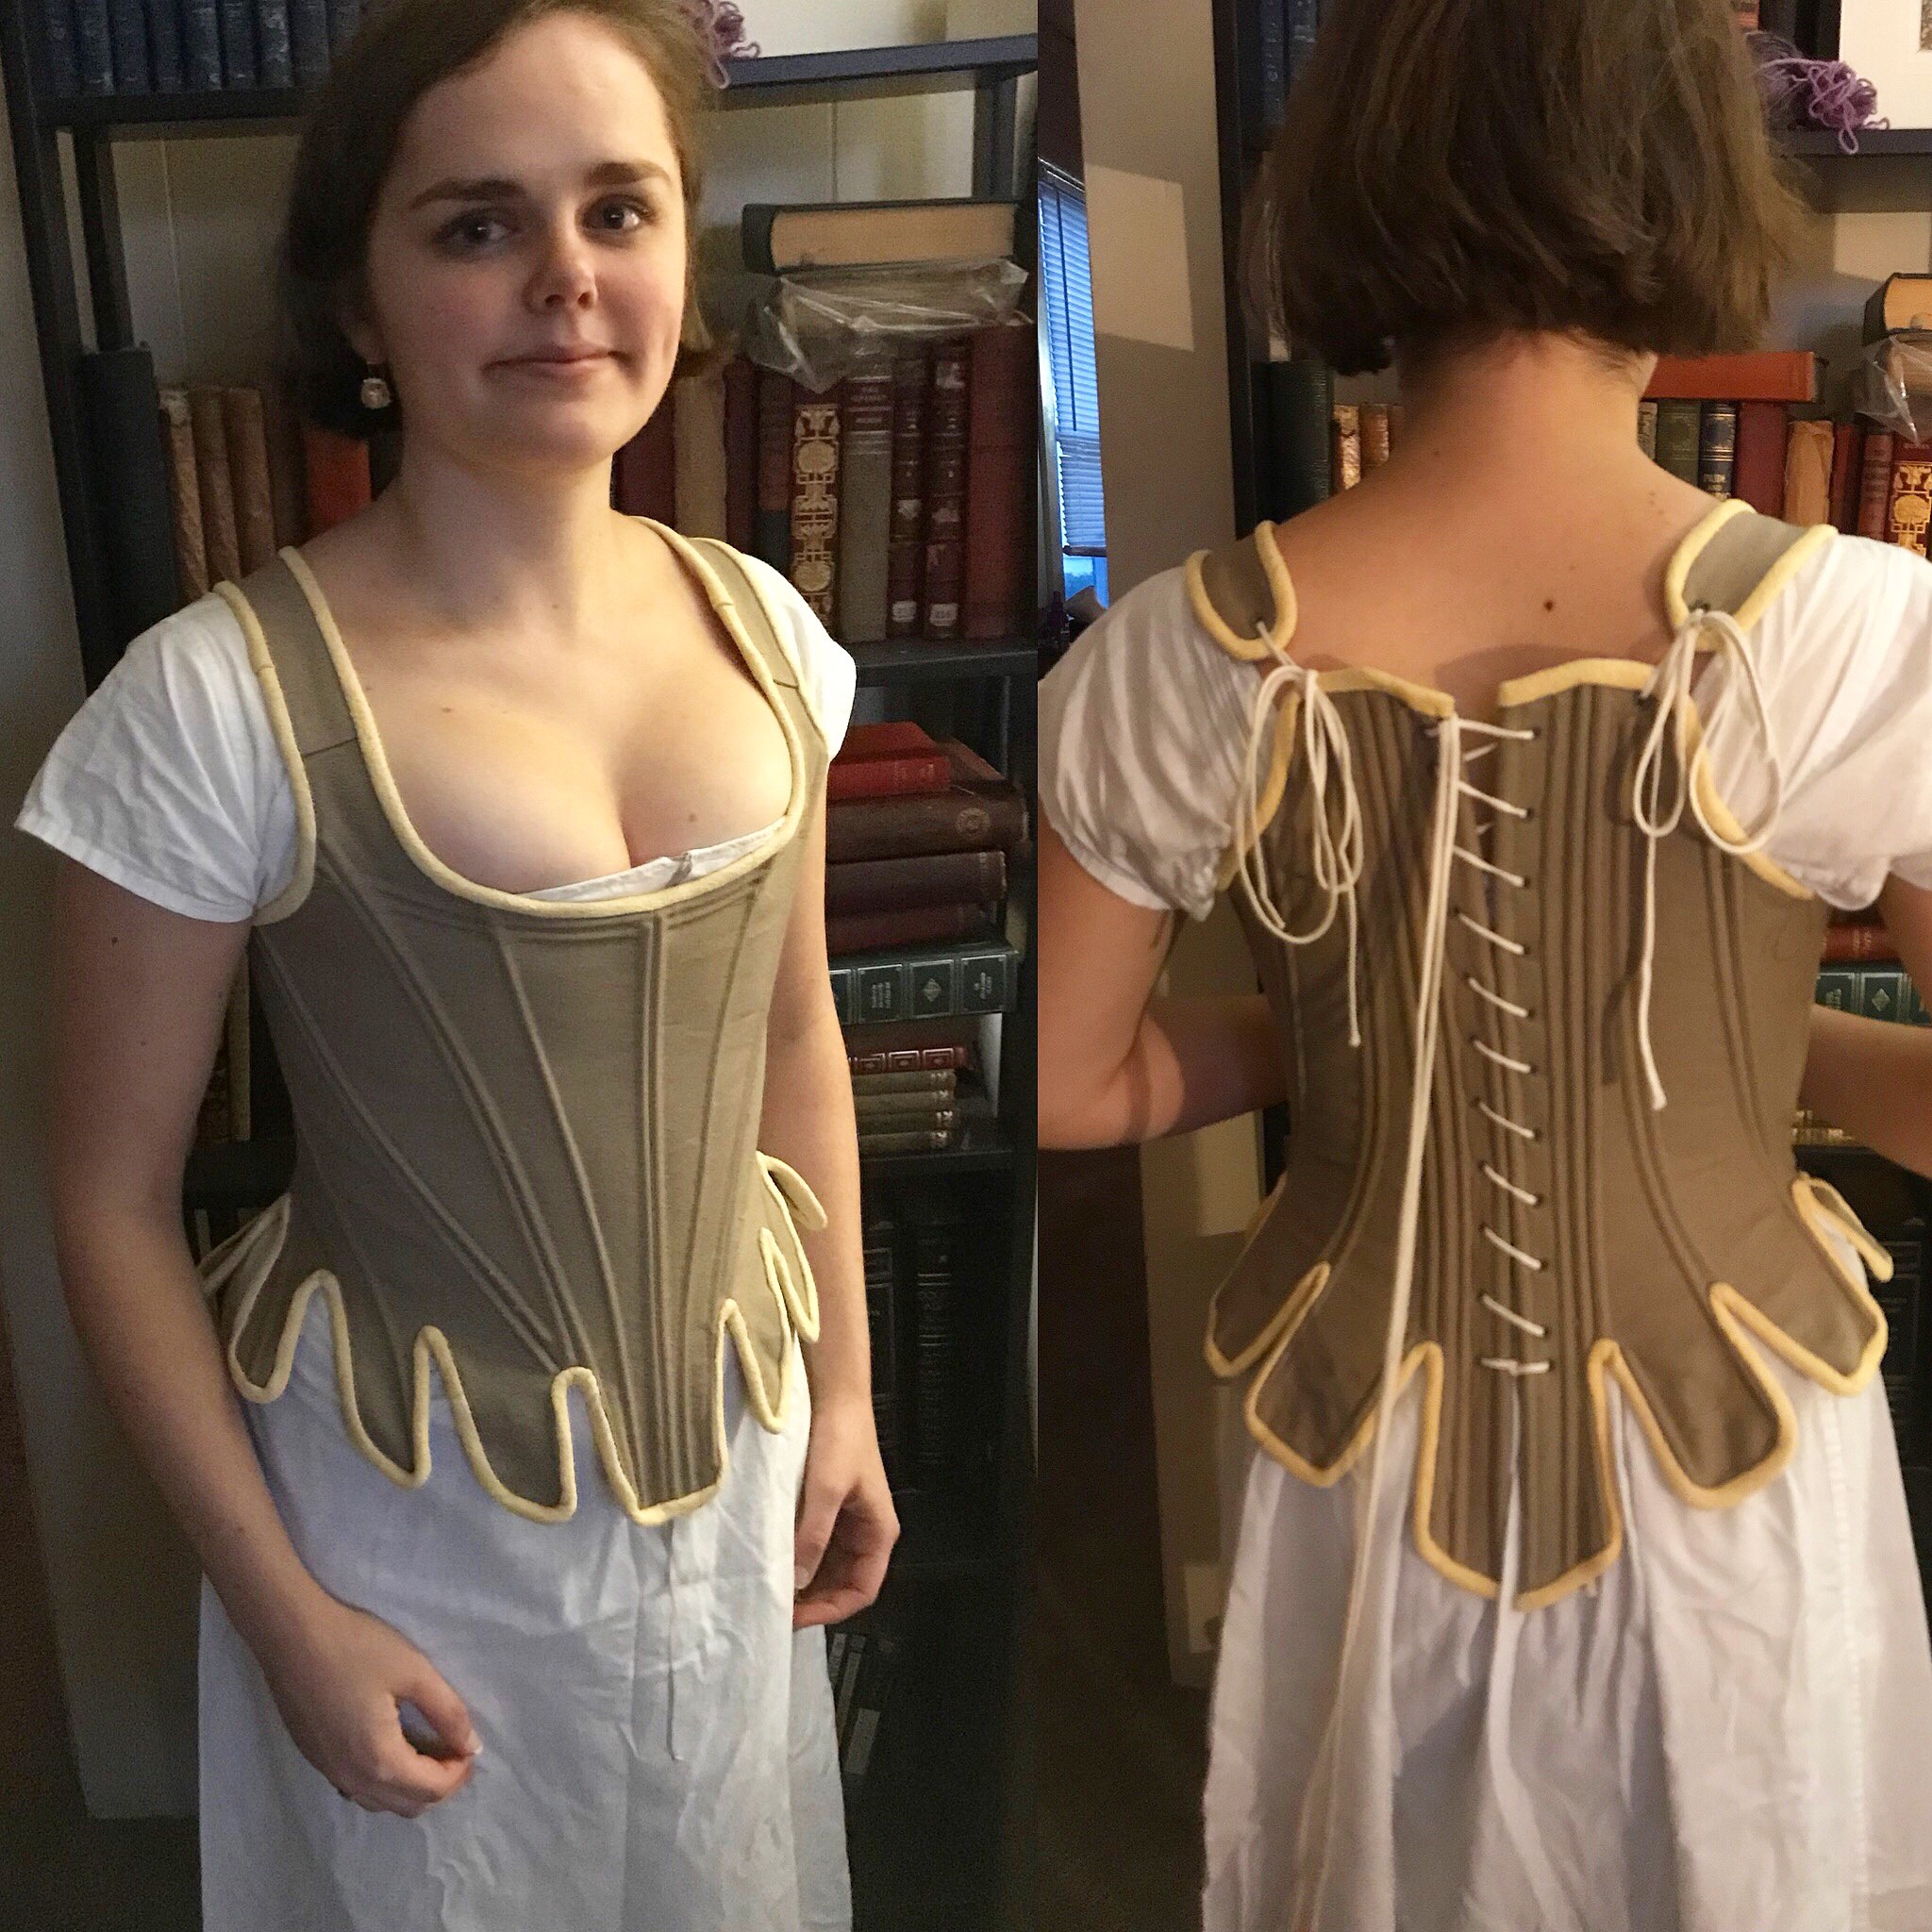
18th Century Stays

IMG_4489

Very pleased with these, though I still haven’t found time to put the lining in!

Columbine 1780s Pierrot Jacket and Petticoat

SC115293IMG_4637IMG_4666IMG_4723

I couldn’t be happier with my first foray into the 18th century–an era which has interested but intimidated me for so long. It was so fun to make and wear, and I can’t wait to wear it again!

Regency Shirt & Waistcoat for Brandon

IMG_4997.jpg

The shirt was a desperate need, as his old one was literally disintegrating more and more with each wear. It’s the first one I’ve made entirely by hand, and I really enjoyed it! I may be posting a blog about it in the next few weeks. The waistcoat was Brandon’s birthday present, which I made in secret, and had his in-character mother give him as a Christmas present at our Christmas event at Locust Grove in early December. He was so surprised–it was really fun!

Coming up in 2018

Number 1: finish Ravenclaw!!! I draped the underskirt on Thursday, and should be cutting  today! It’s really happening!

IMG_2756

It’s going to be a historical heavy year, with only two cosplays planned: A female version of Colonel Mustard from Clue (part of a group that should be really fun!), and Daenerys’ landing dress from Season 7 of Game of Thrones, which I knew I had to have the moment that photos started appearing. There are fabric swatches on their way so that I can start finalizing my plans!

93cb19cd7cb4bfb503c544a3ac81a207.jpg

Other than that, it’s all historical, all the time! I have two new 18th century looks planned (another jacket & petticoat, and a Robe à l’Anglaise), and a whole pile of 1816 plans. I realized I haven’t made myself anything new for the era I spend the most time in since January 2016, and that has to change! I have plans for dresses, spencers, petticoats. The biggest historical project of the year is one I’ve been planning for quite some time, and am finally ready to bring to fruition. A tamboured net evening gown over a colored silk petticoat.

It’s going to take forever, but I’m really excited about it!

All-in-all, it should be a fun year for me, and I hope you’ll enjoy watching!


Columbine Pierrot Jacket and Petticoat, 1780

My first foray into the wonderful world of the 18th century has already made its appearance all over my social media, but here it is officially!

You may have already seen my new 18th century stays, but in case you missed it, you can read all about them here.

It’s kind of amazing, considering the amount of Revolutionary War reenacting that goes on, that it’s taken me four solid years to jump into this particular century, but once I was ready to get started, I had lots of decisions to make. With a large time-span at most of the events I am likely to attend, I first of all had to pick a smaller span in which to focus my research. I ended up focusing on the early 1780s, since it is it is a silhouette I particularly like.

In the 18th century, I will be primarily demonstrating as a wig-maker: so a trades-person, but one who works in a highly valued and fashion-related trade. Therefore I was aiming for something not overly fancy or ornate, but definitely fashionable and neat. I started by looking through paintings and fashion plates, looking for women with similar ideas. I was particularly inspired by the two plates below. The first is from 1778, and is described as a cook from the provinces, who has just begun to take on the elegant airs of Paris. The second is of a governess in 1780.

I fell in love with that cook as soon as I saw her. There’s just something about her little bows and peplum. “Pert” is the first word that comes to mind, but in the best possible way! I found the governess when I decided I wanted to do a short jacket and petticoat combo, and started narrowing my research even more. I love that the two employ basically the same shapes. but show how much variety you can get out of simple garment forms.

I settled on a Pierrot jacket and petticoat, and since I found a fun red and white stripe cotton for cheap on Fashion Fabrics Club, I decided to base the details of my first outfit on the governess plate.

By the time I got my stays done, I had one week left to make the actual outfit, which was a bit nerve-wracking. I knew I could get the petticoat done in very little time during the week, so I used the weekend to blaze through as much of the jacket as possible. I wanted to drape the jacket, but I obviously can’t drape on my own body, so I hemmed and hawed a bit until my friend Meredith made a genius suggestion. She and I are very similar sizes, and crucially, are both 5′ tall with very short waists. In my stays, padded out in a few strategic places, Meredith made an excellent body double! We spent Saturday afternoon draping and putting together the jacket.

By some stroke of luck that hadn’t attended me in the build up to making this outfit, this process was incredibly fast. I had help from a couple of extant pieces in order to see what the pattern shapes should be, and ended up with a simple pattern of center back piece, side back piece, front piece, and shoulder strap. I’ve got to say, I love the 18th century shoulder strap. It makes draping and construction so easy!

ci1998.253.1.R.jpg
Jacket from the Met.

953c0904f851a9c0da83ceebbfc33ad0.jpg
Jacket from Les Arts Décoratifs.

I am an idiot, and managed not to get any pictures of Meredith in the stays for the entire several hours that she was in them, except on my Instagram story, so those are gone forever…

We draped with the lining fabric (white linen left over from a pair of Brandon’s trousers). Here I am cutting out the second center back piece from the original draped piece:

IMG_4501.jpg

I also cut and sewed the jacket together as we went. I had to sew it by machine to save time, but it is constructed using the ingenious method I learned at a Burnley and Trowbridge workshop, wherein the lining and fabric are both sewn at the same time. Why we stopped doing this, I will never truly understand. Bag lining is the worst. But I digress.

And the front pieces:

With the main body of the jacket together, we decided it was high time for me to give it a try. I ended up making a slight alteration to the side seams, but other than that we were good to forge ahead! Meredith had a go at placing the shoulder straps:

IMG_4511.jpg

And then of course, I remembered that I had wanted a zone front, so I tore the fronts back off again, but it was all ok. We had all the shapes we needed, and (most of) the difficult part was over.

IMG_4513.jpg
I cut the zone front so that the stripes matched those on the front. I briefly considered changing the front to have horizontal stripes as in the extant jacket above, but after looking at it for a bit I decided I just didn’t care for it.

IMG_4517
The edge is then turned under and stitched in place with a minuscule running stitch.

When I got the jacket put back together, and the shoulder strap linings attached, I spent ages staring at 18th century sleeves. It’s always scary jumping into a sleeve design you’ve never worked with before. Luckily, I found that Janet Arnold had patterned the perfect sleeve on one of the gowns in Patterns of Fashion 1, or I might have been stalled by indecision forever. It even had a similar gathered cuff detail to the one I wanted!

IMG_4526.jpg
Testing out the mock-up sleeve.

The grid underneath is the original from Patterns of Fashion, the one on top is my final altered piece. It looks crazy, but it makes a nice shape! The scoop on the bottom right comes up over the top of your forearm, while the v on the right gets sewn together so that it cups your elbow.

IMG_4527.jpg

I really liked the way 18th century sleeves are set, but I won’t tell you all about it myself, because Koshka the Cat has a wonderful post dedicated solely to that, which you can read here. Long story short, the bottom of the sleeve is sewn to the body of the jacket as per usual, then the top is pleated to the shoulder strap lining seperately, making it really easy to adjust the pleats to your liking.


IMG_4551
Sleeves on!


IMG_4549.jpg
Top-stitching the shoulder strap in place on top of the sleeve.

At this point, it’s just a matter of finishing off edges. The lining and fabric edges are folded up towards each other, with the lining just slightly shorter than the fabric, then the whole thing is top stitched in place.

IMG_4542.jpg

IMG_4591.jpg
Technically finished! There were still details to add, but those would have to wait until I had something to wear on my bottom half!

Once again, Koshka the Cat has a fantastic tutorial for putting together an 18th century petticoat. Mine is made to go over a split false rump, and pleated smoothly in the front half, and gathered in the back for extra floof to help achieve that 1780s silhouette.

IMG_4599.jpg
Placing pleats.

IMG_4600.jpg
Finishing off the twill tape waistband. The twill is a bit thicker than I would like but I realized too late that I was out of nice thin linen tape in the right width.

I was cutting it very close on time at this point, so of course I had to have one major disaster. I had pressed up the hem, all ready to stitch, and decided to try the petticoat on to check the length. It wasn’t until this point that I realized that I had gathered the (shorter) front half of the petticoat, and pleated the back, which resulted in a bizarre and unflattering silhouette… So off came the waistband and all that work had to be done again.

After wasting all that time, I was down to just a few hours before I really needed to go to bed so that I would be conscious for Market Fair, so I prioritized my details: Hat trimmings and breast knot, peplum ruffle, sleeve ruffles, hem ruffle. The hem was last because it was big enough that I could either get just the hem ruffle done, or everything else.

On Friday night, I trimmed out my straw hat with peach ribbons and white flowers, and made a lovely little bow for the center of my neckline from the leftover ribbon. That would at least give me a bit of fun even if nothing else got done.

After that, I started on my first ruffle. Time was getting very short now, and I had to hope that I could do it quickly, because once it was part way on, I would be stuck doing the rest, no matter now late I had to stay up.

The peplum ruffle has a narrow hem, the top edge is pressed to the back, and a gathering stitch run through both layers.

I had to stop here for Friday night, but after the event on Saturday, I managed to move one more step forward. The sleeve cuffs are made by pressing under both edges of a tube of fabric, gathering both edges, and then stitching each edge to the sleeve. I really like the way these turned out!

I got started hemming the hem ruffle, but quickly realized that hemming, gathering, and attaching a ten yard ruffle was just not going to happen that night.

I took some photos at the event with no hem ruffle. I still love the way this outfit turned out! Market Fair was freezing cold, so I spent most of the time wrapped up in shawl and gloves, but I can’t wait to wear this next spring!

My wig is the one documented in this blog post. If you’re interested in acquiring your own handmade, human hair, and endlessly customizable beauty (or you’re just interested in seeing more of what we do), check out Custom Wig Company!

IMG_4645

IMG_4637

IMG_4693

IMG_4691

IMG_4666

IMG_4683

I enjoyed wearing this so much. I already have many more 18th century ideas bouncing around, and there will be more outfits coming next year!

PS: The Hem Ruffle!

It turned out to be a good thing I waited on this, because it took me aaaaaages to get it together.

IMG_4635.jpg
Here’s what 10 yards of 12″ wide ruffle looks like waiting to be hemmed…

Like the peplum ruffle, the hem ruffle has a narrow hem, and is then pressed under at the top. This one has two rows of gathering: one 1/2″ below the folded edge, and one another 1 1/2″ below that, creating a ruched band between the two rows of stitches when the ruffle is attached.

Sadly, I’m not sure I’ll get to wear the completed look again between now and Kalamazoo Living History Show in March!

IMG_4720

IMG_4723

IMG_4722

18th Century Stays (Finally!)

It has been a year of starting new periods for me! I began venturing in the the 1870s with my Ravenclaw bustle dress, I dipped a toe in 1890 with my Adora Belle Dearheart costume, and now I’m diving headfirst into the 18th century. This particular new period goes along with a passion project for me at work: Custom Wig Company will soon by launching a line of historically-constructed period wigs, researched and developed by Yours Truly! The line won’t be released quite yet, but I’ll be demonstrating several wig-making techniques at the 18th Century Market Fair at Locust Grove this coming weekend.

It has been rather slow going. I actually started mocking up my stays shortly after we returned from the North American Discworld Convention in September, but with the ever-busy Santa season in full swing at work, and a few small projects and adjustments that needed to get done, I was going pretty slowly. Everything would have been back on track, but of course then I got sick in early October, and ended up (most unusually for me), too lethargic and cranky to work on much of anything. You know I’m feeling bad if I’m not even knitting! Being knocked out of commission for 10 days seems to have jump-started me, though, since I’ve been extra productive since I started feeling better!

But things are certainly moving now! With only 5 days to go until Market Fair, my stays and false rump are finished, and my dress is well underway. For the moment I’ll just be using my Regency chemise, and under petticoats from a couple of different outfits in order to be dressed in time for the event!

IMG_4156.jpg
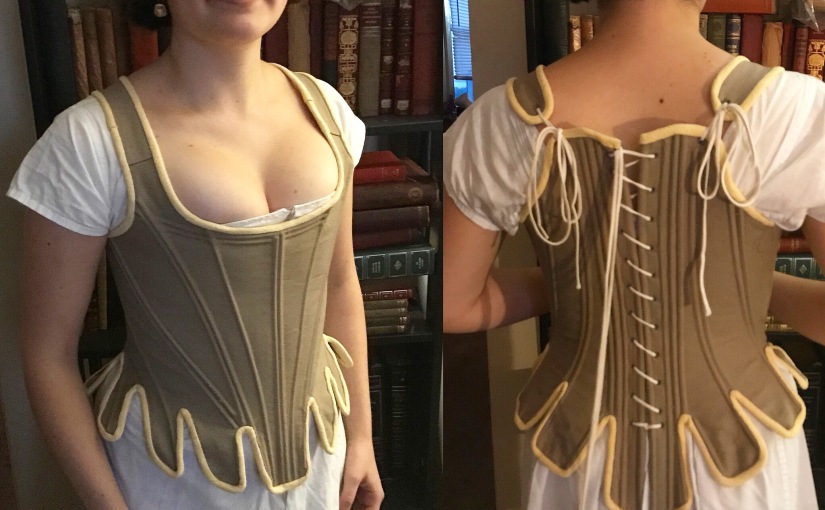
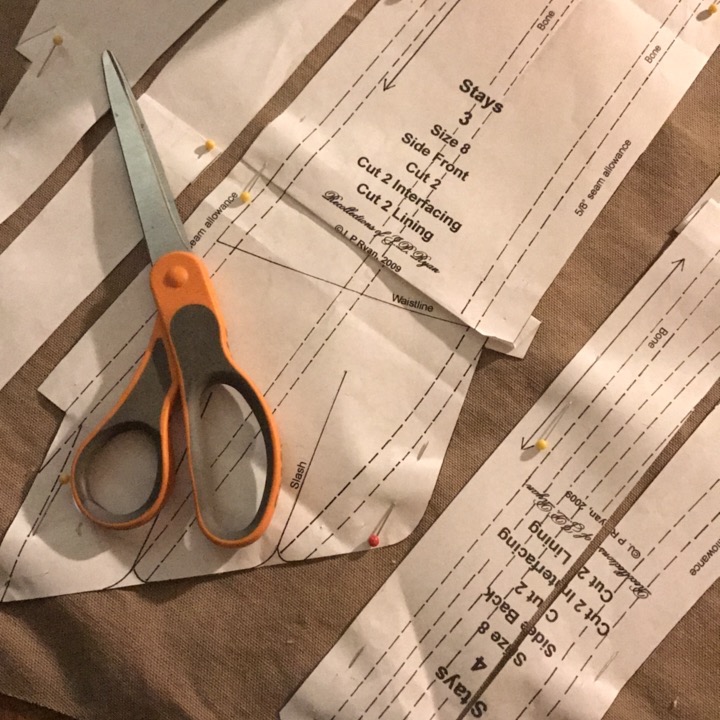
I used the JP Ryan Half-Boned Stays pattern.

IMG_4158.jpg
My purple sateen mock-up (leftovers from my bustle) turned out so pretty, I’ve decided I need to turn the rest of it into a new Victorian corset! I’m thinking whisper grey flossing.

IMG_4168.jpg
The stays are made from a nice, sturdy linen canvas.

IMG_4217.jpg
The front! (Lots more boning channels to come on this piece, both horizontal and vertical.)

IMG_4355.jpg
There are two horizontal boning channels along the front neckline, which help keep everything in that nice, rounded, ice cream cone shape.

My boning is 1/4″ reed, which you can purchase in enormous quantities from William Booth, Draper. There are two pieces, flat sides together, in each boning channel. The reed was very easy to work with, and so far is comfortable to wear (definitely my most comfortable period shapewear! I’m reserving total judgement until I’ve worn them out for a full day or two, though.

IMG_4378.jpg

IMG_4391.jpg
All the bones in, except the two at each center back. I waited until I’d sewn the eyelets before I did those.

IMG_4402.jpg
I love hand-sewing eyelets and buttonholes! These are opened with an awl, and then secured with a simple overcast in buttonhole silk.

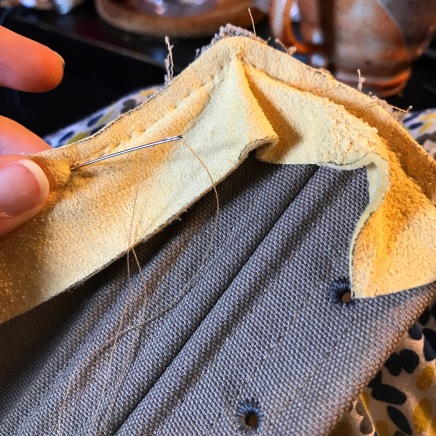
At this point, it’s time for binding! I used chamois leather–just the basic piece you can get for detailing from any auto supply store. One piece was big enough to bind two pairs of stays. It’s cut into 1 1/4″ strips, then sewn to the front side of the stays with a 1/4″ seam,  just like ordinary bias tape, then wrapped around and secured at the back with a whip stitch–no need for any folding under the raw edge like you would with fabric. It was so soft and easy to sew! I did all the binding by hand in order to have more control going around corners and curves. I used a thimble, but that was much more for the canvas than the leather. Chamois is broken down so much in order to make it soft that it’s more like sewing through craft foam than leather.

IMG_4456.jpg
The top edge of the stays, bound!

IMG_4470.jpg
I was especially impressed with how the chamois went around the tabs!

My computer is being a putz about the completed photos for some reason, but luckily it’s ok with this composite I did for Instagram! Like I said earlier, these are definitely the most comfortable shapewear of any era I do! I will put a linen lining in them as well, but I’m skipping that for now due to the need to make a petticoat and jacket before next Saturday! Better get back to that now!

IMG_4489